Importing and Exporting Orders
Exporting orders can be a quick way to back up your order history or transfer it to a third-party accounting software. Orders are an excellent example of when you might want to customize an export. You can change various settings during the export process and customize the export template, so that you can exclude any information you don't find useful.
Want more data? Our Ecommerce Analytics reports and BigQuery integration can provide additional order information and other details.
Importing Orders
Importing orders can only be done via the API. For more information, see our Orders V2 documentation in the Dev Center.
If you would like assistance in importing orders, check the BigCommerce Partner Directory for partners who specialize in order migration. If you are migrating to BigCommerce from another ecommerce platform, we offer in-house Data Migration Services, including order history.
Before migrating orders, make that you have disabled your product review email template so that review emails are not sent to your customers.
How do I ensure that imported historical orders aren't counted as new orders or GMV? When migrating orders from a previous platform, which involves creating new orders via API, use M-MIG in the external_source field to exclude these orders from affecting your store's trailing 12-month sales volume. These orders do not deduct product stock and will bypass quantity requirements.
Choosing an Export Template
An export template determines what order information you are exporting. All export templates will include details like the order ID and customer name, but you can get more granular about other details. For a full list of exportable information, see this table of exportable fields.
BigCommerce comes with a built-in export template. The default template includes basic order information, such as order total, customer information, and shipping information. See the exportable fields for a full list of what's included in the default template.
You can also create custom export templates to add or remove columns from the export.
Creating a Custom Export Template
Customizing your template allows you to select which columns are present in an export file as well as some advanced formatting settings. This gives you a level of control over what details are returned.
However, some data may be returned in a specific format that cannot be customized. For example, products shipped to different addresses may cause order data to be displayed across multiple rows, each representing a unique shipping destination.
You can build an export template from scratch or customize a copy of an existing template to suit your needs. We recommend using this second method by creating a copy of the Default template and then modifying it. This will let you bypass the settings and field mapping when you use the custom template to import.
To start, go to Settings › Export templates. Use the Action menu to Create a Copy of the Default template.

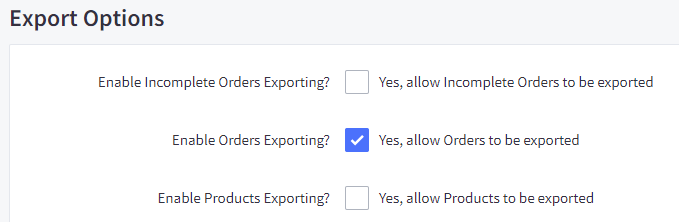
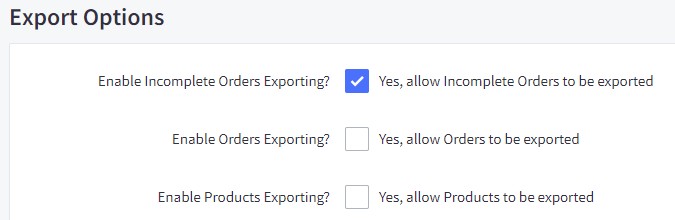
Type a name for your template in the Template Details section and since this template will be for orders, ensure Enable Orders Exporting is the only option selected under Export Options. Notice that the tabs listed along the top update with your selections.
Customize the rest of the template settings to fit your needs. When you're ready, click the Orders tab at the top to view the available export fields.
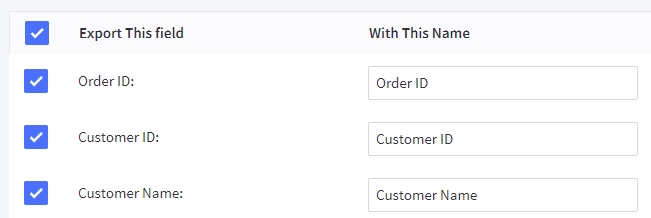
Go through and check or uncheck each field as needed. Click Save & Exit when you have made your changes. You can now export your data using your new template.
Exporting Orders
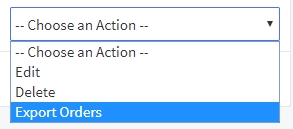
Go to Orders › Export Orders and fill out your order export settings.
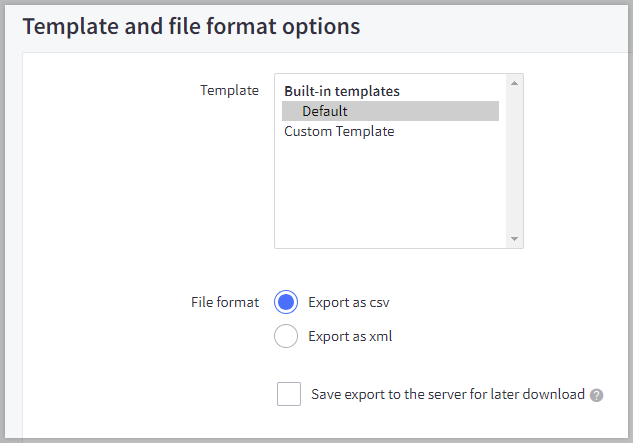
- Template — Select your export template.
- File format — You can choose between exporting to the CSV format or an XML format.
- Save export to the server for later download? — Selecting this option will save the file to your exports folder in WebDAV. (Recommended if you are exporting more than 1000 orders.)
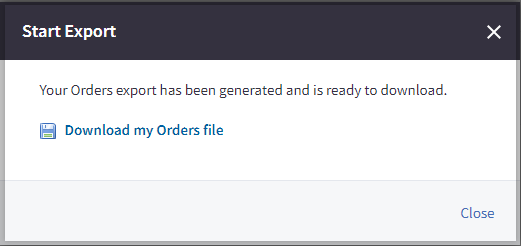
When ready to proceed, click Continue. In the pop-up that appears, click Start export.

When the file is ready for download, click Download my Orders file.
Exporting Orders by Date Range
To export orders from within a certain date range, you will search your orders for that date range, then export the results.
1. Go to Orders › Search.
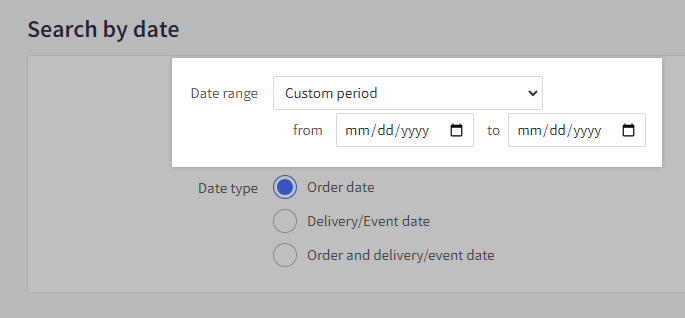
2. Scroll down to the Search by Date section.
3. If your desired date range is available in the drop-down, select it. Otherwise, select Custom period and set your date range.
The drop-down includes these options:
- Today
- Yesterday
- Last 24 hours
- Last 7 days
- Last 30 days
- This month
- This year
4. We recommend setting the date type to Order date. If there are any other search criteria, select them now.
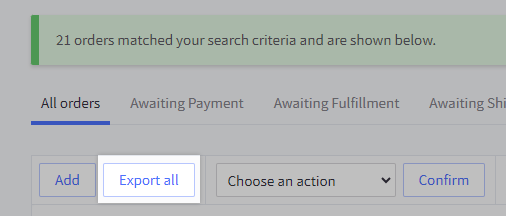
5. Click Search. Your results will be shown on the following page.
6. Click Export all. All of the orders in the search result will be exported, not just the first page.
7. Select Default as your template, or a custom export template.
8. Click Continue, then Start export. When your CSV file is ready, select Download my Orders file.
Exportable Fields
The following fields are the data that can be exported in an order export. The majority of these fields are included when using the Default export template.
| Field | Description | |
|---|---|---|
| Order ID | The unique order ID in BigCommerce | |
| Customer ID | The unique customer ID in BigCommerce (if purchased by existing customer) | |
| Customer Name | The customer's name | |
| Customer Email | The customer's email address | |
| Customer Phone | The customer's phone number | |
| Order Date | The date of the order (formattable) | |
| Order Status | The order's status at time of export | |
| Subtotal (inc tax) | Order subtotal including tax | |
| Subtotal (ex tax) | Order subtotal excluding tax | |
| Tax Total | The total tax for the order | |
| Shipping Cost (inc tax) | The amount charged for shipping, including tax | |
| Shipping Cost (ex tax) | The amount charged for shipping, excluding tax | |
| Ship Method | The shipping method selected | |
| Handling Cost (inc tax) | The amount charged for handling, including tax | |
| Handling Cost (ex tax) | The amount charged for handling, excluding tax | |
| Store Credit Redeemed | The amount of store credit used towards the order | |
| Gift Certificate Amount Redeemed | The amount of a gift certificate used towards the order | |
| Gift Certificate Code | The gift certificate code | |
| Gift Certificate Expiration Date | The date the gift certificate used on the order expires | |
| Coupon Details | The coupon data attached to the order | |
| Coupon Code | The coupon code associated with the order | |
| Coupon Name | The name of the coupon associated with the order | |
| Coupon Value | The amount that the coupon took off of the order total | |
| Order Total (inc tax) | The order total, including tax | |
| Order Total (ex tax) | The order total, excluding tax | |
| Payment Method | The payment method or gateway used | |
| Total Quantity | The total quantity of items ordered | |
| Total Shipped | The total quantity of items shipped | |
| Date Shipped | The date of shipment (determined by Shipment action) | |
| Order Currency Code | The code of the currency the order was placed in | |
| Exchange Rate | The exchange rate at the time the order was placed | |
| Order Notes | The order notes | |
| Customer Message | Message left by the customer at the time of checkout | |
| Billing First Name | The first name entered at checkout under Billing Details | |
| Billing Last Name | The last named entered at checkout under Billing Details | |
| Billing Company | The company entered at checkout under Billing Details | |
| Billing Street 1 | The street entered at checkout under Billing Details | |
| Billing Street 2 | The street entered at checkout under Billing Details | |
| Billing Suburb | The city or suburb entered at checkout under Billing Details | |
| Billing State Abbreviation | The state abbreviation entered at checkout under Billing Details | |
| Billing Zip | The zip or postal code entered at checkout under Billing Details | |
| Billing Country | The country entered at checkout under Billing Details | |
| Billing Phone | The phone number entered at checkout under Billing Details | |
| Billing Email | The customer's email address | |
| Billing Form Fields | Responses for custom form fields | |
| Shipping First Name | The first name entered at checkout under Shipping Details | |
| Shipping Last Name | The last named entered at checkout under Shipping Details | |
| Shipping Company | The company entered at checkout under Shipping Details | |
| Shipping Street 1 | The street entered at checkout under Shipping Details | |
| Shipping Street 2 | The street entered at checkout under Shipping Details | |
| Shipping Suburb | The city or suburb entered at checkout under Shipping Details | |
| Shipping State Abbreviation | The state abbreviation entered at checkout under Shipping Details | |
| Shipping Zip | The zip or postal code entered at checkout under Shipping Details | |
| Shipping Country | The country entered at checkout under Shipping Details | |
| Shipping Phone | The phone number entered at checkout under Shipping Details | |
| Shipping Email | The customer's email address | |
| Shipping Form Fields | Responses for custom form fields | |
| Product Details | The product's details, including the ID, quantity, SKU, name, weight, variant, and price (formattable) | |
| Product ID | The product's unique ID in BigCommerce | |
| Product Qty | The number of units of the product ordered | |
| Product SKU | The product's SKU | |
| Product Name | The product's name | |
| Product Weight | The product's weight | |
| Product Variation Details | The particular variation of the product that was ordered | |
| Product Unit Price | The price of a single unit of the product | |
| Product Total Price | The product's unit price times the number of units in the order | |
| Refund Amount | The amount refunded on the order | |
Custom Export Template Fields
These fields are not automatically enabled in the Default export template, but can be manually added to custom export templates.
| Field | Description | |
|---|---|---|
| Billing Name | The customer's first and last name entered at checkout under Billing Details | |
| Billing State | The state entered at checkout under Billing Details | |
| Billing Suburb + State + Zip | The city, state, and zip/post code entered at checkout under Billing Details | |
| Shipping Name | The customer's first and last name entered at checkout under Shipping Details | |
| Shipping State | The state entered at checkout under Shipping Details | |
| Shipping Suburb + State + Zip | The city, state, and zip/post code entered at checkout under Shipping Details | |
| Product Index | The product's place within the order sequence | |
| Product Unit Cost | The cost of a single unit of the product | |
| Product Total Cost | The product's unit cost times the number of units in the order | |
| # Unique Products in Order | The number of products in the order | |
| Todays Date | The date of the export | |
| Order Time | The time of day in which the order was placed | |
| Merchant-defined Order Status | If you've renamed the default order statuses, it will be listed here | |
| Customer Group Name | The customer group your customer belongs to | |
| Combined Product Weight | The total weight of the order | |
| Order Source | The origin of the order, such as eBay, Instagram, Pinterest, Facebook, Amazon, Buy Buttons, Mobile, Storefront or Manual | |
| Transaction ID | The unique transaction ID generated by your payment gateway | |
FAQ
Can I export incomplete orders from my control panel?
Yes, incomplete orders can be exported by creating a custom export template. Select Enable Incomplete Orders Exporting? under Export Options and check the fields you wish to include in the export.
When you are finished, click the Choose an Action dropdown next to your custom template and select Export Incomplete Orders to begin the export.
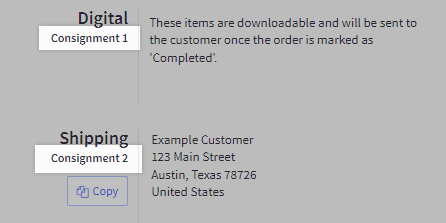
Why are some orders expanded to multiple rows?
Orders that contain multiple consignments will expand to a separate row for each consignment. For example, orders with shipments sent to different addresses or orders containing both digital and physical products.
If these orders do not contain multiple consignments, and your export was completed using a custom template, edit the template and check the Advanced CSV Export Settings. The Sub Items dropdown may be set to Create one row per sub item. This will expand multiple sub items (in this case, products) to separate rows.
