Importing and exporting is an efficient method of managing data in your B2B store. B2B Edition provides tools for creating and updating different data types in bulk, including Company accounts, addresses, Super Admins, and Sales Staff. Exporting records like quotes and orders allows you to back up your store’s purchase history and identify trends with your B2B buyers.
Requirements
In order to import and export different data types in B2B Edition, you must have the following permissions enabled in your user account:
- To import and export Companies and Company addresses:
- View Companies
- Export Company CSV
- Import Companies
- To export quotes:
- View Quotes
- Export Quotes CSV
- To export orders:
- View Orders
- Export Orders
- To import and export Super Admins:
- View Super Admins
- Export Super Admins
- Import Super Admins
- To import and export Sales Staff assignments:
- View Sales Staff
- Export Sales Staff
- Import Sales Staff
- To export invoices and payments:
- View Invoices
- Export Invoices
- View Payments
- Export Payments CSV
- To view import and export notifications in the Dashboard area:
- View Notifications
- View Notification Detail
The above permissions are included by default in the Administrator and Store Owner user roles, and can be enabled in custom user roles. See B2B Edition User Roles and Permissions for more information.
When importing Company account information, you must enable Company credit features in your Company Management settings in order to configure the following fields:
- Enable Credit
- Currency
- Available Credit
- Disable PO Purchases
- Credit Hold
How It Works
In B2B Edition, you can import and export the following data:
| Import | Export |
|---|---|
If you are using the Buyer Portal experience, you can also import and export text customizations for the storefront Buyer Portal. See B2B Edition Settings for more information.
B2B Edition has a CSV template for each importable data type, which can be accessed by selecting the Import action of the data type in question. These templates include all of the necessary fields for importing a new data entry, and exclude fields that would otherwise prevent a new entry from exporting properly.
Changing the text in the column headers of the CSV template will cause B2B Edition to not recognize the data in the field. To prevent import errors, do not edit the headers in your import files.
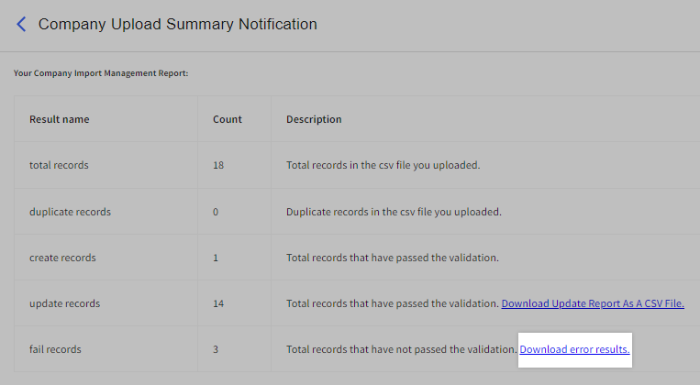
After importing information to B2B Edition, go to the Dashboard and click the notification corresponding to your CSV upload to view a breakdown of the new and existing records in the import. It also includes the link to an error report that lists any CSV lines which failed to import and provides descriptive error messages for you to take action on before reattempting the import.
Importing and Exporting Companies
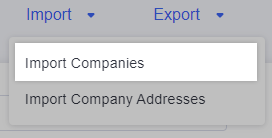
In the Companies area of the B2B Edition control panel, you can create multiple Company accounts at a time and make bulk changes to existing accounts via CSV import. To import new Company accounts, download the CSV import template by clicking Import at the top of the page and selecting Import Companies from the drop-down menu.
Want to create new Company accounts while editing existing ones? Export your existing Company data, but leave the following fields blank when adding new Company information:
- Company ID (this column must be removed from the CSV for the import to be successful)
- Company Status
- Company Create Date
- Company Update Date
Fill in the Company account information fields in the CSV. The following fields are required for creating and updating Company accounts, and are labeled as (Required) in the CSV template:
- Company Name
- Customer Group ID
- Company Phone Number
- Company Email Address
- Company User Email
- Company User First Name
- Company User Last Name
- Any Company or Company User extra fields that you’ve marked as required
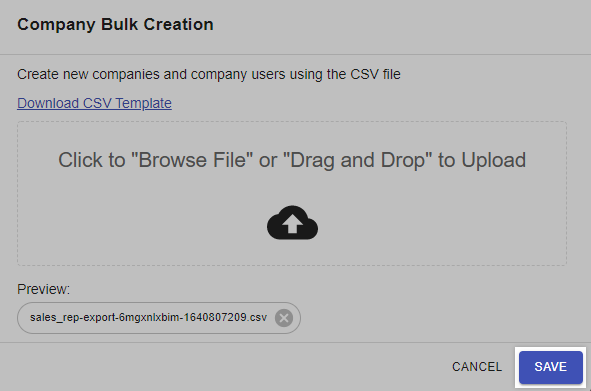
Once you’ve entered the Company’s contact and admin information in the CSV file, drag and drop the file into the popup, or use the Click to Browse File option to select the file from your computer. Click Save to begin the import.
Exporting Companies
B2B Edition allows you to collect and back up data from your Company accounts by exporting it to a CSV spreadsheet. To export Companies, go to the Companies area of the B2B Edition control panel and select Export Companies from the dropdown.
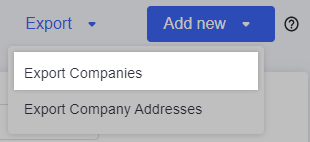
Once exported, click Download to view the CSV spreadsheet of your store’s Company accounts. The rows in the CSV provide information for each user in every Company account. If you are updating Company-wide information, such as the assigned payment methods, make sure that it is updated for every user in that Company.
The table below lists all information included in a Company export CSV. If you’ve added any extra fields for Company accounts or users, they will also be present in the CSV.
| Field | Description | Format / Additional Information |
|---|---|---|
| Company ID | The system-generated Company account identifier; it cannot be created manually | This field is required for updates, but must be removed when creating new Company accounts. |
| Customer Group ID | The customer group identifier generated by BigCommerce; it cannot be created manually |
This field is required for creating new Companies and updating existing ones. To assign Companies to a specific customer group, enter its ID in the field. To assign Companies to no customer group, enter 0 in the field. To assign Companies to the default customer group, leave the field blank. |
| Company Name | The name of the Company account | This field is required for creating new Companies and updating existing ones. |
| Company Phone Number | The default phone number provided when creating the Company account | This field is required for creating new Companies and updating existing ones. |
| Company Email Address | The default email address provided when creating the Company account | This field is required for creating new Companies and updating existing ones. |
| Company Address Line 1 | The first line of the default address provided when creating the Company account | When creating a Company account via import, this address is not added to the Company’s address book. You must import Company addresses separately. |
| Company Address Line 2 | The second line of the default address provided when creating the Company account | |
| City | The city of the default address provided when creating the Company account | |
| State | The state of the default address provided when creating the Company account | |
| ZipCode | The postal code of the default address provided when creating the Company account | |
| Country | The country of the default address provided when creating the Company account | If the spelling and capitalization of the country doesn't match how it appears in the dropdown when creating a Company in the B2B Edition control panel, the country field will be blank upon import. |
| Company User Email | The email address of a buyer user in the Company account | This field is required for creating new Company users and updating existing ones. |
| Channel ID | The ID of the storefront channel(s) assigned to the buyer user |
Your primary storefront will have an ID of 1. Additional storefront channels have a system-generated ID located in the storefront's permanent address. Separate multiple channel IDs with a semicolon (like 1;123456) |
| Company User First Name | The first name of a buyer user in the Company account | This field is required for creating new Company users and updating existing ones. |
| Company User Last Name | The last name of a buyer user in the Company account | This field is required for creating new Company users and updating existing ones. |
| Company User Role | The user role assigned to a buyer user | If left blank, the user will automatically be assigned the Admin role. |
| Company User Phone Number | The phone number of a buyer user in the Company account | |
| Enable Payment Terms |
Use a unique payment term for the Company account, rather than the default selection. Unlike other fields, this field should only be edited for the first user listed for a given Company account. | Type in TRUE to support a Company-specific payment term, or FALSE to use the default payment term. |
| Payment Terms |
Enter the payment term you want to assign to the Company account. Like Enable Payment Terms, only specify the desired term for the Company account’s first user. |
Leave blank to apply the default payment term, or enter one of the following payments terms:
You must use the spelling and spacing presented above in order to ensure the payment term is successfully applied to the Company account. |
| Enable Credit | Enable or disable credit settings on the Company account | Type in TRUE to enable Company credit, or FALSE to disable it. |
| Currency | The three-letter identifier for the currency assigned to the Available Credit value | Only active transactional currencies on your storefront can be assigned. |
| Available Credit | The maximum order value that Company buyers can place using the Purchase Order payment method | Use numbers only; no units. |
| Disable PO Purchases | Disable the Purchase Order payment method when a buyer’s order exceeds the Available Credit value | Type in TRUE to disable purchase order payments over the established credit limit, or FALSE to allow purchase order payments of any order value. |
| Credit Hold | Place a Company account on a credit hold | Type in TRUE to place the Company on a credit hold, or FALSE to remove the credit hold. |
| Payment Methods | The payment methods assigned to the Company account |
Each payment method uses a specific value, which must be entered exactly to assign it to a Company account. Separate multiple payment methods with a semicolon (like method1;method2). To see these values, edit a Company's payment methods in the B2B Edition control panel. |
| Company Status | The approval status of a Company account | This field is read-only. |
| Company Create Date | The date the Company account was created | This field is read-only. |
| Company Update Date | The most recent date that the Company account was updated | This field is read-only. |
Importing and Exporting Company Addresses
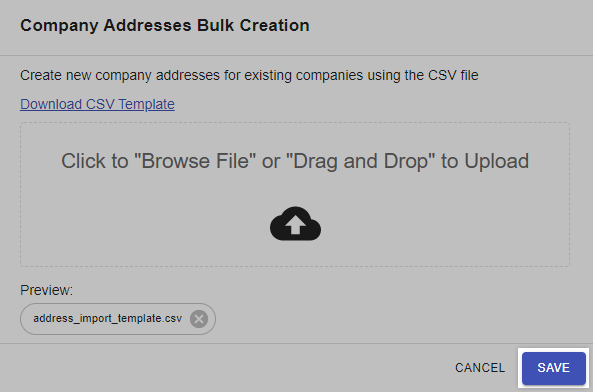
The most efficient way to add or edit multiple Company addresses is to import them into B2B Edition by using a CSV spreadsheet. To import new Company addresses, go to the Companies area. Click Import and select Import Company Addresses from the drop-down menu, then click Download CSV Template in the popup.
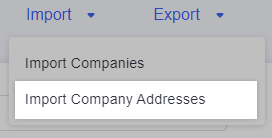
If you want to import new addresses while editing existing ones, export a CSV of your addresses, but remove the following fields when adding new address lines:
- Address ID (this can be left blank for new entries instead of removing the entire column)
- Create Date
- Update Date
The following fields are required to create a new address:
- Customer Group ID
- Company Name
- First Name
- Last Name
- Address Line 1
- City
- Country
- State
- Zip Code
- Any Address extra fields that you’ve marked as required
Once you’ve added new addresses or updated existing ones in the CSV file, drag and drop the file into the popup, or use the Click to Browse File option to select the file from your computer. Click Save to begin the import.
Exporting Company Addresses
To export Company addresses, click Export and select Export Company Addresses from the dropdown.
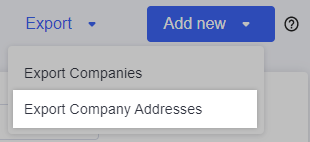
When the export is complete, a popup will appear for you to Download the CSV file.

The following fields are included when exporting Company addresses. If you’ve added any extra fields for Company addresses, they will also be present in the CSV.
| Field | Description | Format / Additional Information |
|---|---|---|
| Customer Group ID | The system-generated customer group identifier; it cannot be created manually | You must use the Customer Group ID associated with the Company account, visible from the ID column in the Companies area of the B2B Edition control panel. |
| Company Name | The name of the Company account | This field is required for creating new addresses and updating existing ones. |
| Address ID | The system-generated identifier for a Company address; it cannot be created manually |
This field must be left blank when creating new addresses. If left blank on an existing address, a new address will be created upon import. |
| Address Label | A custom identifier used to organize different addresses in a Company account | |
| First Name | The buyer's first name in the address | This field is required for creating new addresses and updating existing ones. |
| Last Name | The buyer's last name in the address | This field is required for creating new addresses and updating existing ones. |
| Address Line 1 | The first line of the address | This field is required for creating new addresses and updating existing ones. |
| Address Line 2 | The second line of the address | |
| City | The city in the address | This field is required for creating new addresses and updating existing ones. |
| Country | The country in the address |
This field is required for creating new addresses and updating existing ones. If the spelling and capitalization of the country doesn't match how it appears in the dropdown when creating a Company address in the B2B Edition control panel, the address will fail to import. |
| State | The state in the address | This field is required for creating new addresses and updating existing ones. |
| Zip Code | The postal code in the address | This field is required for creating new addresses and updating existing ones. |
| Phone Number | The phone number in the address | |
| isShipping | Indicates that the address can be used as a shipping address | Type YES to include it in the list of Company shipping addresses, or NO to exclude it from the list. |
| isDefaultShipping | Indicates that this is the default shipping address used at checkout |
Type YES to mark it as the default shipping address, or NO to change a previous default shipping address. There can be only one default shipping address per Company account. |
| isBilling | Indicates that the address can be used as a billing address | Type YES to include it in the list of Company billing addresses, or NO to exclude it from the list. |
| isDefaultBilling | Indicates that this is the default billing address used at checkout |
Type YES to mark it as the default billing address, or NO to change a previous default billing address. There can be only one default billing address per Company account. |
| Create Date | The date the address was added to the Company account | This field is read-only. |
| Update Date | The most recent date that the address was updated, either in the B2B Edition control panel or via CSV import | This field is read-only. |
Exporting Quotes
To export a list of sales quotes from the B2B Edition control panel, go to the Quotes area and click Export as CSV.

Pro Tip! Use the search and filter tools in the Quotes area before exporting to restrict your CSV file to a certain set of quotes. You can also export specific quotes by clicking the checkbox to the left of the quotes you want to export.
When the file is ready, click Download in the popup. The following information fields are included in the CSV:
| Field | Description |
|---|---|
| Quote Number | The system-generated quote identifier |
| Quote Title | A label that can be used to search for a specific quote in the Quotes area of the B2B Edition control panel and the storefront Buyer Portal |
| Reference Number | An identifier that can be used to associate a quote with a purchase order |
| Customer Email | The email address of the buyer user that requested the quote |
| Customer Phone | The phone number of the buyer user that requested the quote |
| Customer Company | The Company account associated with the quote |
| Customer Country | The billing country in the quote |
| Customer Address | The first line of the billing address in the quote |
| Customer City | The billing city in the quote |
| Customer State | The billing state in the quote |
| Customer Postal Code | The postal code of the billing address in the quote |
| Notes | Any notes left for the buyer when creating the quote |
| Terms and Conditions | The terms specified in the Terms and Conditions field of the quote |
| Create Date | The date that the quote was created |
| Last Updated | The most recent date that the quote was updated |
| Expiration | The date that the quote expires on |
| Status | Indicates the current status of the quote. Note that this may be different from the customer-facing quote status in the Buyer Portal. |
| Sales Staff Name | The full name of the Sales Staff user assigned to the Company account associated with the quote |
| Sales Staff Email | The Sales Staff user’s email address |
| Sales Staff Phone | The Sales Staff user’s phone number |
| Products |
Information on the line items added to the quote. Includes the following:
|
| Shipping Method |
Information on the shipping method selected for the quote. Includes the following:
|
| Currency | The three-letter identifier for the currency used with the quote |
| Original Total | The total cost of quoted line items before discounts, shipping, and tax |
| Discount Amount | The total amount of discounts applied to the quote. Note that this does not include discounts applied when the quote is taken to the checkout page, such as promotions or coupons. |
| Quoted Total | The total cost of the quote, including discounts, shipping, and tax |
| Shipping Cost | The cost of the shipping method on the quote |
| Tax | The tax rate applied to the quote |
| Grand Total | The cost of the quoted line items and discounts, excluding shipping and tax |
| Store Channel | If you are using B2B Edition on multiple storefronts, displays the name of the storefront the order was placed on |
Exporting Orders
In B2B Edition, you can export any order placed by buyers with a Company account. Orders placed by your B2C customers must be exported from the BigCommerce control panel.
To export B2B orders, go to the Orders area of the B2B Edition control panel and click Export Orders.

Orders can also be exported from Invoice Management › Orders. Both areas share the same orders list, filtering options, and exportable fields.
On the selection page, specify which orders you wish to include in the export. You can narrow your selection by order status, date range, and whether or not the order was placed by a Super Admin.
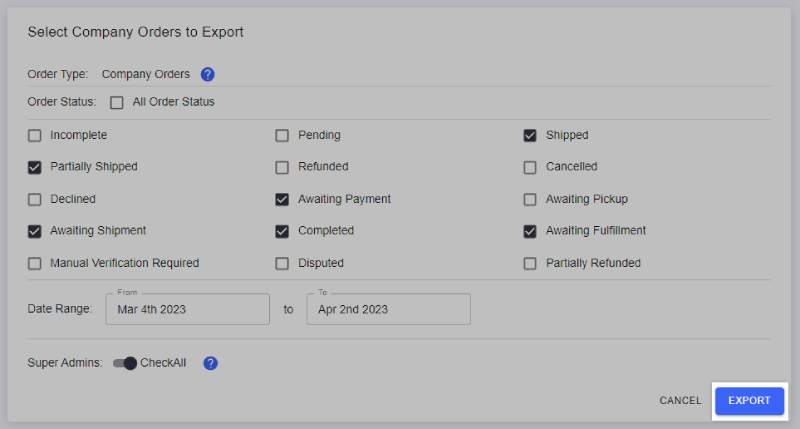
After making your selection, click Export. The fields in the table below are included in the CSV file, as well as any extra fields you’ve created for orders.
| Field | Description |
|---|---|
| Order ID | The unique order ID in BigCommerce |
| Customer ID | The system-created unique ID for the customer |
| Customer Name | The customer’s full name |
| Customer Email | The customer’s email address |
| Customer Phone | The customer’s phone number |
| Company Name | The Company account associated with the customer |
| Order Date | The date the order was placed |
| Order Status | The status assigned to the order in the BigCommerce control panel |
| Order Total | The total cost of the order, including discounts, shipping, and tax |
| Total Quantity | The combined quantity of all line items in the order |
| Order Currency Code | The three-letter identifier for the currency used with the order |
| Purchase Number | If a purchase order was used, the reference number will appear here |
| Product Detail |
Information on the line items present in the order. Includes the following:
|
| Channel Id | If you are using B2B Edition on multiple storefronts, displays the ID of the storefront the order was placed on |
| Channel Name | If you are using B2B Edition on multiple storefronts, displays the name of the storefront the order was placed on |
Importing and Exporting Super Admins
The quickest way to add or edit multiple Super Admin assignments at a time is to import them to the B2B Edition control panel. In the Super Admins area, click Import Super Admins to your store and Download the CSV template, or export your existing Super Admins. The import and export templates for Super Admins have the same fields.

While editing existing Super Admins or adding new Super Admins in the CSV file, make sure you have addressed the following considerations:
- The following information fields are required to create a new Super Admin: Email Address, First Name, and Last Name.
- If you want to add a new or existing Super Admin to more than one Company, create a new line with the Super Admin’s name and contact information, and enter the customer group ID associated with the Company account in the Customer Group ID field.
- This is visible from the ID column in the Companies area of the B2B Edition control panel.
- If you leave the Customer Group ID column blank when importing a new Super Admin, they will be added to the list, but will not be assigned to any Company accounts.
- The Company Name field is read-only. Leave this blank when creating new Super Admins, or assigning existing Super Admins to additional Company accounts.
- If you are using B2B Edition in multiple storefronts, the storefront channels that a Super Admin can access via Masquerade cannot be specified via CSV.
- By default, a Super Admin created via CSV will have access to all storefronts. Edit the Super Admin in your B2B Edition control panel to restrict the storefronts they can log in to.
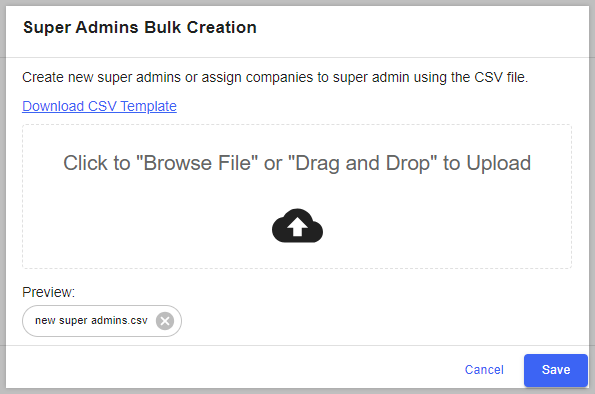
When you’ve made your changes in the CSV, drag and drop the file into the pop-up window, or use the Click to Browse File option to select the file from your computer. Click Save to begin the import.
Exporting Super Admins
To export your Super Admins, go to the Super Admins area of the B2B Edition control panel and click Export your Super Admins to a CSV file.

When the file is ready, click Download. The following information fields are included in the CSV:
| Field | Description | Format / Additional Information |
|---|---|---|
| Email Address | The Super Admin’s email address, used to log in to the storefront Buyer Portals of assigned Company accounts | This is a required field for creating new Super Admins and updating existing Super Admins. |
| First Name | The Super Admin’s first name | This is a required field for creating new Super Admins and updating existing Super Admins. |
| Last Name | The Super Admin’s last name | This is a required field for creating new Super Admins and updating existing Super Admins. |
| Phone Number | The Super Admin’s phone number | |
| Customer Group ID | The customer group identifier, which corresponds to the Company account that the Super Admin is assigned to | This value can be found in the ID column in the Companies area of the B2B Edition control panel. |
| Company Name | The name of the Company account that the Super Admin is assigned to | This field is read-only. |
Importing and Exporting Sales Staff Assignments
In B2B Edition, you can assign any users listed as Sales Staff to Company accounts in bulk via CSV import.
CSV import only supports adding new Company assignments to existing Sales Staff. You can only create new Sales Staff users or change the assignments of existing staff from the subsections in the Users tab of Settings › System users and roles.
To import Sales Staff assignments, go to the Sales staff subsection of Settings › System users and roles in the B2B Edition control panel and click Import sales staff company assignment.

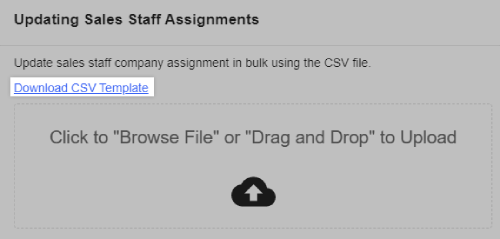
Download the CSV template in the Import window. If you’re adding new assignments to an existing CSV export file, remove the User Name column to prevent import errors.

Fill in the user’s Email Address and the Company Name you want to assign them to. Note that the Company name is case-sensitive, and the import will fail if the Company is not spelled or capitalized correctly.
You can include the Company ID and Customer Group ID when importing Sales Staff assignments. This is helpful for distinguishing between Company accounts of the same name. Note that if the Company or Customer Group ID does not correspond to the Company Name, the Sales Staff user will not be assigned to the Company upon import.
To assign a Sales Staff user to more than one Company, create additional lines for each Company.

When you’ve added your desired Sales Staff assignments, drag and drop the file into the pop-up window, or use the Click to Browse File option to select the file from your computer. Click Save to begin the import.
Exporting Sales Staff Assignments
Exporting your Sales Staff is the best way to view all Company assignments in one place. In the the Sales staff subsection of Settings › System users and roles, click Export sales staff to CSV file.

The following fields are included in the Sales Staff export CSV:
| Field | Description | Format / Additional Information |
|---|---|---|
| Email Address | The Sales Staff user’s email address, used to log in to the B2B Edition control panel | This is a required field for assigning Sales Staff to a Company. |
| User Name | The Sales Staff user’s full name | This field must be removed from the CSV file in order to successfully import it. |
| Company Name | The name of the Company account that the Sales Staff user is assigned to | This is a required field for assigning Sales Staff to a Company. The Company Name must be spelled and capitalized correctly. |
| Company ID | The system-generated Company account identifier; it cannot be created manually |
Export your Company information to locate a Company’s ID. This field is optional, but it must correspond to the Company Name in order to import the assignment successfully. |
| Customer Group ID | The customer group identifier generated by BigCommerce; it cannot be created manually |
A Company’s Customer Group ID can be found under the ID column in the Companies area of the B2B Edition control panel. This field is optional, but it must correspond to the Company Name in order to import the assignment successfully. |
Exporting Invoices and Payments
The following invoice details can be exported in the B2B Edition control panel:
- Invoice orders (see Exporting Orders)
- Invoices
- Invoice payments
Invoices
To export buyer invoices, go to Invoice Management › Invoices in the B2B Edition control panel and click Export Invoice.

The invoice export file includes the following fields, as well as any extra fields for invoices.
| Field | Description |
|---|---|
| Invoice ID | The system-generated invoice identifier |
| Order ID | The unique order ID in BigCommerce |
| Customer Group ID | The system-generated customer group identifier |
| Company Name | The name of the Company account associated with the invoice |
| Issued At | The date that the invoice was created |
| Due Date | The date that the invoice must be paid in full |
| Invoice Total | The original total of the invoice |
| Currency | The three-letter identifier for the currency used with the invoice |
| Amount Due | The remaining amount of the invoice to be paid |
| Status | Indicates whether the invoice is Open (unpaid), Partially Paid, or Paid |
Invoice Payments
Export payment records for your B2B invoices by going to Invoice Management › Payments and clicking Export as CSV.

In the invoice payments CSV, each line includes information on a specific invoice that was paid for in a given payment. A payment can include multiple invoices, and an invoice can be paid for across multiple payments.
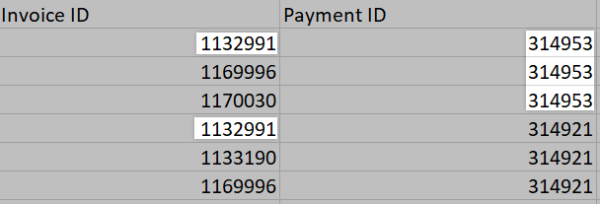
The following information fields are available in the invoice payment CSV:
| Field | Description |
|---|---|
| Invoice ID | The system-generated invoice identifier |
| Payment ID | The system-generated payment identifier |
| Customer Group ID | The system-generated customer group identifier |
| Company Name | The name of the Company account associated with the invoice payment |
| Payment Method | Indicates whether the payment was made online or externally |
| Currency | The currency the payment was made in |
| Amount | The amount paid on a particular invoice in the payment |
| Status | Indicates whether the payment is Awaiting Processing (authorized, but not captured), Processing (capture in process), Completed, or Refunded |
| Date Received | The date the payment was submitted |
FAQ
Can I create an export template that only includes select information fields?
No, exported CSVs include all information fields associated with the data type.
Why am I getting a “Header Line Error. Please Use Template File” error when importing data in B2B Edition?
This error appears when one of the following issues occur:
- An export-only field has been included in the import file.
- A required field is missing from the import file.
- A field header has been renamed in the import file.
Compare your CSV to its corresponding import template to identify what needs to be changed.
Can I sort or filter my data in B2B Edition in order to export a subset?
With the exception of orders, quotes, and invoices, data in B2B Edition cannot be filtered prior to exporting.
Why are some of my quotes not appearing in the export CSV?
If you archived a quote, it will not be included in the export by default. To export a list of archived quotes, go to the Quotes area of the B2B Edition control panel, select the Archived tab, and click Export as CSV.
Can I import quotes, orders, or invoices in B2B Edition?
While they cannot be imported via CSV, you can use the B2B Edition API to create them. See the following developer documentation for more information:
If I include one ID value when importing Sales Staff assignments, do I need to include the other?
No, including either the Company ID or the Customer Group ID in the import template will still allow for a successful import, as long as the ID value matches the Company specified in the Company Name field.
Can I still download my CSV export after the download popup is gone?
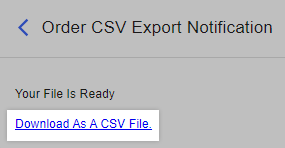
In the Dashboard notifications area, you can view a record of all imports and exports performed in your B2B Edition account.
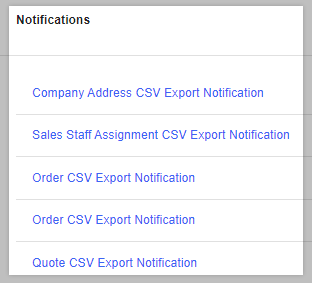
Click the record corresponding to your CSV export, then click Download as a CSV file.
Can I delete data via CSV import?
No, CSV import can only be used to create or edit data in B2B Edition.
How does Company import/export differ if I'm using Dependent Companies?
If you are using Dependent Companies, the information below details any differences in the fields and values of your file:
| Field | Description | Format / Additional Information |
|---|---|---|
| Customer Group ID | The customer group identifier generated by BigCommerce; it cannot be created manually |
This field must be left blank when creating new Company accounts. If left blank on an existing Company account, a new account will be created upon import. |
| BigCommerce Price List Name | The Price List assigned to the Company account |
The spelling and capitalization must match the Price List name in order to successfully assign it to the Company account. If left blank when creating a new Company account, the account will be assigned the default Price List specified in your General settings. |


