With B2B Edition, you can create user accounts for your staff, giving them access to the B2B Edition control panel, specifying what actions they can take, and assigning specific Company accounts that they can manage. The predefined user roles in B2B Edition provide permissions for your staff to perform the day-to-day tasks of managing a B2B store, but you can also configure custom user roles with specific permissions.
Look different? The setting locations described in this article are found in B2B Edition’s Buyer Portal experience. If you are using the legacy storefront experience, you can find them in the Sales Staff, Users, and Roles & Permissions areas of the B2B Edition control panel. The settings themselves remain the same in both experiences.
Requirements
You user account must have the following permissions to manage the following aspects of B2B Edition users and roles:
- To create and edit user accounts in B2B Edition:
- View Users
- Add New User
- Update User
- Delete User
- To manage users assigned as Sales Staff:
- View Sales Staff
- Company/View Sales Staff
- Company/View Company
- Edit Sales Staff
- Edit Company
- Import Sales Staff
- Export Sales Staff
- To create and edit user roles:
- View Roles
- View Role
- Edit Role
- Manage Default Role
- Add New Role
- Delete Role
How It Works
When you have set up B2B Edition in your store, the BigCommerce store owner user is automatically assigned the Store Owner role in B2B Edition. You can create and manage B2B Edition user accounts, also known as system users, from Settings › System users and roles in the B2B Edition control panel.
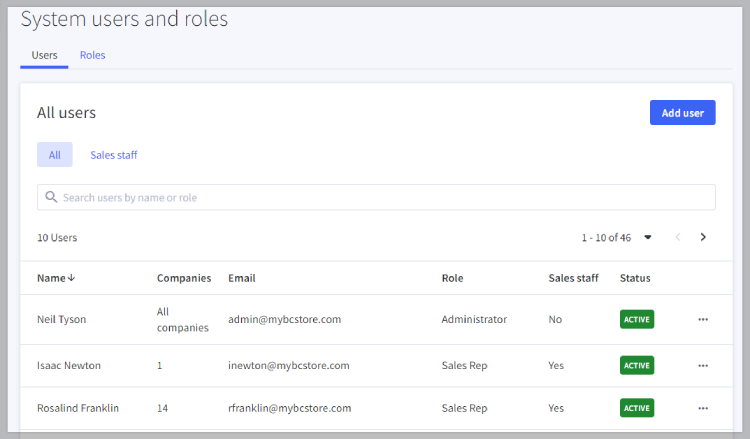
System users and roles settings are organized into the following tabs:
- Users — Manage system user accounts. This tab is further divided into the following subsections:
- All — View all system user accounts.
- Sales staff — View system users assigned a “Sales Staff” user role.
- Roles — View existing user roles, and create or edit custom user roles with unique permissions.
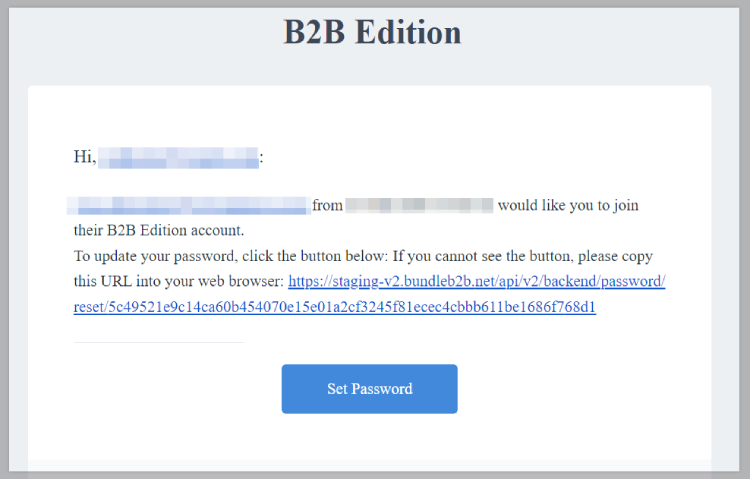
In order to access B2B Edition in the control panel, BigCommerce users must have the correct permissions in their user account. Once assigned, they can automatically generate a B2B Edition user account with a default user role, or you can create a user account for them with a different role. When a user is invited, they will receive an email from noreply@bundleb2b.com with a link to create a password and sign in to the B2B Edition control panel.
B2B Edition includes a comprehensive set of permissions that restrict what a user can view, edit, and delete in the B2B Edition control panel. Rather than assigning permissions to each user account as with BigCommerce user accounts, B2B Edition permissions are assigned to user roles, which you can then apply to your users as needed. While the permissions in the predefined user roles cannot be changed, you can create custom roles with unique permissions.
In addition to permissions, you can designate certain user roles as “Sales Staff” roles. When a user is assigned as Sales Staff, any permissions enabled in their user role only apply to Company accounts they are approved to see. This is helpful if you have a team of sales representatives that each manage distinct subsets of your B2B clients.
Want to manage user accounts and roles for Company buyers? See B2B Edition Buyer Roles and Permissions to learn more about creating custom user roles and assigning them to your B2B clients.
Creating a New User in B2B Edition
Before adding a user to B2B Edition, you must first configure their BigCommerce user permissions to access the B2B Edition control panel. Note that only the store owner, or users with the Manage Users, Edit Users, and Add Users permissions, will be able to modify user accounts in the control panel.
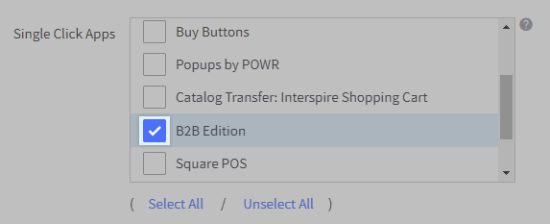
Go to Account Settings › Users and select Edit from the action menu of the user you wish to add, or create the user account if it isn’t there already. Scroll down to Single Click Apps, then check the box next to B2B Edition.
Once the BigCommerce user account has the correct permissions, you can create a user account in B2B Edition via the self-service or manual creation methods.
Self-Service Account Creation
After they have been assigned the B2B Edition permission, a BigCommerce user can generate their own B2B Edition account by navigating to Apps › B2B Edition in the BigCommerce control panel. B2B Edition will automatically create a user account using their BigCommerce user email address.
This user account is automatically assigned the default user role configured in the Roles tab of Settings › System users and roles, and users with the appropriate permissions can edit the user’s account information at any time from Settings › Users.
Manual Account Creation
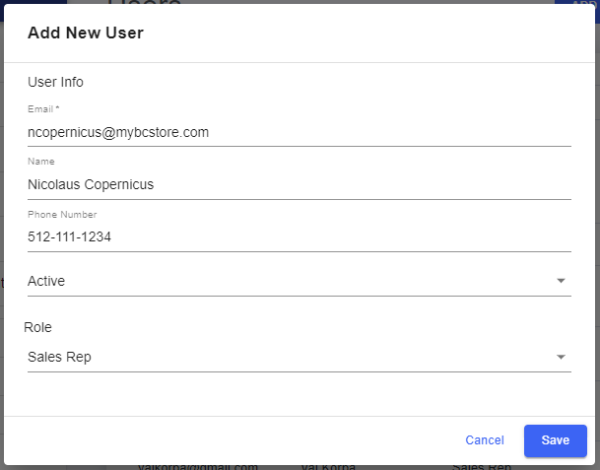
If you would prefer to specify a user’s account information before they have access to B2B Edition, go to the Users tab of Settings › System users and roles in the B2B Edition control panel and click Add User. This action is available in the All and Sales staff subsections.

Fill out the user’s contact details, specify whether you want their account to be active or inactive, and assign a user role. When assigning a Sales Staff role to users, there are additional user fields that must be filled out.
Click Save to send an invite email to the email address previously entered for the user account. Note that new users set as inactive will still receive the invite email, but will be unable to log in after setting their password.
A user’s email address in B2B Edition must match their BigCommerce login email address. If they attempt to log in to B2B Edition with a mismatched email address, B2B Edition will automatically create a new user account associated with their BigCommerce email address.
Editing B2B Edition User Accounts
This covers how to edit users from the All subsection within Settings › System users and roles. See Managing Sales Staff Users to learn more about editing users from the Sales staff tab.
To edit a user in B2B Edition, go to the Users tab of Settings › System users and roles. Locate the user account in the list, sort the user list by clicking on the header of an information column, or use the search bar at the top to find a user by their name or email address. Select Edit from the action menu to open the Edit user window.

Edit the information in the following fields. Note that a user’s email address cannot be changed.
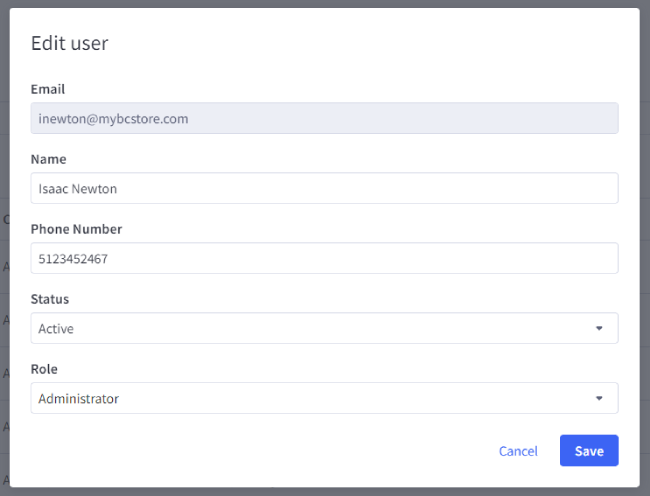
- Name — the user’s full name
- Phone Number — the user’s phone number
- Status — specifies whether or not the user can log in to their account. Select Active to allow the user access to the B2B Edition control panel, or Inactive to temporarily disable the user account.
- Role — select a predefined or custom user role to specify the user’s permissions
Pro Tip! You can enable or disable a user’s account activity status from the action menu in Settings › System users and roles.
Managing Sales Staff Users
Sales Staff are system users that can only view and interact with Company accounts they are assigned. This is determined by the user role assigned to the user and can be configured using the built-in Sales Rep role, or by creating a custom role specified as Sales Staff.
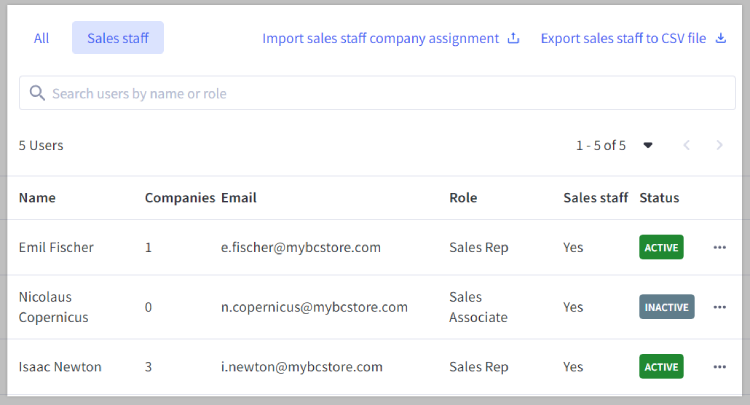
To manage users assigned as Sales Staff, navigate to the Sales staff subsection of Settings › System users and roles. From here, you can view the number of Company accounts assigned to users, sort them by clicking on the header of an information column, and search by name or user role.
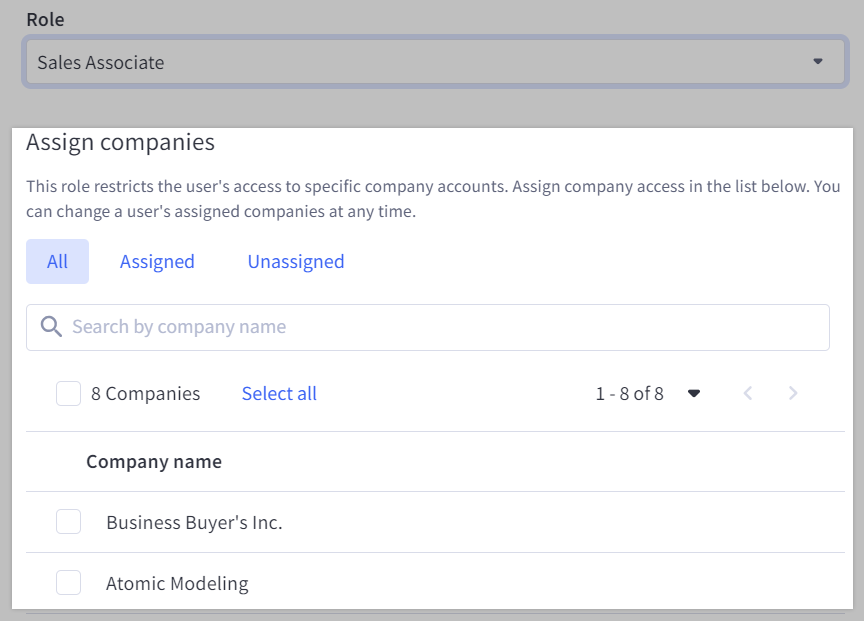
When you select a Sales Staff role while creating or editing a user account, you can then use the Assign companies settings to select which Company accounts the user has access to. You can filter the Companies by whether or not they are currently assigned to the user, or locate specific Companies by using the search bar.
Sales Staff users are created from an existing B2B Edition user account, not an existing BigCommerce control panel user account. While B2B Edition users must have a control panel account, assigning a B2B Edition user as Sales Staff does not affect permissions or visibility in the control panel.
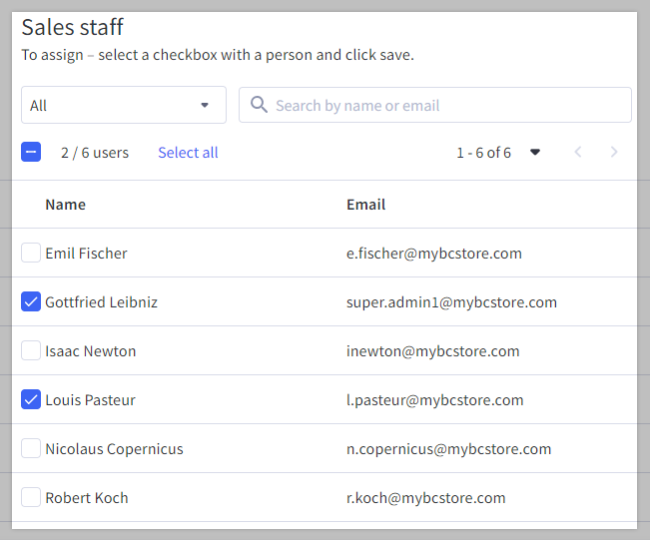
You can also assign Sales Staff when editing a Company from the Sales Staff tab. Select All or Unassigned from the dropdown and select the Sales Staff users you want to assign to the Company account. You can also narrow the list of users by name or email address the search bar.
To assign existing Sales Staff to Companies in bulk, import them to your B2B Edition control panel. Note that new Sales Staff users cannot be created via CSV import.
User Roles
The roles you assign to your users allow you to control what actions they can take within the B2B Edition control panel. The following roles are available by default:
- Sales Rep — can only view and manage the compan details, orders, and quote requests of Company accounts assigned to them. Sales Reps cannot access users, roles, or settings in the B2B Edition control panel.
- Accountant — can view and export invoicing data, such as invoiced orders and invoice payments, but cannot create or edit them.
- Financial Manager — can manage all aspects of invoicing data, including the ability to create and edit invoice payments.
- Administrator — can access all Company account information and manage users, roles, and settings. There can be more than one Administrator user.
- Store Owner — assigned by default as the store owner user in the BigCommerce control panel. The Store Owner has access to all areas of the B2B Edition control panel. There can be only one user assigned as Store Owner.
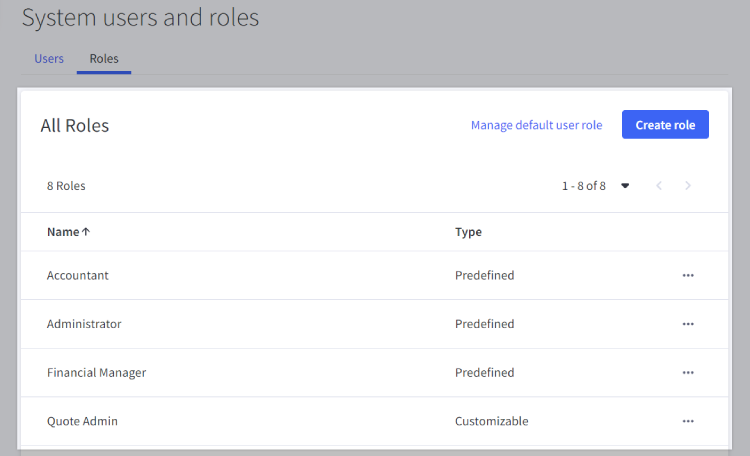
To manage your user roles, go to the Roles tab of Settings › System users and roles in the B2B Edition control panel. The available roles are labeled as Predefined (available by default) or Customizable (manually created). Click the information columns to sort your user roles list by name or type.
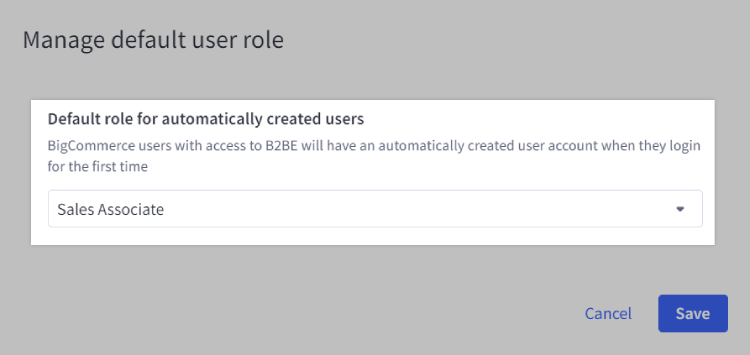
To define the user role you want assigned by default to automatically-created user accounts, click Manage default user role, then select the role from the drop-down list.
From a user role’s action menu, you can View and Edit a custom role’s permissions, or Delete a role. Predefined roles cannot be edited or deleted.
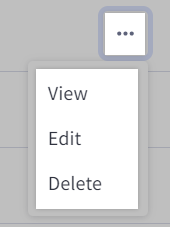
Note: Before deleting a custom role, you must edit any user accounts assigned to the role and reassign them to a different role.
To add a new custom role, click Create role.

Name your custom role and check the boxes next to the permissions you want to enable, or check the box next to Permissions to enable all of them.. If you set the user role as a Sales Staff role, users assigned to the role will only be able to view and manage Company accounts that are assigned to them. The Sales Rep role is set as a “Sales Staff” role by default.
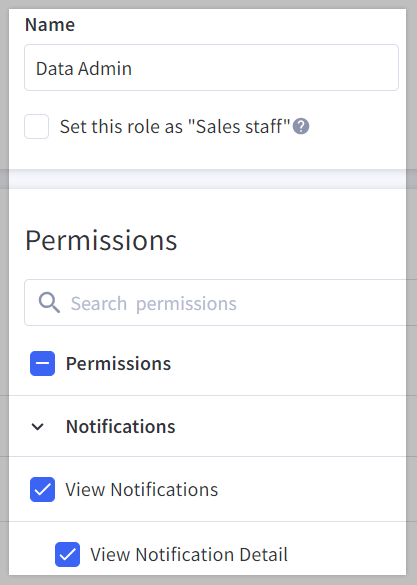
Click Save when you’re done, then assign the new role to any desired users.
User Permissions
The table below lists the available permissions in B2B Edition. The Requires column indicates any prerequisite permissions that must be enabled in order to assign a particular permission to a user role. Note that while creating or editing a custom user role, checking the box next to a permission will automatically enable any prerequisite permissions.
| Permission | Effect | Requires |
|---|---|---|
| Notifications | ||
| View Notifications | View the list of import and export notifications in the Dashboard area | |
| View Notification Detail | Click on the dashboard notifications to view details and download reports | View Notifications |
| Companies | ||
| View Companies | View the Companies area of the B2B Edition control panel | |
| Add New Company | Create a Company account manually or by converting a customer group | View Companies, View Super Admins, Add New Super Admins |
| Delete Company | Delete a Company account | View Companies |
| Export Company CSV | Export a CSV spreadsheet of Company account information and addresses | View Companies |
| Import Companies | Create or update Company accounts and addresses via CSV import | View Companies |
| View Company Detail | View a Company account’s information in the B2B Edition control panel | View Companies, View Company Super Admins, View Company Sales Staff |
| View Basic Info | View the content in the Basic information tab of a Company’s details | View Company Detail |
| Update Basic Info | Edit the content in the Basic information tab of a Company’s details | View Basic Info, Update Price List |
| View Company Users | View the content in the Company users tab of a Company’s details | View Company Detail |
| Add User | Add new users to a Company account | View Company Users |
| Update User | Edit existing Company account users | View Company Users |
| Delete User | Delete Company users | View Company Users |
| View Company Super Admins |
View the content in the Super admins tab of a Company’s details. Different from View Super Admins, which allows you to access the Super Admins area of Company details. | View Company Detail, View Super Admin by Company |
| Update Company Super Admins | Assign or unassign Super Admins to a Company account | View Company Super Admins |
| View Company Sales Staff | View the content in the Sales staff tab of a Company’s details | View Company Detail |
| Update Company Sales Staff | Assign or unassign Sales Staff to a Company account | View Company Sales Staff |
| View Payment Methods | View the content in the Payments tab of a Company’s details | View Company Detail |
| Update Payment Methods | Manage the payment methods available to a Company account | View Payment Methods |
| View Company Payment Terms | View payment term settings in a Company’s details | View Payment Methods |
| Update Company Payment Terms | Configure Company-specific payment terms for invoices | View Company Payment Terms |
| View Credit Settings | View the credit settings in a Company’s details | View Payment Methods |
| Enable/Disable Company Credit | Enable credit on a Company account | View Credit Settings |
| Update Currency and Credit Availability | Assign an available credit Amount and specify the value’s currency | View Credit Settings |
| Update Purchasing | Disable the Purchase Order payment method when the available credit Amount is exceeded | View Credit Settings |
| Update Credit Hold | Place Company accounts on a credit hold | View Credit Settings |
| View Addresses | View the content in the Addresses tab of a Company’s details | View Company Detail |
| Add New Address | Add an address to the Company account | View Addresses |
| Update Address | Edit an existing Company address | View Addresses |
| Delete Address | Delete Company addresses | View Addresses |
| View Attachments | View the Attachments tab of a Company’s details | View Company Detail |
| Update Attachment | Upload new files to the Company account | View Attachments |
| Delete Attachment | Delete attachments included in the original Company account application | View Attachments |
| Super admins | ||
| View Super Admins |
View the Super Admins area of Company details. Different from View Company Super Admins, which allows you to view the content in the Super admins tab of a Company’s details. | |
| Import Super Admins | Add or edit Super Admins via CSV import | View Super Admins, Export Super Admins |
| Export Super Admins | Export a CSV spreadsheet of Super Admins | View Super Admins, Import Super Admins |
| Add New Super Admins | Create Super Admins in the B2B Edition control panel | View Super Admins |
| Delete Super Admins | Remove a Super Admin from your B2B Edition account | View Super Admins |
| Super Admins/View Companies | View Companies from the Super Admins area | View Super Admins |
| View Super Admin by Company | View the content in the Super admins tab of a Company’s details | View Super Admins, View Company Super Admins |
| Edit Company | Displays the Edit Company action when viewing Companies from the Super Admins area | View Super Admins, View Company Detail |
| Edit Super Admin | Update existing Super Admin contact information and Company assignments | Super Admins/View Companies |
| Quotes | ||
| View Quotes | View the Quotes area of the B2B Edition control panel | |
| Create Quote | Create a new quote in the B2B Edition control panel | View Quotes, Check the details |
| Delete Quote | Archive an existing quote | View Quotes |
| Export Quotes CSV | Export a CSV spreadsheet of quotes | View Quotes |
| Edit Quotes | Edit an existing quote | View Quotes, Check the details |
| Check the details | View a quote’s information | View Quotes |
| Download PDF | Download a PDF of the quote you are viewing | Check the details |
| Send E-mail | Email quote updates to the buyer | Check the details |
| Orders | ||
| View Orders | View the Orders area of the B2B Edition control panel | |
| Export Orders | Export a CSV spreadsheet of orders placed by Company users | View Orders |
| Settings | ||
| View Settings | View the Settings area of the B2B Edition control panel | |
| Update Settings |
View and update the following settings: | View Settings |
| Extra Fields | View Extra Fields settings | View Settings, Get Extra Fields List |
| Add Extra Field | Create a new extra field | Extra Fields |
| Update Extra Field | Edit an existing extra field | Extra Fields |
| Delete Extra Field | Delete an extra field | Extra Fields |
| Get Extra Fields List | View the extra fields created for each form | Extra Fields |
| Account Form Fields | View Account Form Fields settings. You must be on the Buyer Portal experience in order to view and enable this setting. | View Settings |
| Update Account Form Fields | Edit information fields of B2B Edition account forms | Account Form Fields |
| View API Accounts | View API Accounts settings | View Settings |
| Add API Account | Create a new B2B Edition API token | View API Accounts |
| Delete API Account | Delete an existing B2B Edition API token | View API Accounts |
| View Company Users and Roles | View Company users and roles settings | |
| View Users |
View the Users tab of Settings › Company users and roles. Different from the View Users permission for B2B Edition users. | View Company Users and Roles |
| View Roles |
View the Roles tab of Settings › Company users and roles. Different from the View Roles permission for B2B Edition users. | View Company Users and Roles |
| Add new Role |
Create a custom buyer role. Different from the Add New Role permission for creating B2B Edition user roles. | View Roles |
| Update Role |
Edit existing custom buyer roles. Different from the Update Role permission for editing B2B Edition user roles. | View Roles |
| Delete Role |
Delete a custom buyer role. Different from the Delete Role permission for deleting B2B Edition user roles. | View Roles |
| System users and roles | ||
| View Sales Staff | View the Sales staff subsection of Settings › System users and roles | |
| Import Sales Staff | Update Sales Staff assignment via CSV import | View Sales Staff |
| Export Sales Staff | Export a CSV spreadsheet of Sales Staff users | View Sales Staff |
| Company/View Sales Staff | View the Company accounts assigned to a Sales Staff user | View Sales Staff |
| Company/View Company | View Companies from the Sales Staff area | View Sales Staff, View Company Detail |
| Edit Sales Staff | Update the Company accounts assigned to a Sales Staff user | Company/View Sales Staff |
| Edit Company | Displays the Edit Company action when viewing Companies from the Sales Staff area | View Sales Staff, View Company Detail |
| View Users | View the Users tab of Settings › System users and roles | |
| Add New User | Create a new user account | View Users, View Roles |
| Update User | Edit an existing user account | View Users, View Roles |
| Delete User | Delete a user account | View Users |
| View Roles |
View the Roles tab of Settings › System users and roles. Different from View Role, which allows you to view the permissions assigned to a user role. | View Users |
| View Role |
View the permissions assigned to a user role. Different from View Roles, which allows you to access the Roles tab of Settings › System users and roles. | View Roles |
| Edit Role | Edit custom user roles | View Roles |
| Manage Default Role | View and update the default user role | Edit Role |
| Add New Role | Create a custom user role | View Roles |
| Delete Role | Delete a custom user role | View Roles |
| View Storefronts and Settings | View the Storefronts area of the B2B Edition control panel | |
| Manage Storefronts and Settings | Edit storefront-specific settings | View Storefronts and Settings |
| Invoices | ||
| View Orders | View Invoice Management › Orders in the B2B Edition control panel | |
| Export Orders | Export a CSV spreadsheet of orders placed by Company users | View Orders |
| View Invoices | View Invoice Management › Invoices in the B2B Edition control panel | View Payments |
| View Invoice | View an invoice’s details | View Invoices, View Payment |
| Edit Invoices | Edit an existing invoice | View Invoices |
| Add Invoice | Create an invoice from an existing order | View Invoices |
| Export Invoices | Export a CSV spreadsheet of invoices | View Invoices |
| Delete Invoices | Delete an invoice | View Invoices |
| Send Email | Email the invoice to the buyer | View Invoices |
| Download PDF | Download a PDF copy of the invoice | View Invoices |
| View Payments | View Invoice Management › Payments in the B2B Edition control panel | View Invoices |
| View Payment | View a payment’s details | View Payments |
| Add Offline Payments | Record invoice payments that were made externally | View Payments |
| Export Payments CSV | Export a CSV spreadsheet of invoice payments | View Payments |
| View Settings | View Invoice settings and the invoice-specific templates in Email settings | |
| Update Settings | Make edits to Invoice settings and the invoice-specific templates in Email settings | View Settings |
FAQ
What is the difference between Sales Staff and Super Admin users?
Sales Staff users manage relationships with Companies from your B2B Edition control panel, while Super Admins assist Company users within their storefront Buyer Portal. See Assigning Super Admins and Sales Staff to learn more.
How do I delete a user account?
To delete a user account in B2B Edition, go to the Users tab of Settings › System users and roles and select Delete from the user’s action menu.
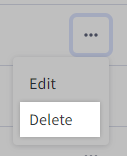
Note that a user account cannot be recovered after deleting it. If you want to temporarily prevent a user from accessing B2B Edition without having to manually recreate their account, edit their account and set it as Inactive instead.
How do I change which user has the Store Owner role?
While logged in as the current store owner user, go to the Roles tab of Settings › System users and roles in the B2B Edition control panel and edit the user you would like to assign as store owner. Select Store Owner from the Role dropdown and Save your changes.
After reassigning the store owner, the previous store owner will be assigned the Administrator role. Note that this does not affect who is assigned as the BigCommerce store owner. If the current store owner user does not have access to the BigCommerce control panel, contact our Support team and they can assist you with changing the store owner user.
Can I create user accounts in bulk?
No, user accounts can only be created individually in B2B Edition.
Can I configure storefront permissions for Super Admin users?
Super Admins automatically have the Admin Buyer role when they log in to a Company account. However, their Buyer role and permissions cannot be altered. See Super Admin Masquerade for more information.


