Once you’ve set up Companies in your B2B Edition account, you’ll be ready to build an order flow for your B2B customers. In this chapter, we’ll cover managing orders, creating personalized quotes, and generating invoices for your customers.
Viewing Orders in B2B Edition
You can view company-level order history placed by Company users and sales representatives, as well as search for specific orders by keyword. To access the order list, go to the Orders area of the B2B Edition control panel.
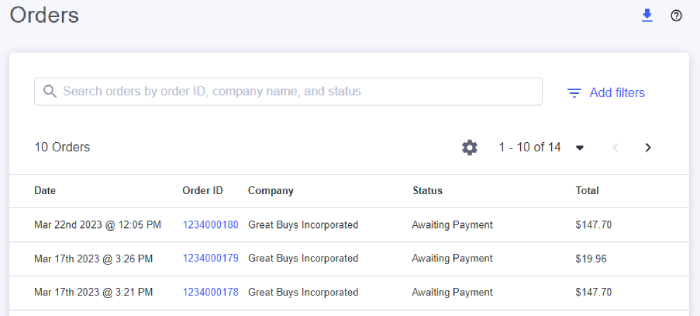
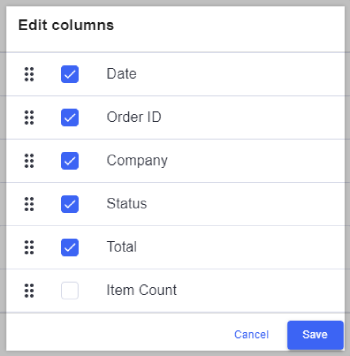
Click the gear icon to show, hide, or rearrange the information columns in the order list.
You can sort orders by criteria such as order ID, company name, order total, number of items, and date created.
To view a subset of orders, click Add filters at the top of the page. There are filter options for order ID, company name, and order status.

You can export your B2B orders to a CSV spreadsheet by clicking the Export Orders button. Use the filters to export orders by status, date range, or Super Admin.

Super Admin Masquerade
The Masquerade feature allows Super Admins to log in to the Buyer Portal on behalf of any Company they are assigned to. This gives Super Admins the ability to view the storefront from their customer’s perspective and to create orders on their behalf.
To use Masquerade, log into the storefront as a Super Admin user and locate a Company from the Dashboard area. If a Super Admin has multiple Company accounts assigned to them, they can sort or search for specific Companies by name or email address.
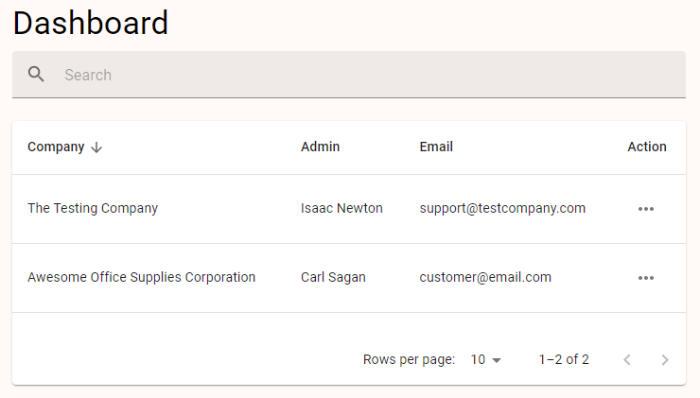
After locating the Company in question, select Masquerade from the Action menu to start.

When masquerading as a Company Admin user, your Super Admins can take the following actions:
- View products and pricing based on the Company’s Price List.
- Manage Company addresses.
- Create and approve Shopping Lists.
- Request quotes for the Company.
- Purchase quotes created by Sales Staff using the checkout link in the Buyer Portal or the quote email.
- Place orders on the Company’s behalf.
- View and pay Company invoices.
When finished, click End Masquerade at the bottom of the Buyer Portal to return to the Super Admin account.

Not all Company Administrator actions are available via Masquerade. Super Admins cannot modify Company user roles, and are unable to delete existing Shopping Lists created by other users.
Sales Staff Quoting
At times, you may want to make an individualized offer for your B2B customers. With Sales Staff Quoting, users assigned as Sales Staff can build a quote from scratch to offer customer-specific discounts, enable the sale of custom or request-only products, or negotiate offer details with the Buyer based on a quote request submitted from their storefront account.
To create a quote in the B2B Edition control panel, navigate to the Quotes area and click Create A Quote.

The quote creation process consists of several mandatory and optional actions. Click the links in the list below to learn about each step.
- Quote information
- Address
- Add product to quote
- Quoting non-purchasable products
- Discounts, shipping, and tax
- Additional information
- Submitting the quote
Quote Information
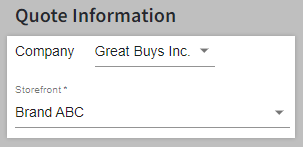
The Quote Information area is where you specify who the quote is for and provide important details for reference. Select the desired Company account and storefront from the drop-down menus.
In the Contact Email field, enter the buyer’s email address, or select an email address associated with the Company account from the drop-down menu. Selecting an email address from the dropdown automatically fills in the buyer’s name and phone number.

Give your quote a title and include the buyer’s reference number if they have one. If there are additional buyers or staff members you want to include, add their email addresses in the CC To field.
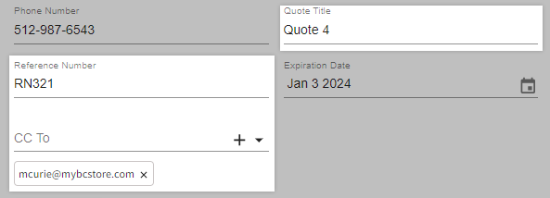
The Expiration date field automatically uses the default validity period specified in your Quote settings. Click the calendar icon to change the amount of time a buyer has to purchase the quote.

Address
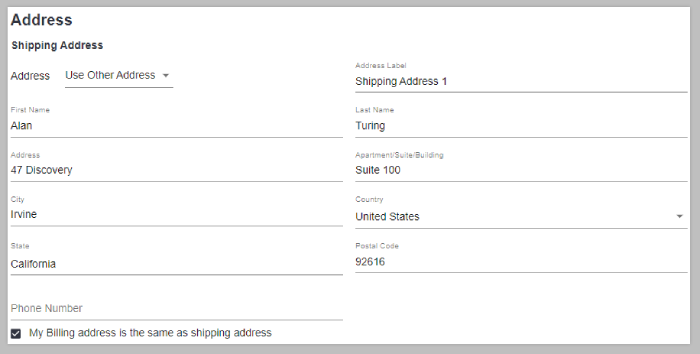
In the Address area, select an shipping address from the dropdown, or enter a new address in the fields below. By default, the quote uses the shipping address as the billing address. To select a different billing address, uncheck my Billing address is the same as shipping address and select or enter the desired address.
Add Product to Quote
After you’ve specified the Company account, contact email, and address, you can add line items to the quote. Use the Search tab to locate products by name or other keywords. If you know the exact SKU, you can enter it in the Search By SKU tab.
File upload modifier options are not supported in quotes. If a product has a file upload option marked as required, it cannot be added to a quote.
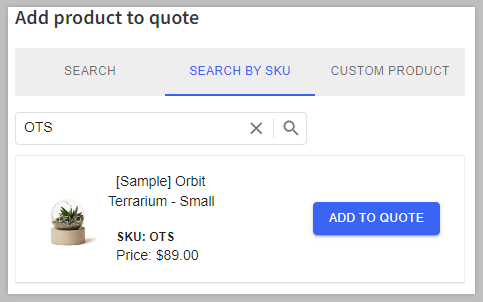
From the Custom Product tab, you can also create a product specific to the quote, or select a previously-created custom product.
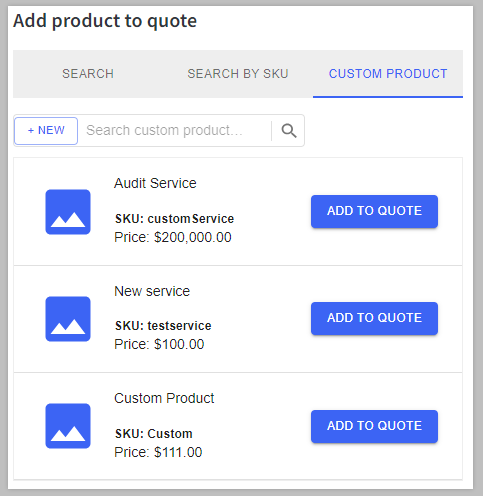
Click + New to create a new custom product. In the Create Custom Product window, enter your product’s details. The following information is required to add a custom product to a quote:
- Name
- SKU (this cannot match the SKU of an existing product)
- Price
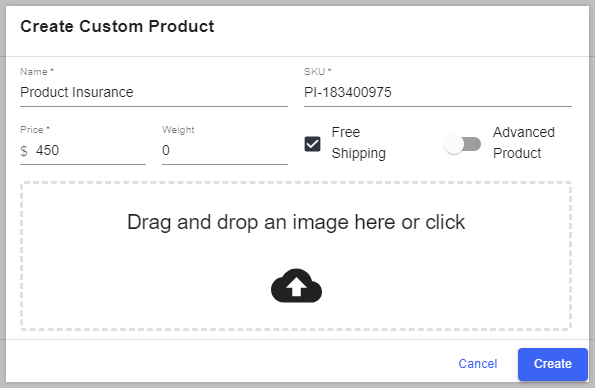
While creating a custom product, you can enable Free Shipping to exclude it from the quote’s calculated shipping cost, and upload an image from your computer. To add optional information like a product description, cost price, MSRP, sale pricing, physical dimensions, and tax class, toggle Advanced Product and fill out the corresponding fields.
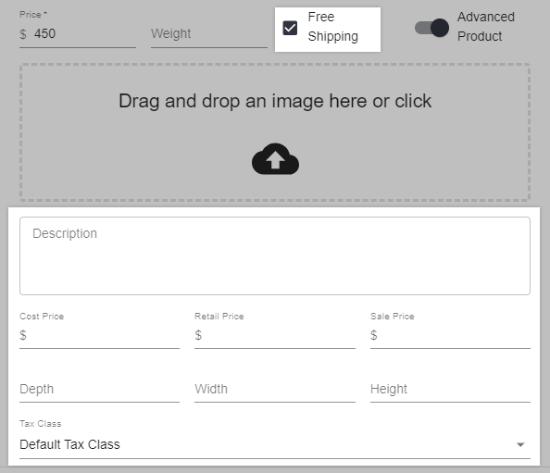
Need to add more attributes to your custom product? After creating it in the quote, go to Products › View in the BigCommerce control panel and edit it to include additional information.
Custom products are saved to your product catalog in BigCommerce, but they are automatically added to a hidden category called BundleB2B Quote Custom Category and marked as not visible so that they cannot be viewed from the storefront.
You can change the quantity and add notes to each line item in the quote. From the Action menu next to each line item, you can Refresh Product to update information like price and SKU, or Delete the product from the quote.

After adding products to the quote, you can manage quote display and behavior by using the following settings, located above the line items list:
- Display discount — By default, any quote- or line item-level discounts are displayed to the buyer. Toggle this off to hide original product prices and discount values in buyer-facing quote details in the Buyer Portal, as well as emails and PDFs. Instead, a Quoted Price is presented to buyers, which corresponds to the Quoted Subtotal values in the B2B Edition control panel.
- Allow checkout — Toggle this off to remove the checkout link from emails and in the Buyer Portal after submitting the quote to the buyer. This is a great way to send a “draft quote” for the buyer to review before they can purchase the quoted line items.

Quoting Non-Purchasable Products
In some cases, you may want to create a quote with products from your catalog that cannot normally be purchased from the storefront, such as:
- Out of stock products
- Products with insufficient stock for the desired quantity
- Products marked as not purchasable
Rather than creating a custom product for the quote, you can add the existing product to the quote as a custom item. Custom products and custom items have the following differences:
| Custom Product | Custom Item |
|---|---|
|
|
Before you can add non-purchasable products to your quotes, you must first enable custom items in your Quotes settings. Once enabled, use the Search or Search By SKU tabs to locate the product in question, and click Add to Quote. A banner will appear to inform you that a custom item will be used in place of the selected product.
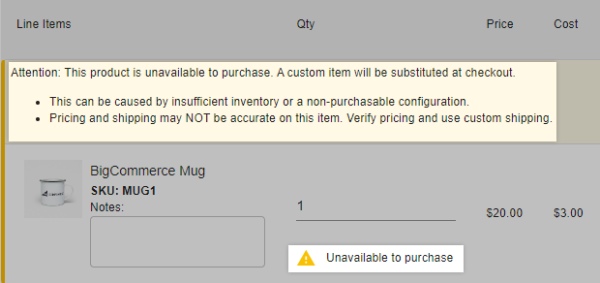
As with standard products, you can add notes to your custom item and adjust the quantity before proceeding to the next step.
Pro Tip! Create a “draft” quote with non-purchasable products by toggling off Allow checkout above your line items. This allows you to present buyers with the products, pricing, and additional information of your quote without letting them convert it into an order until you’re ready. Alternatively, you can convert the quote from the B2B Edition control panel, or by using an external order management system.
When using custom items in quotes, be aware of the following considerations:
- While custom items use the same name and SKU as the original product, they will not inherit its product ID. Some external integrations like product information systems, order management systems, or ERP suites may use the ID field to sync product information and events, and custom items may not be registered as a result.
- We recommend creating a test order from a quote that only uses custom items to identify any potential issues with your integrations.
- If a product was previously in stock, but runs out of stock after submitting the quote to the buyer, it will not immediately be converted to a custom item. Instead, the buyer will see an error message while viewing the quote that the product is out of stock, and to contact you for more information.
- To generate a custom item in this situation, use the Refresh Product action on the affected product while editing the quote, then re-submit it.
- Similarly, if a product comes back in stock after submitting a quote with a custom item, the quote will continue to use the custom item until you refresh the products in the quote and re-submit.
- Since custom items are not a perfect copy of the original product, you may need to validate and adjust pricing before submitting the quote.
- If you need to make pricing adjustments on a custom item, but do not want to display the price changes to the buyer, toggle off Display discounts to hide the original price and any discounts made.
- Custom shipping is required for quotes that only have custom items. You can select other shipping options for quotes with at least one standard product, but the custom items in the quote will not be factored into the shipping rate.
Discounts, Shipping, and Tax
After adding line items to the quote, select one of the following discount methods from the Discount Type dropdown:
- Per Line Item — Apply percentage discounts or override the default price of each line item in the quote.
- Total % — Apply a percentage discount to all line items.
- Fixed Amount — Apply a fixed-rate discount to all line items.
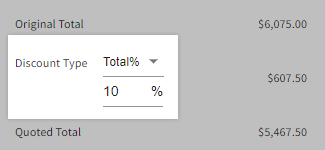
Can I set a product price that is higher than the default catalog price? You can add a higher price to line items in your quotes by selecting the Per Line Item discount type and entering the new price in the line item’s Quoted Price field. If you want to hide price changes from the buyer, toggle off Display discounts.
To apply a shipping rate to the quote, select one of the following options from the Shipping dropdown:
- Customer choice at checkout — allows the buyer to select from your available shipping options when they proceed to checkout
- Calculate rates — select a preconfigured shipping method. Note that the buyer will be presented with the shipping method you specified, but they can select other available shipping methods at checkout.
- Custom shipping — select from the custom shipping methods you’ve created in Quotes settings, and enter the desired shipping cost. Using a custom shipping method on the quote prevents buyers from selecting another shipping method at checkout.
- Note that you cannot apply a custom shipping rate if all line items in the quote have product-level free shipping. This includes custom products with Free Shipping enabled.
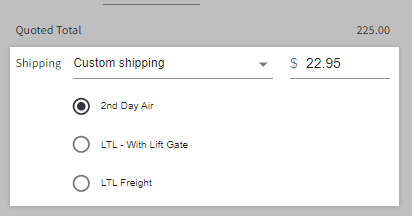
Why am I getting “Error calculating shipping rates”? If you selected the Calculate rates shipping option, this error occurs if the shipping destination or line items on the quote are not compatible with your available shipping methods. Compare the physical dimension limitations of your shipping methods with the line items in the quote, or use a custom shipping method to apply a unique shipping rate to the quote.
After selecting the Calculate rates or Custom shipping method for the quote, tax is automatically calculated based on the rates from your basic or automatic tax setup. However, since the Customer choice at checkout shipping method does not supply a shipping rate until the buyer proceeds to the Shipping step of checkout, selecting this option will cause the tax total to be listed as “TBD”.

Note that if you are using an automatic tax provider, any custom items in the quote will not inherit the tax code of the original product. If you need to apply a tax code to the product for accurate tax calculation, create a custom product and then edit it in your BigCommerce control panel before submitting the quote to the buyer.
Additional Information
The Additional Information area is where you can specify terms and provide additional context on the quote’s details. Pass important information, such as questions about custom products or information on purchasing the quote, in the Notes field. Alternatively, you can add it as a Message, which the customer can respond to in the Buyer Portal.
By default, your quote includes the preset terms and conditions from your Quotes settings. If you want to revise the specific terms of the quote, edit the text in Terms and Conditions.
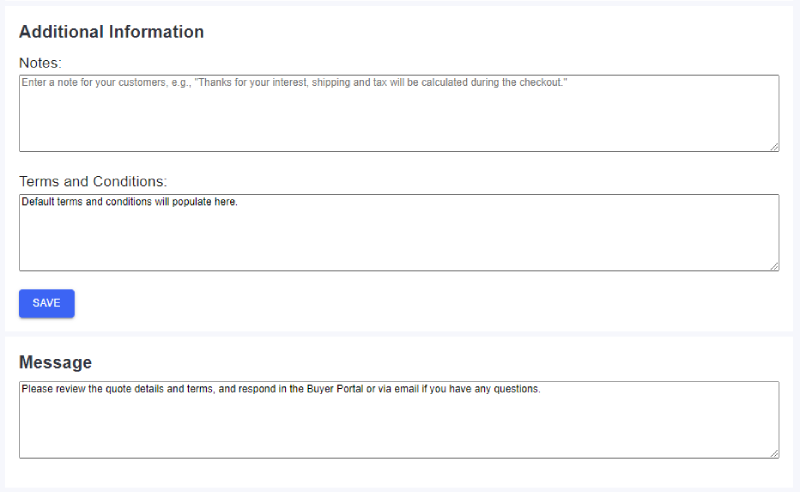
Click Upload File to include documents and other files with your quote. You can view any customer attachments after submitting the quote from the Uploaded By Customer column.

Submitting the Quote
Once you’ve finished your initial draft of the quote, use the actions in the menu on the right. Click Save As Draft to return to the quote later, or click Preview to verify the quote details before sending it to the customer. When ready, Submit the quote.

Once submitted, Senior Buyer and Company Administrator users will be able to see the quote in the Buyer Portal. You can email a copy of a quote to the Company user by clicking Send in the confirmation popup.

Before the email is sent, you can preview its contents in the Quote Email window, as well as make the following customizations:
- Select a preconfigured template. Note that these are not customizable.
- Note that if you’ve toggled off Allow checkout after adding line items, the checkout link will not appear in the email, regardless of the template selected.
- Add CC email addresses
- Add a personalized subject
- Attach a PDF copy of the quote and select the template. By default, the PDF uses the template selected in your Quotes settings.
- When re-submitting an existing quote, changing the PDF template or altering your store’s Locale settings will update the quote PDF available in the Buyer Portal.
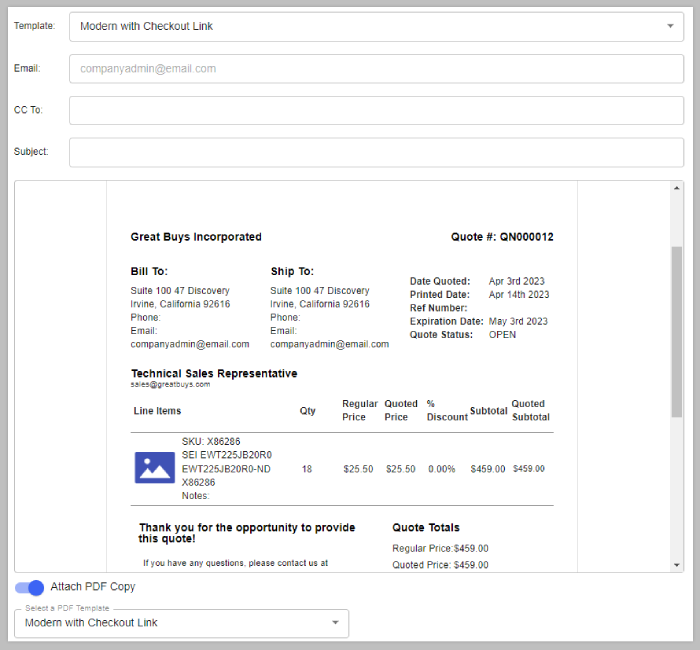
If the default language in your Locale settings is supported by B2B Edition, the text in the quote PDF will display in that language. If your storefront language is not supported, the PDF text will be in English. The following languages are supported:
- Chinese
- Dutch
- English
- French
- German
- Italian
- Japanese
- Spanish
Newly-created quotes will have a status of In Process. When a Company user converts a quote into an order, the quote’s status will be updated to Ordered. If a quote is not converted into an order before its expiration date, it will automatically move to the Expired status.
Managing Quotes as a Store Admin
Store Admin users can view all sales quotes from the Quotes area of the B2B Edition control panel. Click Add filters to narrow down quotes by details like Company name, date created, or quoted total.
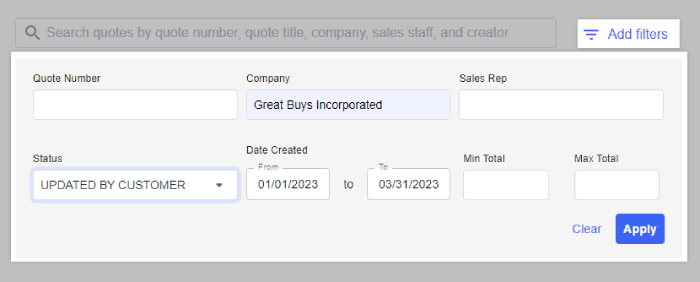
Click on one of the columns at the top of the list to change how your quotes are sorted.

Click on a specific quote to view its details, such as included products, any discounts applied, and the quote’s expiration date. You can also view, edit, duplicate, or archive a selected quote from its action menu. Archived quotes are not visible to Company users, and can be viewed from the Archived tab of the Quotes area.
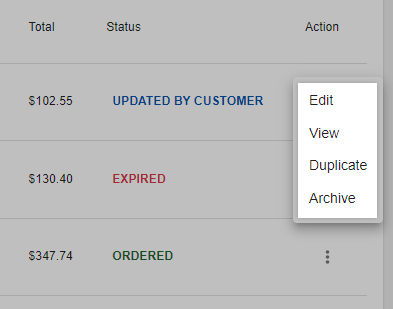
Upon selecting a quote to view from the list, you can take the following actions:
- Edit details
- Archive the quote to prevent the customer from purchasing it
- View and respond to customer messages
- Print or download as a PDF
- Email quote updates to the customer
- View history of quote events and email revisions
After submitting a quote to the buyer, they can review and order it from their Company account. Alternatively, you can manually convert it into an order from the B2B Edition control panel by clicking Order from the action list.
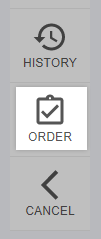
Confirm the addresses on the quote, select a shipping method, and transfer any notes before submitting the order to your control panel.
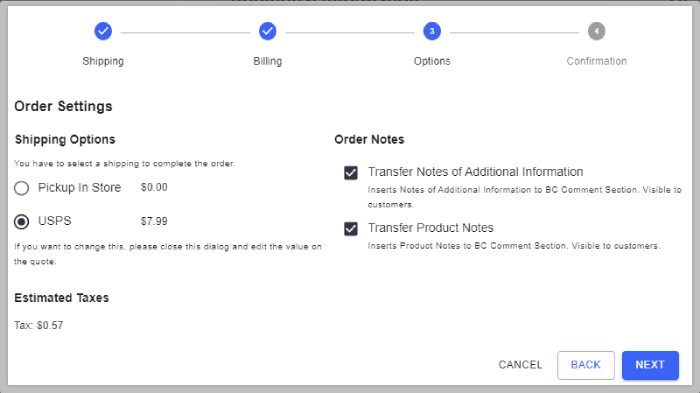
Payment credentials cannot be added when manually converting a quote into an order. Edit the order in your BigCommerce control panel to manually process payment with an online payment method, or change the order’s status to Awaiting Payment and generate an invoice for the customer to pay.
Once a quote has been converted to an order, you can see the order details by selecting View Order from the action menu in the quote list.

Managing Company Invoices
Invoices in B2B Edition allow customers to pay for an order in their storefront account after it was placed. This allows you to support purchase order payments, set net terms, and accept asynchronous payments. The Invoices area of the B2B Edition organizes invoice information into the following tabs:
- Orders — generate invoices from existing B2B orders
- Invoices — view and edit invoice details
- Payments — keep track of invoice transactions and record external payments
Creating an Invoice
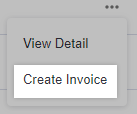
To generate an invoice for an existing order, go to Invoice Management › Orders, locate the order, and select Create Invoice from the Action menu. If an order already has an invoice, its ID will be listed in the Invoice Number column, which you can click to view its details.
Pro Tip! Configure automatic invoice generation, set default payment terms, and specify payment methods for invoice payment from your Invoice settings.
Upon creation, the customer will receive an email notification that they can pay the invoice in their storefront account. You can customize invoice notifications in B2B Edition’s Email settings.
Only one invoice can be created for a single order in the B2B Edition control panel. If you need to assign multiple invoices for an order, create an additional invoice via the API. Leave the orderNumber field blank and include the order ID in the externalId field for the buyer’s reference.
Viewing Invoices
To view existing invoices, go to Invoice Management › Invoices in the B2B Edition control panel. From here, you can access important information at a glance, such as the associated order, Company name, the payment status, and the total amount owed. Additionally, you can export your invoices to a CSV spreadsheet by using the Export Invoices action.
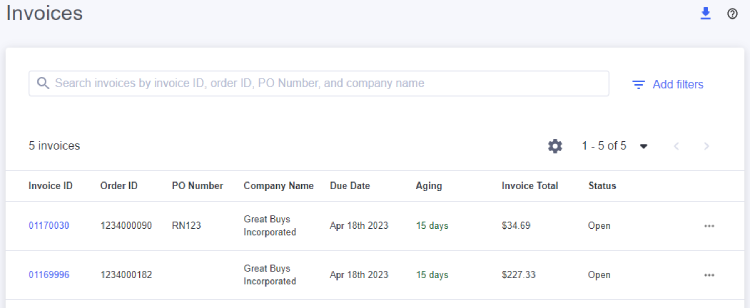
You can change the sort order of your invoices by clicking any of the information columns at the top of the list.

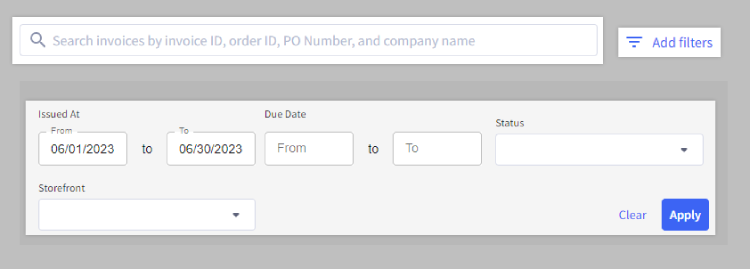
Use the search bar to locate specific invoices by ID or Company, or Add filters to narrow invoices by creation date, due date status, and the storefront that the original order was placed on.
From a quote’s Action menu, you can View its details, Edit payment terms and amounts, or Delete the invoice entirely. Note that partially and fully paid invoices cannot be deleted, and fully paid invoices cannot be edited.
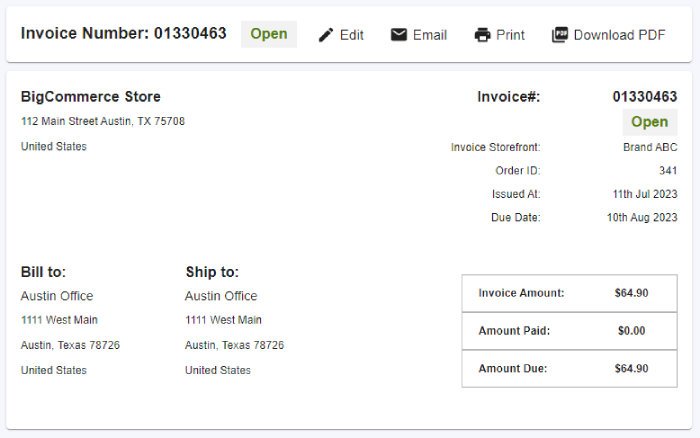
The invoice details include buyer and line item information from the original order, the invoice status and due date, and how much has been paid. While viewing an invoice, you can edit it, send an email reminder to the customer, print it, or download it as a PDF. If the invoice has been partially or fully paid, you can also click the payment ID to view payment details.
The following options are available when editing an invoice:
- Adjusting the invoice due date
- Adding, editing, and deleting line items
- Modifying and deleting additional costs like shipping and tax rates
- Adding custom costs like handling or packaging fees
- Adjusting the default terms and conditions specified in Invoice settings
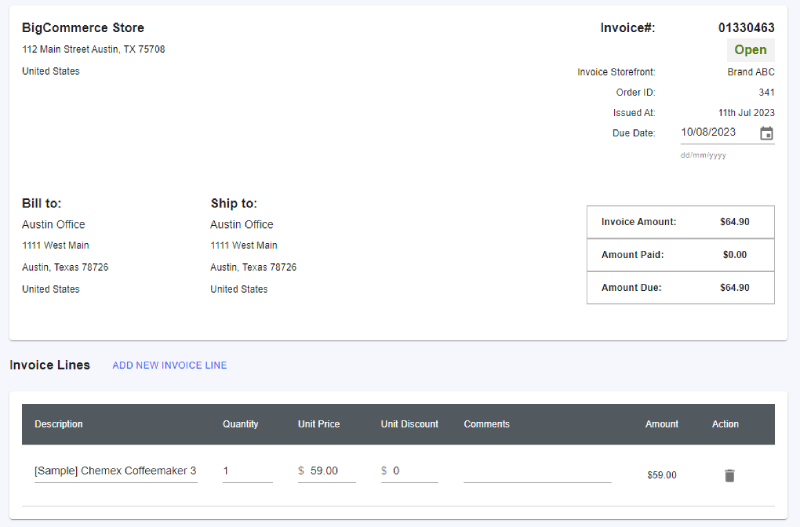
When you’ve made the desired changes, Preview and Update the invoice to carry it over to the customer’s Company account. We recommend sending an email after editing an invoice, as customers are not automatically notified when invoice details are changed.
Managing Invoice Payments
When a customer makes a payment on an open invoice, a payment record is created in Invoice Management › Payments within the B2B Edition control panel.
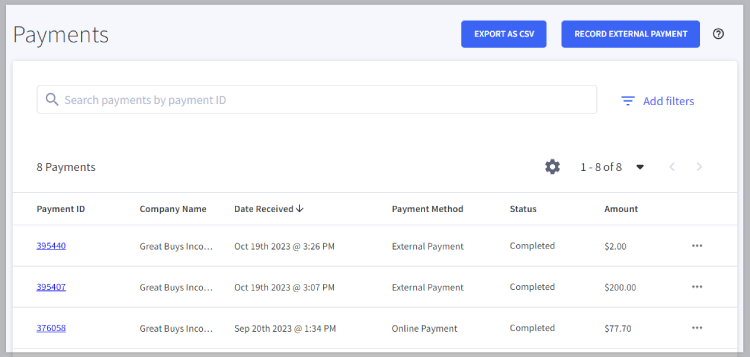
Like invoices and orders, you can search for specific payments by ID, filter by payment date, or sort by clicking the column names. Additionally, you can download a spreadsheet of all invoice payments by clicking Export as CSV. The CSV includes the same attributes present in the payments list, such as payment ID, payment method type used (online or external), and amount paid.
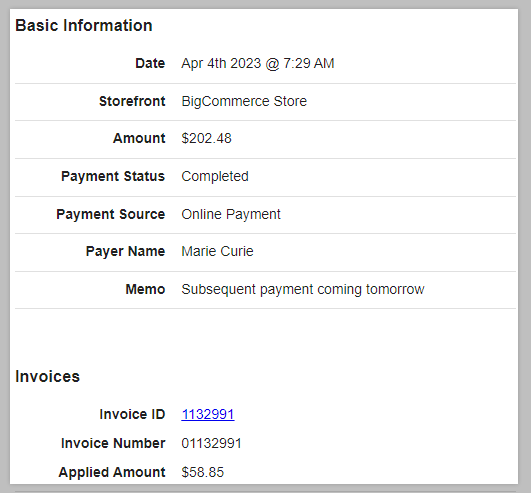
To view complete information on a particular invoice, select View Details from that invoice’s Action menu. This includes the memos left by the customer, a breakdown of which invoices were paid for and how much was paid for each, and a raw transaction response with details on the payment method and credentials used. You can also click the invoice ID to view the invoice’s details.
Logging Offline Invoice Payments
If a customer pays for an invoice with an offline payment method, such as check or money order, you can add a payment record in Invoice Management › Payments by clicking Record External Payment.

In the Pay Invoice: Record External Payment window, look up invoices by ID or Company name, then enter the paid amounts.

Specify how the invoices were paid in the Payment Methods dropdown, and leave any notes in the Payment Memo field. When done, click Apply Payment to add the record to your payments list.


