
With B2B Edition, your B2B customers are organized into Companies. Buyers with Company accounts can assign roles to each of their users and create, approve, and submit orders from the Buyer Portal.
In this chapter, we'll go over the Company account management within the Companies area of the B2B Edition control panel. If you are using the legacy storefront experience, the Details page for each Company account is organized differently. Unless otherwise noted, the settings themselves remain the same in both experiences.
How Company Accounts Work
After creating a Company account or approving an account request from a customer, you can manage their orders, users, addresses, and settings from the Companies area of the B2B Edition control panel.
Company accounts can be assigned to a customer group, which manages catalog visibility and pricing for your buyers. See Companies and Customer Groups in B2B Edition to learn more.
Other information, like visible payment methods and Company addresses, is not assigned to the customer group and can only be managed in the B2B Edition control panel.
If your store is not using Independent Companies, creating a Company account automatically generates a corresponding customer group in your BigCommerce control panel. The following information is synced between the customer group and Company account:
- Company and customer group name
- Company users in the Company account and customer accounts in the customer group
- Super Admin users in the Company account and customer accounts in the customer group
- Price Lists assigned to the customer group and Company account
Company accounts can have the same name, but customer groups cannot. If you give a Company account the same name as an existing one, the resulting customer group will have a string of random text added to the end of its name. For example, if you create a Company account with the name B2B Corporation, and there is already a customer group with this name, the new customer group would have a name like B2B Corporation_abc.
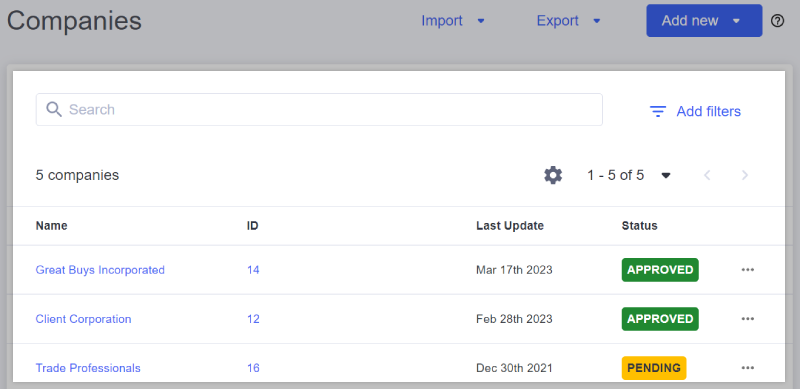
In the Companies area, you can view the approval status of a Company account, import and export Companies, and import and export Company addresses. Click a column name to sort your Companies list by that information field.

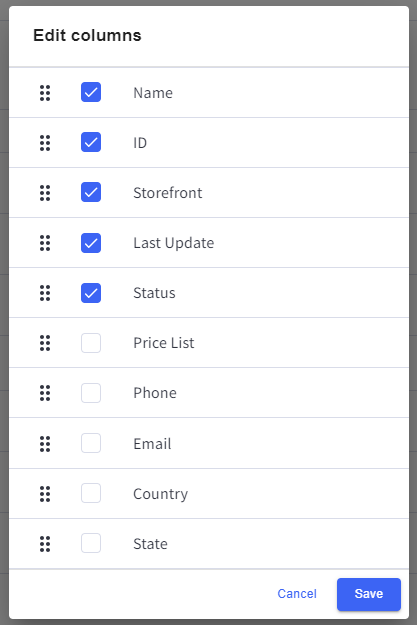
To change which information is visible in the Companies area, click the gear icon and check the boxes next to the fields you want to display. You can also drag and drop the fields to change their order in the list.
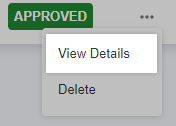
By clicking on a Company’s name or selecting View Details from the action menu, you can access and manage the following Company account information tabs:
- Basic Information — view Company contact details, assign a customer group, and enter information for any Company extra fields you’ve configured
- Company users — manage the buyer users in a Company account
- Super admins — assign Super Admin users to assist your clients from their Buyer Portal
- Sales staff — assign Sales Staff users to manage Company accounts from the B2B Edition control panel
- Payments — specify which payment methods are available at checkou, define invoice payment terms, and set Company-level credit
- Addresses — create, edit, and delete shipping and billing addresses in a Company account
- Attachments — view, add, and delete a Company’s attached files
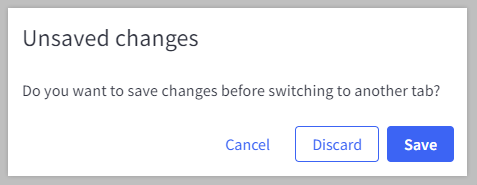
When editing information in a Company detail tab, you will be prompted to save your changes, discard them, or remain on the current tab before navigating to another one. This does not occur in the Company users and Addresses, though, as updated entries are saved from their respective pop-up modals.
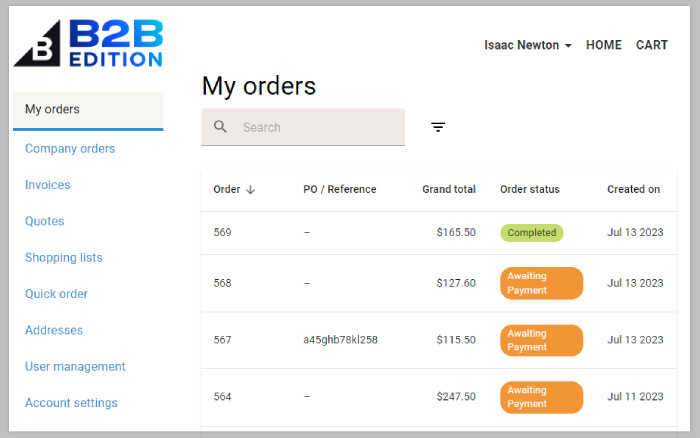
With a Company account, your B2B buyers will gain access to all features in the Buyer Portal in your storefront where they can manage their users, build orders, and view quotes from your Sales Staff.
Creating a Company Account
B2B customers can register for a Company account by submitting a Company account application from the storefront, which you can approve in the B2B Edition control panel. Once approved, a company account will automatically be created for them.
If you already have clients you’re working with, you can create their Company accounts manually, create Company accounts in bulk, or, if you have organized them into customer groups from your control panel, convert them into Company accounts.
Creating a Company Account (Manual)
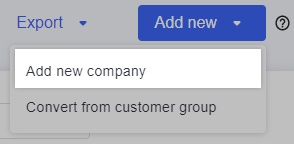
To quickly and easily establish an account for your customers’ business, go to Companies in the B2B Edition control panel and click Add new. From the drop-down menu, select Add a new company. If you’re using B2B Edition on multiple storefronts, the Add new dropdown is a single button instead.
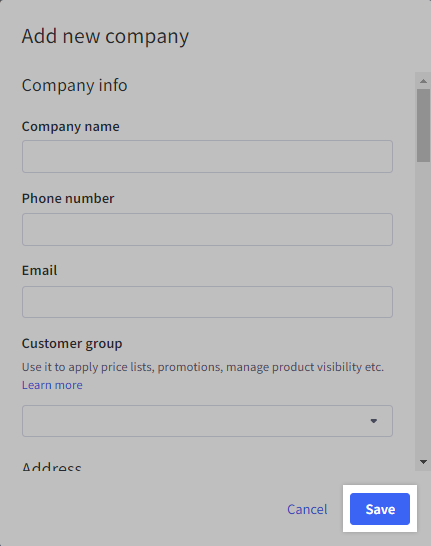
Fill out the business’s details in the pop-up window that appears, including Company name, phone number, Company email address, customer group, and Company admin user information.
When you are done, click Save.
Using the Buyer Portal experience? The address entered when manually creating a Company account is saved to the Company’s address book. If you’re on the legacy storefront experience, the address is only present in the Company’s Basic Information tab.
Creating Company Accounts in Bulk (Import)
If you have multiple Company accounts to create, you can import them in bulk using a CSV template. You can also modify an exported CSV spreadsheet of Company accounts to edit existing accounts and create new ones simultaneously. For more information, see Importing and Exporting Company Accounts.
Converting Customer Groups into Company Accounts
Customer group conversion is not supported in stores with stores using the Buyer Portal Experience or with multiple B2B storefronts. Create new Company accounts manually or via CSV import.
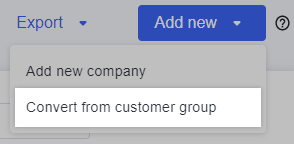
Stores using the legacy storefront experience can easily convert customer groups into Company accounts. Click Add new from the Companies area of the B2B Edition control panel and select the Convert from customer group option from the drop-down menu.
Select the desired customer group and click Convert. You will be prompted to confirm your selection, as all customers in the customer group will receive a notification when the Company account is created.
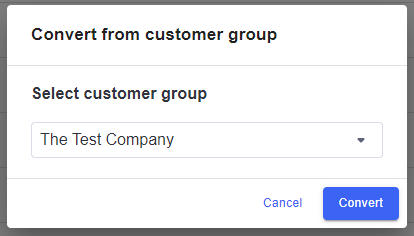
Fill out the Company’s information in the pop-up window and click Convert. Once you’ve finished, any product visibility settings and Price Lists will be applied to the Company. Any orders previously placed by customers in a converted customer group will be visible when viewing orders from the B2B Edition control panel.
Applying for a Company Account
In your storefront, customers can apply for a Company account by submitting a Company account application in your storefront. This form requests them to enter their Company admin user information, as well as the Company’s name and contact details.
Customers can access and fill out this form in your storefront login page by clicking Create Account and selecting the Business Account type. This can be filled out by guest customers, or by customers with existing storefront accounts. If you’ve enabled reCAPTCHA in your BigCommerce control panel, a reCAPTCHA checkbox appears at the last step of account registration.
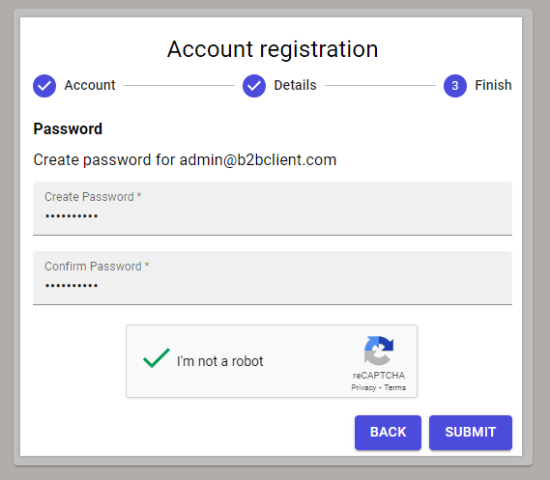
Pro Tip! Customize the Company account application experience by adding unique information fields to the application form, or restricting products and purchases from customers with pending Company accounts.
If the customer is logged in to their storefront account, the form is pre-filled with their name and email address in the Contact Information fields. If the customer is not logged in or does not have an account, an account will be automatically created for them when they submit the form.
Note that the Company account application form does not enforce the password requirements configured in your BigCommerce store. A buyer's account password must have at least seven characters with at least one letter and one number.
If you are using the Buyer Portal experience, the address the customer enters into the form is added to the Addresses tab of their pending Company account details. If you are using the legacy storefront experience, this address will not be available as a saved billing or shipping address at checkout until it is added by you or a Company user.
Approving Company Accounts
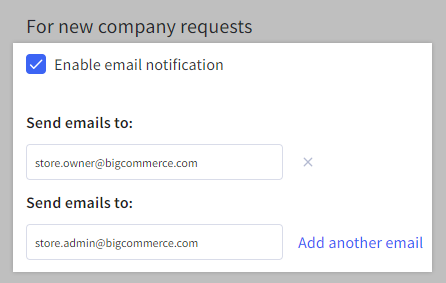
Once a customer has submitted a Company account application, you will receive an email notification for the account request. To set the receiving email address for Company requests, go to General settings in the B2B Edition control panel, check the box next to Enable email notification, and enter your desired address in the Send emails to: field.
Company accounts that have not yet been approved will appear in the Companies area with a Pending status. Pending accounts do not have all Company details tabs available until approved.

To approve or reject a pending account, select View Details from the action menu. You can view the information submitted by the company before selecting Approve or Reject at the top of the page. Once selected, the customer who submitted the request will receive an email notification, informing them of the account’s approval or rejection.

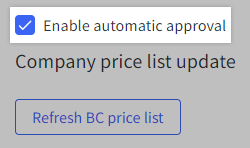
If you want to automatically approve Company account applications upon submission, check the box next to Enable automatic approval in General settings.
Assigning Super Admins and Sales Staff
Once you’ve created Company accounts for your B2B customers, you’ll want to assign your staff members to act as liaisons between your business and theirs. In B2B Edition, users can be assigned as Super Admins or Sales Staff in your B2B Edition control panel, which have the following differences:
| Super Admins | Sales Staff |
|---|---|
|
|
Super Admins
To manage your store’s Super Admins, go to the Super Admins area of the B2B Edition control panel. From here, you can view assignment listings by Super Admin name or by Company name, using the Group by toggle.
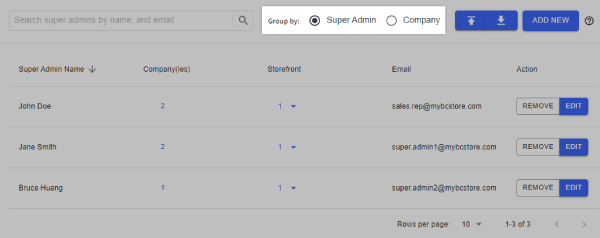
Use the search bar at the top of the page to locate a particular Super Admin by their name or email address. You can also click a column name to sort your Super Admins list by that information field.

Add new Super Admins to the list by clicking the Add New button and filling out the information in the pop-up window. Upon creation, the new Super Admin receives an email with instructions on accessing the Buyer Portal of their assigned Company or Companies.

To assign an existing Super Admin to a Company account, click the Edit button next to the Super Admin in the list. When editing a Super Admin, check the boxes next to Companies under Company Assignment to assign them to the Super Admin. You can look for specific Companies with the search company name field, and assign or unassign to all Companies using the Select All checkbox.
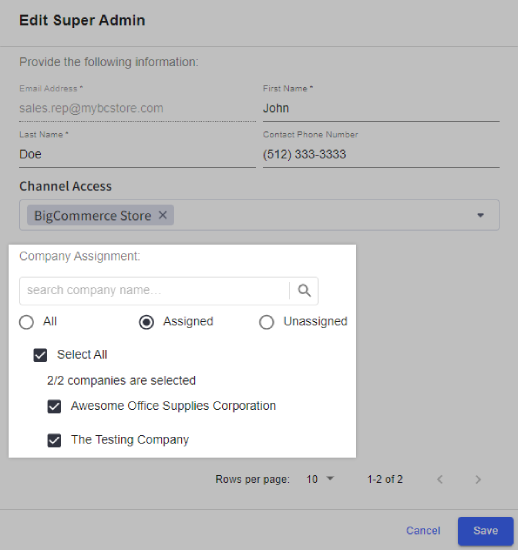
While grouping Super Admins by Company, click Edit Company to modify its Super Admin assignments. This takes you to the Company’s details in your B2B Edition control panel.

Go to the Super Admins tab and select All or Unassigned from the drop-down menu to view Super Admin users not currently associated with the Company. View the list of Super Admins or search by name or email address to locate specific users, then check the box next to their name to assign them to the Company account. You can also click Select all or check the box next to the user account to assign all Super Admins to the Company.
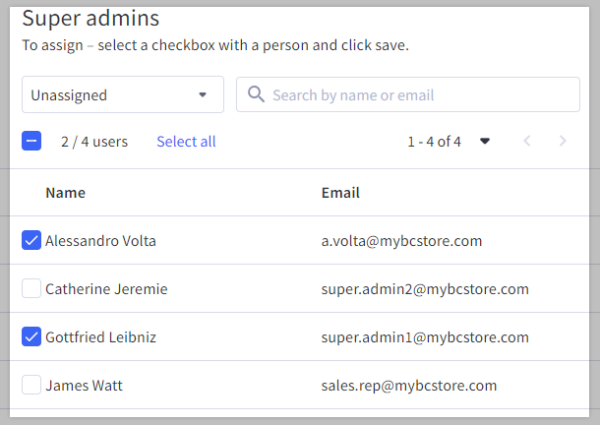
You can also add or edit multiple Super Admin assignments at a time via CSV import. As with adding a single Super Admin in the B2B Edition control panel, creating new Super Admins via CSV will automatically send an email notification to them once the import has finished.
Sales Staff
To assign users as Sales Staff in your B2B Edition control panel, you must assign them a designated Sales Staff role, such as the predefined Sales Rep role. From there, you can specify which Company accounts they are permitted to view and interact with. To learn more about managing Sales Staff users, see B2B Edition User Roles and Permissions.
Company Addresses
Your B2B customers may use several billing and shipping addresses for their businesses. B2B Edition makes it easy to add, maintain, and organize Company addresses for you and your buyers.
To view a Company’s address book, go to the Companies area of the B2B Edition control panel and select View Details from the Company’s action menu. Click the Addresses tab to access a list of all Company addresses and view the default shipping and billing addresses.
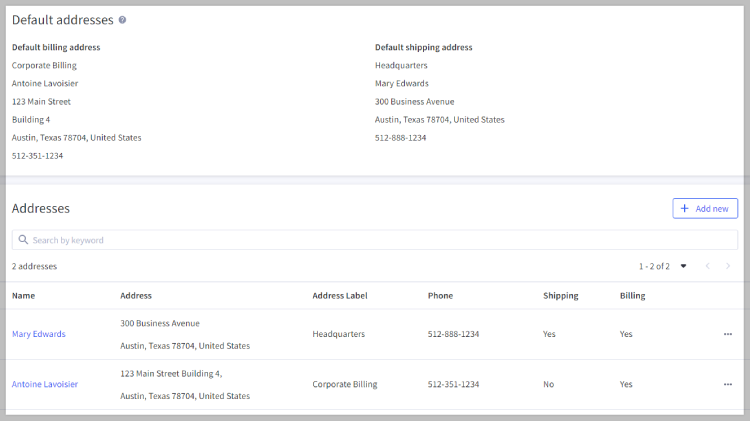
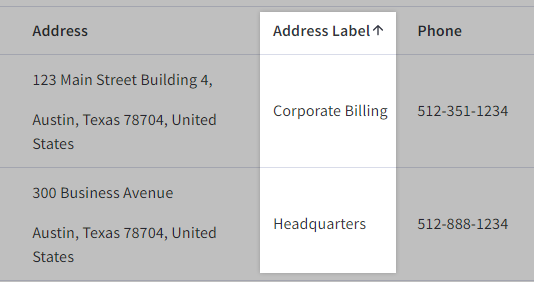
To sort a Company’s addresses by a particular information field, such as name or address label, click the column name. You can also search for specific addresses by using keywords from the address itself.
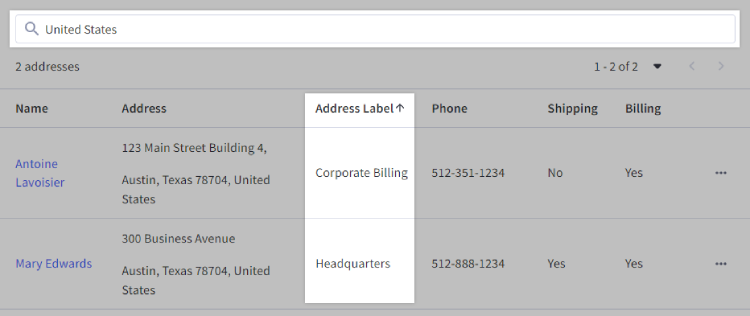
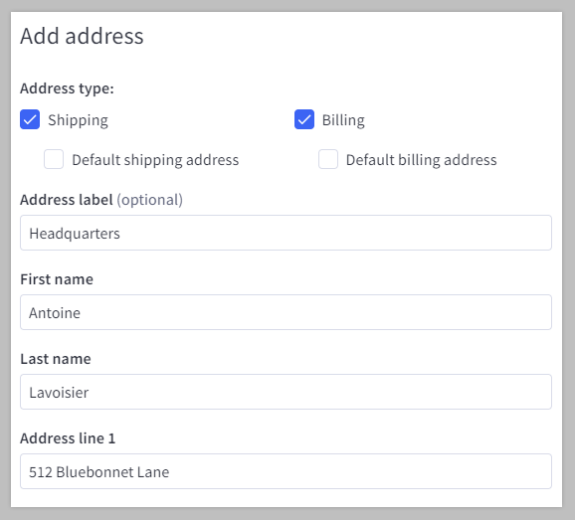
To enter a new Company address, click Add new and fill out the address fields. While creating a new address, you will be prompted to specify whether it is a billing address, shipping address, or both, and if it should be used as a default address for billing or shipping.
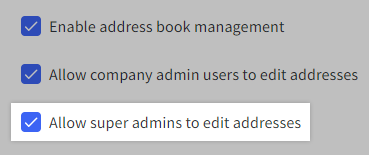
By default, only the Store Admin user can manage Company addresses within the B2B Edition control panel. To allow Super Admins access to address management for their assigned Company accounts, go to General settings and check the box next to Allow super admins to edit addresses.
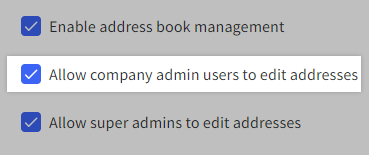
You can also enable Company admins to manage their own addresses by checking Allow company admin users to edit addresses. Once enabled, Company admins can view and edit their addresses from the Addresses tab of their storefront account.
You can also create and update multiple addresses in bulk via CSV import. See Importing and Exporting Company Addresses for more information.
Address Labels
An address label is an optional field that allows users to organize the different billing and shipping addresses in a Company’s account. This can be used to denote Company Name, Location Name, Organization Name, Company Code, or other identifiers.
To search and filter addresses by label, open a Company’s details and navigate to the Addresses tab. Buyers can view and manage their addresses from the Buyer Portal.
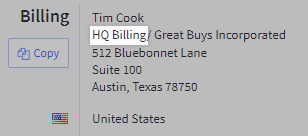
When viewing orders in the BigCommerce control panel, you can see an address’s label next to the Company name.
Managing Payment Methods
You may have online or offline payment methods in your store that are not meant to be used by all of your B2B customers. B2B Edition makes it easy to control which payment options are available to a given Company account.
You must use B2B Checkout in order to manage Company payment settings. Enable B2B Checkout in your Checkout settings to configure Company-specific payment methods, as well as payment terms and credit settings.
To assign approved payment methods to a company, go to the Companies area of the B2B Edition control panel and select View Details from the action menu next to the Company you want to manage. Go to the Payments tab and click Edit and check the boxes next to the payment methods approved for the client, or leave them unchecked to hide them from checkout.

Payment gateways and alternative payment methods (APMs) which require shoppers to meet certain prerequisites, such as billing address country, currency, or minimum order value, cannot be assigned to Company accounts. These payment options can still be used by guest customers, as well as customers with storefront accounts that are not assigned to a Company.
To set which of your configured payment methods are available by default, go to General settings in the B2B Edition control panel. In the Default payment methods drop-down menu, check the box next to one or more of the options. If you do not want any payment methods available by default, leave all boxes unchecked.
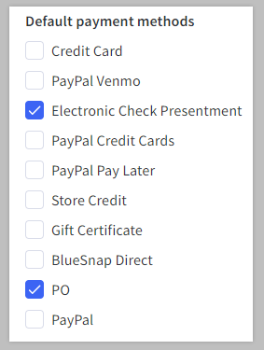
The Purchase Order (PO) payment method appears in the Company’s payment method settings as PO (cheque). Enabling PO payments for a Company allows them to place an order without needing to immediately pay in full. Instead, they receive an invoice which they can pay incrementally over their Company’s established net payment terms.
Setting Company Level Payment Terms
When an invoice is generated for a Company order, it is assigned the default payment term configured in your Invoice settings. However, you may have different agreements on payment deadlines with different B2B clients. To accommodate your individual business relationships, you can set payment terms on the Company level instead.
To enable unique payment terms on a Company account, go to the Companies area of your B2B Edition control panel and click the Company’s name. In the Company Details page, go to the Payments tab, then check the box next to Enable company payment terms to configure an invoice due date separate from the default selection.
This unlocks the Company Payment Terms drop-down menu, where you can select the desired terms. The following options are available:
- Due on receipt
- Net 5
- Net 15
- Net 30
- Net 45
- Net 60
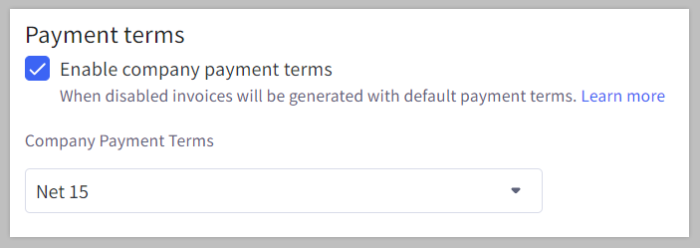
Once saved, the payment term applies to all subsequent invoices generated for the Company’s orders.
Pro Tip! Set payment terms for multiple Companies at a time by importing a CSV file of Company account information.
Configuring Company Credit
If you offer Purchase Order payments on your storefront, you can mitigate risk by imposing restrictions on how it can be used. Company credit settings allow you to set a maximum value for orders using the PO payment method and place Company accounts on a credit hold. Company credit consists of three settings:
- Available Credit — the currency and value of a Company’s credit. This can be used for reference purposes, or it can act as an order value maximum for the Purchase Order payment method when the following setting is enabled.
- Disable payment via PO(cheque) when credit value exceeded — this prevents Company buyers from using the PO payment method at checkout if their order exceeds their available credit. This requires an available credit value in order to function.
- Put account on credit hold — this restricts Company users from making any transactions in your store, except invoice payments. This setting does not interact with the other two, and must be enabled manually in the B2B Edition control panel.
Before you can configure credit on Company accounts, you must enable it in your Company Management settings. Once activated, click on a Company name, navigate to the Payments tab, and check the box next to Enable Credit to manage credit settings for the Company account.
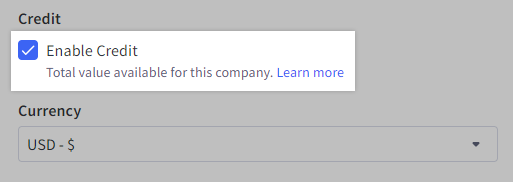
In the fields that appear below, select one of your store’s transactional currencies for the Company credit, then enter the maximum order value that Company users can place with the PO payment method into the Amount field.

The credit Amount does not track buyer credit usage; it only establishes a maximum order value that can be placed using the Purchase Order payment method. This means that the available credit value will not decrease when buyers make a purchase order, nor increase when they pay an open invoice.
If you want to monitor credit usage across multiple Company accounts, we recommend using the Payments API to sync an ERP or accounting system like Acumatica.

After setting the Company’s available credit value, enforce the credit limit by checking the box next to Disable payment via PO(cheque) when credit value exceeded. If a buyer has a cart value higher than the credit value, the PO payment will be disabled at checkout with the following message: “This purchase exceeds your available credit, please select an alternative payment method”. Buyers can still place their order using an online payment method.

When Put account on credit hold is enabled, all Company account users are unable to place new orders on any of your storefronts. They are still able to make invoice payments, however. This is helpful for preventing Company users from making purchases until they have settled any overdue invoices.
When a Company account is placed on credit hold, a warning banner appears in the Company’s Buyer Portal, which informs buyers of the credit hold and advises them to contact you for more information.
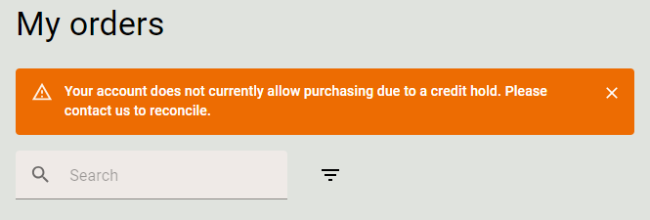
Pro Tip! If you’re using the Buyer Portal experience, you can use Translation settings to add custom instructions to the credit hold warning banner.
Managing Attached Files
In the Company account application, customers can upload files while registering their business’s information. This is helpful if you require B2B clients to fill out printable documents in order to make purchases in your store. These documents appear in the Attachments tab of the Company’s details in your B2B Edition control panel.
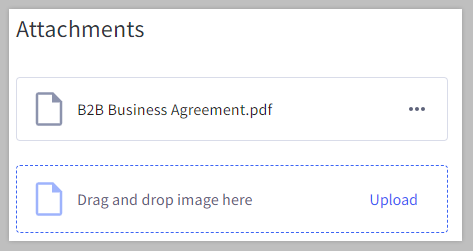
Open the file’s action menu to Download it to your device, or to Delete it from the Company’s details. If you are using the Buyer Portal experience, you can also attach new files by dragging and dropping them into the upload field, or by clicking Upload to select them from your device.
Each Company account can have up to 10 file attachments. The following file types are supported:
- PNG
- JPG/JPEG
- BMP
- WMBP
- XBM
- WEBP
- DOC/DOCX
- XLS/XLSX
- CSV
After a Company account has been registered, all file attachments are only visible in the B2B Edition control panel. You can view and manage files from the Attachments tab, but Company users do not have access to them in the Buyer Portal. This allows you to upload additional files after a Company account has been created for internal reference purposes.
FAQ
Do changes to a customer account or customer group in the BigCommerce control panel carry over to the corresponding Company user or Company account in B2B Edition?
While updates from the B2B Edition control panel will carry over to the BigCommerce control panel, not all changes are relayed from BigCommerce to B2B Edition. As a result, changes to Company users or accounts must be made in the B2B Edition control panel in order to avoid data issues.
Can I assign ShipperHQ customer groups to my Company accounts?
While you cannot directly assign a ShipperHQ customer group to a Company account in the B2B Edition control panel, you can link individual customer accounts to a ShipperHQ group with a customer attribute. For a complete set of instructions, see ShipperHQ's documentation about Customer Groups on BigCommerce B2B Edition.
Note that you must be using ShipperHQ Plus in order to configure B2B customer groups.
Why don’t I see the payment terms settings when viewing a Company’s information?
If you have not enabled Invoices in your Feature Management settings, the settings to configure payment terms are hidden in the Payments tab of the Company Details page.
Can I set storefront-specific invoice payment terms for individual Companies?
No, default and Company-level payment terms apply to all of your B2B storefronts.
How do I set custom payment terms outside of those available in the drop-down menu?
While you cannot configure custom payment terms that automatically apply to invoices, you can edit a Company’s invoice from the B2B Edition control panel and manually edit the preset Due Date. You can also update invoice due dates via the API.
Can I set Available Credit values for different currencies?
No, you can only select a single currency for available credit. If a buyer selects a currency on the storefront that is different from the one assigned in their Company account, they will be unable to use the Purchase Order payment method to place their order.

Can I configure Company credit in bulk?
While you can only edit one Company account at a time in the B2B Edition control panel, you can manage available credit and enable or disable credit holds for multiple Companies via CSV import.
In the next chapter, we will discuss the details of Seller-side order management and the tools your Sales Representatives can use to create a streamlined customer experience.


