Stripe is a great way to accept payments online and one of the easiest payment gateways to set up with BigCommerce. Stripe aims to expand internet commerce by making it easy to accept credit card transactions and manage an online business. In addition, Stripe also allows you to offer several digital wallet payment methods on your storefront.
Stripe works with Google Pay and Apple Pay. Once enabled, the Stripe payment gateway allows you to set up Apple Pay and Google Pay, giving your customers even more payment options on the cart and checkout pages.
Requirements
Before enabling Stripe, the store needs to fulfill the following requirements:
- The store cannot be selling any of the Restricted Businesses.
- The store must be using Optimized One-Page Checkout.
- Merchants must be based in one of the countries in the list below.
- Manage Payments and Manage Settings user permissions must be enabled.
Setting up Stripe
To set up Stripe, go to Settings › Payments and select Stripe from the list of Online Payment Methods.
You'll be taken to the Stripe settings tab. Click Connect with Stripe to create a new account or log in to an existing account. If you are logging into an existing account, you must be logged out of your Stripe dashboard before connecting from within BigCommerce.
Stripe Settings
Once you have finished configuring your Stripe account, you can set up a Display Name, Transaction Type, and toggle Test Mode in the BigCommerce control panel. You can also configure features such as stored credit cards and receipt emails.
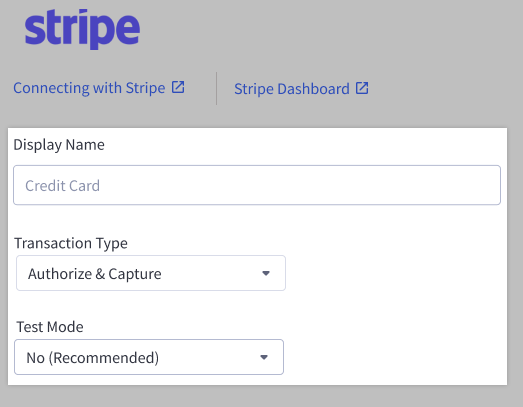
- Display Name — controls how the payment method displays as on the checkout page. We recommend using Credit/Debit.
- Transaction Type — can be set to Authorize & Capture or Authorize Only. Authorize Only allows you to capture the funds manually. See Manually Capturing Transactions (Authorize Only) to learn more.
- Test Mode — set this to Yes to test checkout flow. Make sure this is set to No when your store goes live.
Stored Credit Cards
Stored credit cards allow your customers to save their credit card details for future purchases, allowing them to check out quickly and easily. See Enabling Stored Payment Methods for more information on this feature.

- Enable stored credit cards with Stripe — toggle to enable stored credit cards
Enable receipt email allows Stripe to send payment or refund receipts to your shoppers automatically, in addition to any order status emails you have set up under Settings › Order notifications. Stripe can automatically send email receipts to the shopper after a successful payment, or when you refund one. Receipt emails are sent to the shopper’s email address they provided at checkout.
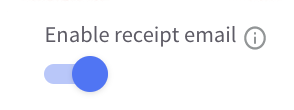
To customize the look and feel of the invoice, log into your Stripe account and go to email receipt settings. See Stripe's Customizing Receipts documentation for more information.
Using Bolt with Stripe? To avoid duplicate fields, the built-in credit card feature is automatically disabled and replaced by Bolt's hosted credit card fields when you select Stripe as the payment processor on your Bolt account. Credit card fields can be manually enabled if desired from Stripe Settings in the BigCommerce control panel. Other payment methods, such as APMs, will remain visible at checkout.
Alternative Payment Methods
Below is a list of alternative payment methods supported by Stripe. Based on the store transactional currency assigned to Stripe, you can manage certain APMs within your Stripe Settings page in the BigCommerce control panel. Click on an APM to see its requirements and limitations.
- ACH Direct Debit*
- Alipay
- Apple Pay
- BACS Direct Debit*
- Bancontact*
- BECS Direct Debit*
- Boleto Bancário*
- EPS*
- Google Pay
- GrabPay*
- iDEAL
- Klarna* (US only)
- OXXO*
- PayNow*
- SEPA Direct Debit
- WeChat Pay*
*You must be on the latest version of Stripe to offer these payment methods.
Setting up Link
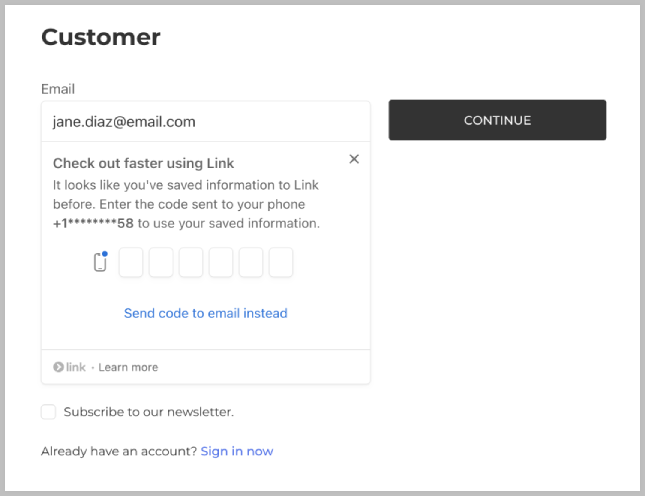
Link is a Stripe payment method that autofills your customers’ payment and shipping details to deliver an easy and seamless checkout experience. Businesses who enable Link benefit from network effects: customers can join Link from any business with Link enabled, and pay in one click with any businesses across the Link network.
During checkout, shoppers enter in a one-time code sent to their phone, which will automatically prefill the shipping and billing addresses. Shoppers are brought directly to the payment step with their saved cards selected, allowing them to check out with a single click.
If the shopper’s email address does not belong to the Link network, they will be given an opportunity at the payment step to register their phone number and enroll.
Link has shopper type restrictions. Currently, Link is available for guest shopper transactions. US and EU-based merchant Stripe accounts are supported, as well as all Stripe-supported currencies.
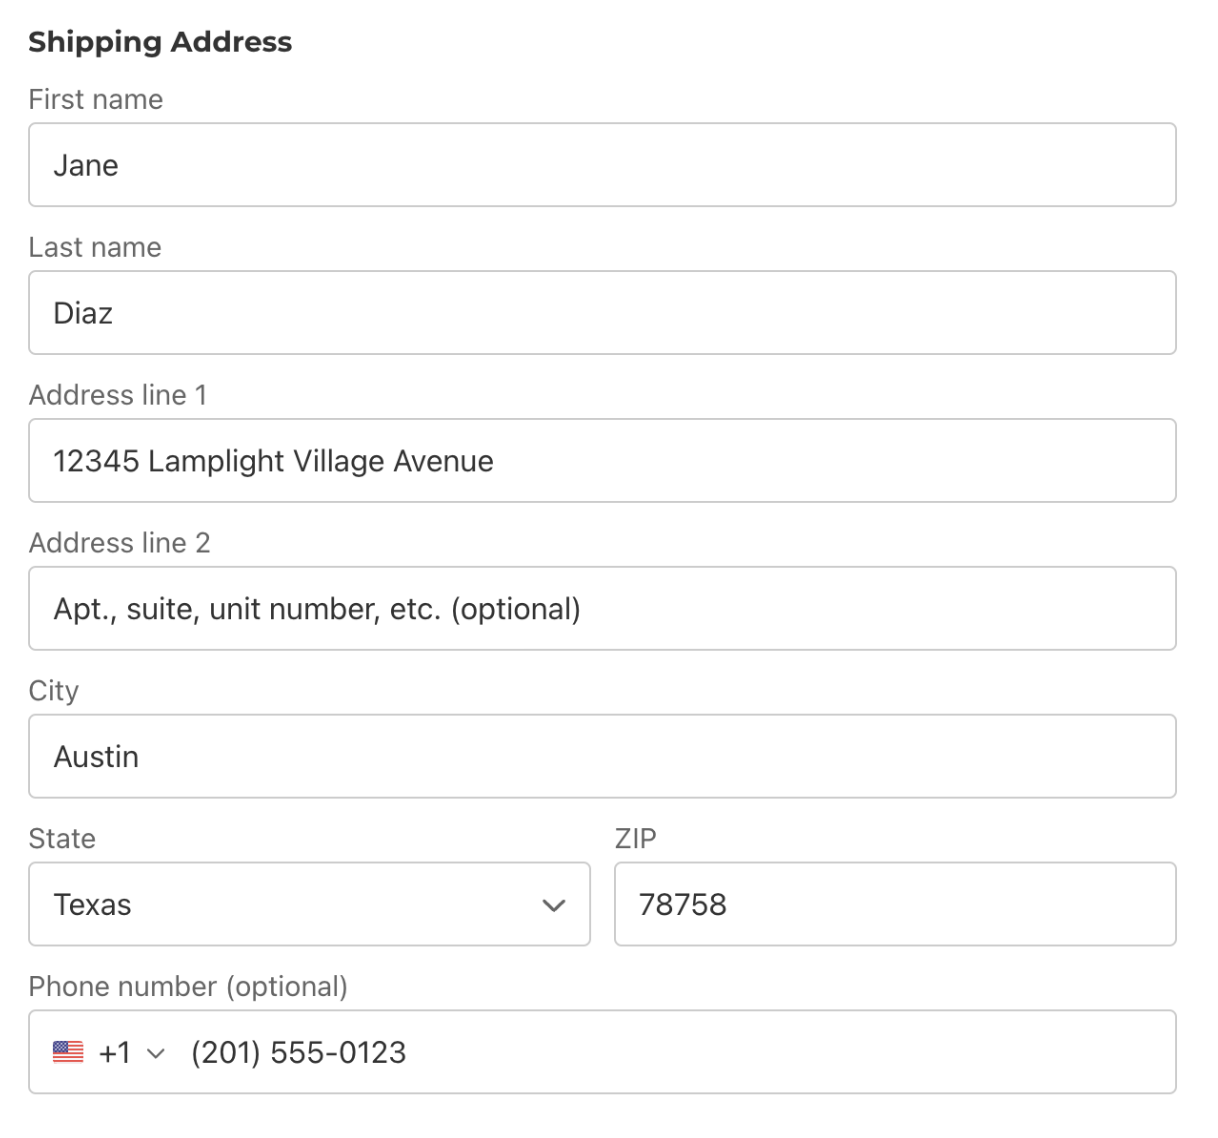
Link replaces the native BigCommerce shipping address form with Stripe's own Address Element. When used in conjunction with the Link authentication step, Stripe's Address Element is what allows the checkout to automatically select and populate the shopper's last used address as well as provide the interface to add or remove Link addresses. However, because the Address Element replaces the native BigCommerce shipping form, certain changes made within Settings > Account Sign Up Form > Address Fields will not work with Stripe’s Address Element. These limitations are listed below:
- The built-in field for Company Name is not supported.
- Changing the sort order of fields will not affect Stripe's Address Element.
- Custom user-defined address fields are not supported.
- Changing the field name will not affect Stripe's Address Element.
- Setting field size, maximum field length, CSS class name, and inline CSS style will not apply to Stripes address input fields.
In addition, unlike the BigCommerce shipping form, Stripe’s Address Element is initially partially collapsed. After the shopper fills out their address line, the rest of the address form will expand out to show the rest of the fields.
Requirements for Link
To use Link, the store must meet the following requirements:
- You must have a US or EU-based Stripe account.
- You must be on the latest version of Stripe.
- The store must have guest checkout enabled.
- Your store must have Existing Accounts set to “Allow customers with existing accounts to checkout as guests” in Checkout Settings.
- Your store cannot have "Customers must have or create an account to check out" selected in Checkout Settings.
- Your store should not have "Require existing accounts to sign in" selected in Checkout Settings.
- The store must have any custom address fields set as optional.
- The store must have the built-in “Company Name” address field set as optional.
- The store cannot have Bolt’s One-Click Checkout enabled.
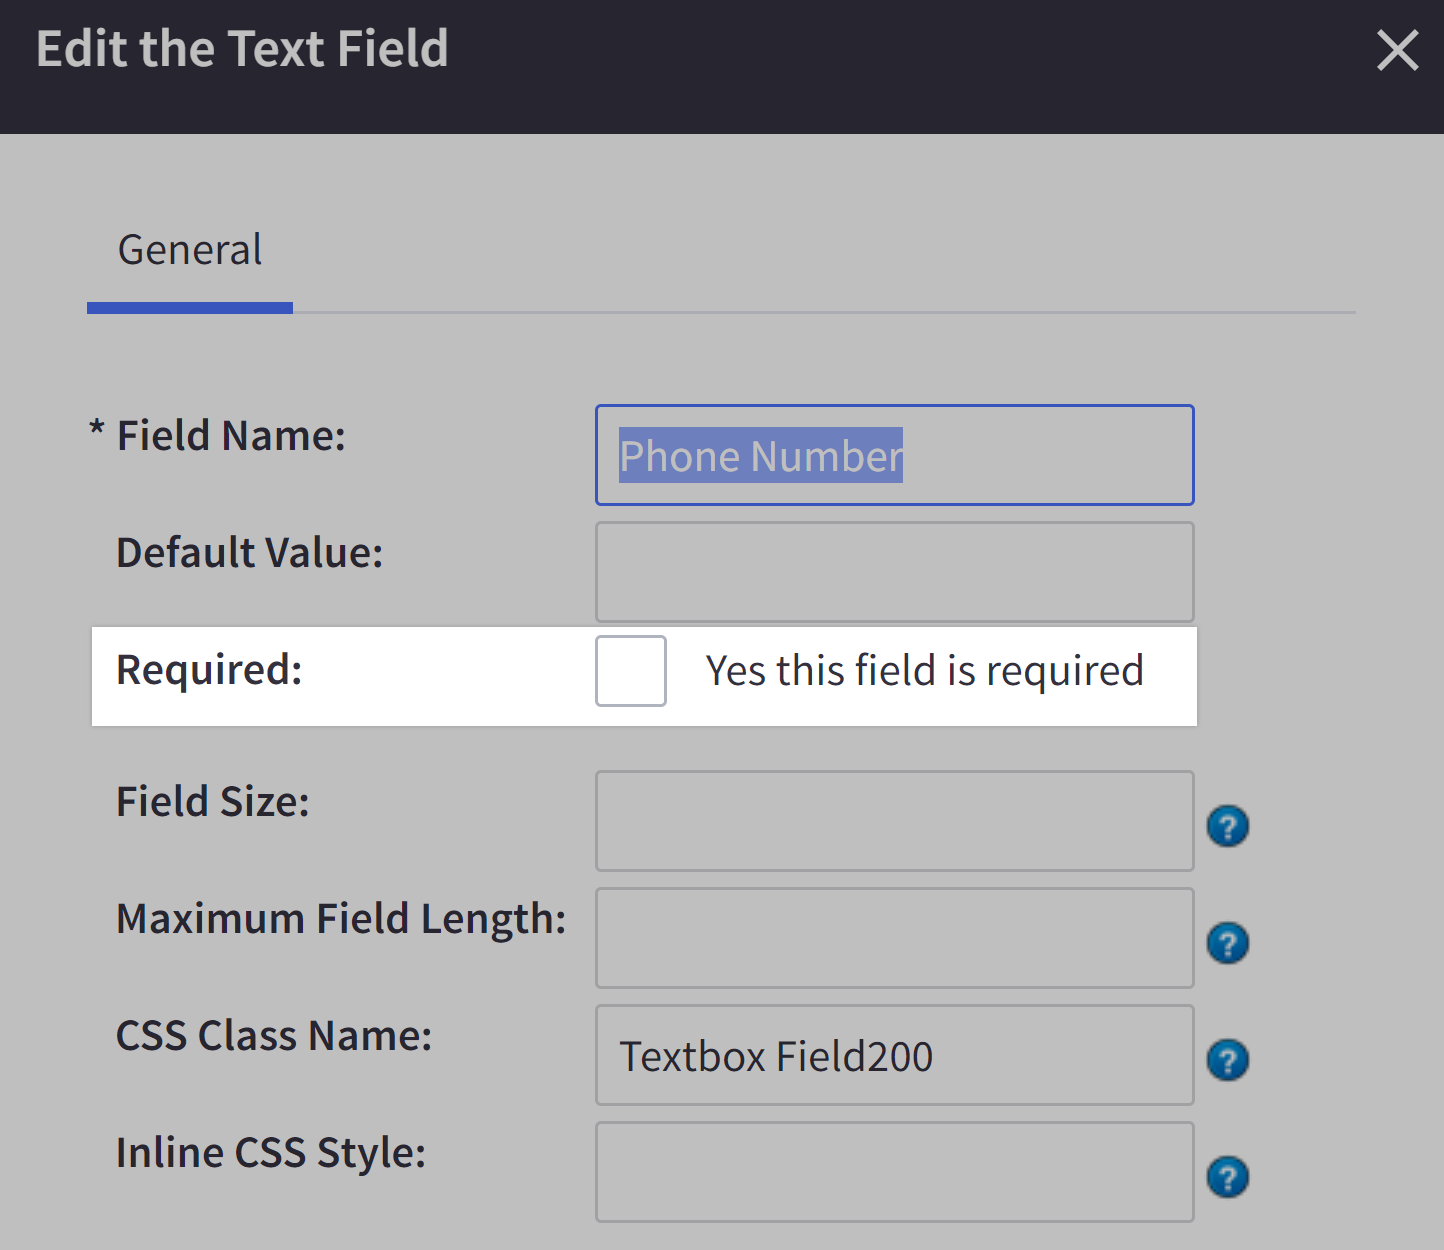
You can choose to have the built-in Phone Number field set to either optional or required. If the phone number is required, shoppers will be directed to the shipping step of checkout and will need to provide their phone number before they can finish placing the order.
Enabling Link
To offer Link on the checkout, go to Settings › Payments and click on the Stripe Settings tab. Click on the checkbox to enable Link, then click Save.

Setting up Notifications
Enabling notifications ensures that an order’s status in the BigCommerce control panel accurately reflects any delayed payment and/or fraud review updates from Stripe. You will need to set up notifications if you want to use any of the following Stripe features:
- Radar or Radar for Fraud Teams
- Any of Stripe's alternative payment methods, except Apple Pay and Google Pay
1. Copy the Notification URL from your Stripe Settings page in BigCommerce and paste it into to your Stripe Backoffice at the following location: Developers › Webhooks › Add endpoint › Endpoint URL.
Avoid potential order status mismatches. Skipping this step could cause Stripe orders to show as Incomplete in the BigCommerce control panel, due to an order status mismatch between BIgCommerce and Stripe.

2. Click Select events and add only the following 8 events:
- Review.closed
- Payment_intent.canceled
- Payment_intent.payment_failed
- Payment_intent.succeeded
- Charge.refunded
- Charge.failed
- Charge.captured
- Charge.succeeded
3. Copy the Signing Secret from your Stripe Backoffice at the following location: Developers › Webhooks › Signing secret › Click to reveal. Paste it into your Stripe Settings page in BigCommerce, then Save your changes.
Note: If you have multiple Stripe accounts connected to your BigCommerce store, you will need to ensure that the account under which you are obtaining the Signing Secret matches the account you have connected.
Upgrading to the Latest Version of Stripe
If you are currently using Stripe we recommend upgrading to the latest version of the integration. To upgrade, follow these steps:
1. If your store is built on a custom checkout using our Checkout SDK, you must first update to the latest version of the SDK, which supports the new Stripe integration. If your checkout page is highly customized, we recommend that you work with your developer to test the upgrade.
2. If your store has any of the following apps installed that are obtaining credit card info from BigCommerce to process payment, they must:
- Be using the API to obtain the credit card info, and
- Be processing the payment through the “stripeupe” gateway using the Payments API
Apps
- Bold Subscriptions Pro
- PayWhirl
- Rebillia Platform
- Subscrimia
- Ordergroove
- Recurring Billing & Vaulting by MINIBC
- Bread Finance
- Partial.ly Payment Plans
- Sufio
3. Navigate to Settings › Payments › Stripe Settings.
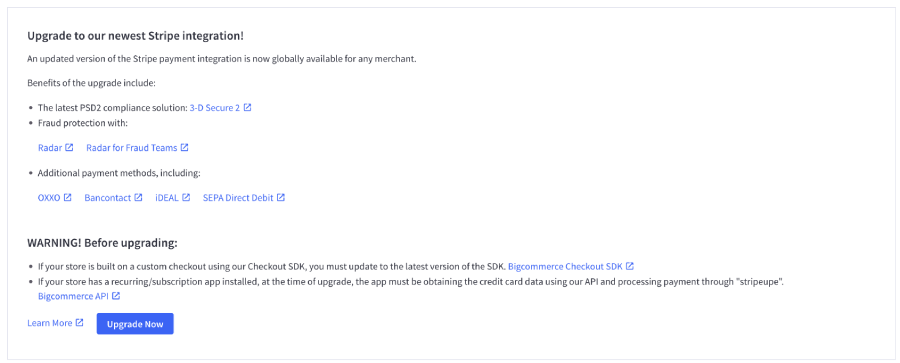
4. Click Upgrade Now! and Save your settings.
5. If you had previously enabled Notifications, you will need to reconfigure the Notification URL and Signing Secret. Refer to Setting Up Notifications for instructions.
6. If you are currently accepting payment through Apple Pay on Stripe, but would like to do so on the latest version of Stripe, follow these steps:
- Upgrade to the latest version of Stripe.
- Contact Support to request that they disconnect Stripe on your store to clear out the existing authentication token.
- Go to Store Settings › Payments › Stripe to Reconnect Stripe.
- Enable the wallet to begin accepting payment.
Common Questions
This information is for the Stripe integration. For common questions and troubleshooting information about a supported APM, see our Guide to Alternative Payment Methods.
- General
- Pricing and Fees
- Account Eligibility
- Transactions
- Refunds
- Additional Features
- Troubleshooting and Payment Disputes
General
Is Stripe responsive on checkout?
Yes, as part of the integration, the Stripe component on checkout is responsive to accommodate different devices, resolutions and screen sizes. This includes credit/debit cards and Google Pay.
Pricing and Fees
What fees are associated with Stripe?
For merchants based in the US, there is a transaction fee of 2.9% + $0.30 per transaction. For merchants based outside the US, please see Stripe Pricing.
Account Eligibility
What currencies and countries does Stripe support?
Our integration supports all Stripe supported currencies and the following countries:
|
|
* HRK is not supported for Croatia. EUR is supported for merchants who want to continue to sell to Croatian shoppers.
**KWD is supported for the United Arab Emirates only. To enable this currency, your Stripe account country must be the United Arab Emirates. See Stripe’s supported currencies article for more information.
Why am I unable to offer KWD as an available currency in my store?
If you are managing transactions on your store with the Payments API, you will need to contact our support team to enable KWD as an available transactional currency.
What items are restricted for merchants to sell?
See Stripe's documentation for a list of prohibited and restricted businesses.
Transactions
After I create an account, what is the waiting period before I can process transactions?
There is no waiting period. However, Stripe does flag accounts for verification after a certain processing threshold.
How long until a transaction's funds are transferred to my bank?
The first payout is made 7 - 10 days after the first successful payment. Subsequent payouts are processed according to your account's payout schedule. See Receiving Payouts for more information.
Will I or my customers receive an additional email or invoice from Stripe?
You can opt to send email receipts. See Email Receipts to learn how to enable it.
Refunds
How soon after a transaction can I perform a refund?
Refunds can be issued from the BigCommerce control panel once the transaction has settled. Settlement time is determined by your account's payout schedule.
Once submitted, Stripe issues a refund request to your customer’s bank or card issuer immediately. Your customer sees the refund as a credit approximately 5-10 business days later, depending upon the bank. Once issued, a refund cannot be cancelled.
Is there an amount of time after which I cannot perform a refund?
No. However, refunds processed long after the charge may not always be successful, as the payment source could have expired.
Are there any fees for chargebacks/refunds?
There may be a fee for disputed charges. See Dispute fees for more information.
Additional Features
Are there any fraud filtering options available?
Yes, Stripe's fraud solution, Radar, is available. The following two solutions are supported:
- Radar — For any merchants that have Stripe configured on their store, Radar for Fraud comes automatically set up when Stripe is enabled on your store. It can be optionally turned off with Stripe's help. To learn more, visit Stripe Radar.
- Radar for Fraud Teams — For merchants that have dedicated fraud teams who want to customize their fraud rules, merchants can optionally enable Radar for Fraud teams, by contacting Stripe. To learn more, visit Stripe Radar for Fraud Teams.
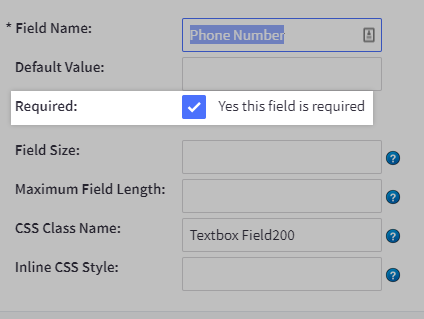
To take full advantage of Radar’s fraud detection tools, we recommend ensuring that the phone number is required. To do this, go to Settings › Account sign up form, then click Address Fields.
Click the Action button to edit, and make sure the Required box is checked.
To enable either Radar solution, you will need to set up notifications.
Does Stripe allow authorize-only or recurring/subscription payments?
Stripe allows authorize-only for credit/debit cards, Google Pay, and Apple Pay. Delayed capture is not possible with any of the other supported APMs. For more information on creating authorize-only transactions, see Creating Charges and Manually Capturing Transactions (Authorize Only).
How long are authorize-only transactions valid before they must be captured?
Authorize-only transactions have a 7 day window, after which they are automatically voided. However, you can request extended authorizations of up to 30 days if you meet the following prerequisites:
- You are using the latest version of Stripe.
- You are enrolled in Stripe’s Interchange+ (IC+) pricing model.
Contact our support team to request extended authorizations in your store. Note that not all transactions are eligible for the 30-day authorization window. See Stripe’s availability restrictions for more information.
Is 3D Secure supported?
Yes, our Stripe integration automatically supports 3D Secure (3DS). No other configuration is needed. 3D Secure will automatically be triggered if required by a regulatory mandate such as Strong Customer Authentication.
Prompting your shoppers with 3DS gives you a liability shift against fraudulent payments that have been verified by the card issuer.
Can I require my shoppers to authenticate through 3D Secure even if it’s not required by the card issuer?
Yes. To configure Stripe so that 3D Secure is applied to your transactions, even when 3DS is not required by a regulatory mandate, log in to your Stripe Dashboard and configure your 3D Secure Radar rules so that 3DS is applied to your transactions in other scenarios.
Does Stripe support 3D Secure for shoppers using Google Pay at checkout?
Yes. 3D Secure authentication is supported for Google Pay transactions.
Is Level 2 and Level 3 data supported?
Yes, our Stripe integration supports Level 2 and Level 3 credit card processing data for B2B transactions. See Stripe's documentation for more information on supported fields.
Does Stripe support multicurrency? (supported by BigCommerce multicurrency)
Yes, multicurrency is supported in our Stripe integration, including Google Pay and Apple Pay. To learn more about setting up multiple currencies, see Using Multiple Currencies.
Does Stripe support cryptocurrency?
No, cryptocurrency is not supported.
Can I connect a single Stripe account to multiple BigCommerce stores?
Yes, Stripe supports Multi-Storefront.
You can connect a single Stripe account to multiple stores for payments only. However, if you have multiple stores and intend to use the notification system along with Stripe's Radar fraud tools, you can have only one Stripe account per store. If multiple stores are connected to a single Stripe account, Stripe will send payment notifications from all stores connected to an account, leading to errors displaying on stores not associated with another store's transaction: "payment_request_missing". You can create multiple Stripe accounts under a single email address.
Troubleshooting and Payment Disputes
Why did my shopper receive an error when trying to pay?
- For card declines due to card issuers, see Stripe's documentation on Payments declined by card issuers
- For Radar or fraud blocked charges, see Stripe's documentation on Blocked payments
- For API-based errors, see Stripe's documentation on API Errors
Why do orders placed with Stripe have an Incomplete status in BigCommerce?
Orders can have an Incomplete status in the BigCommerce control panel if you have not set up Notifications in Stripe’s Backoffice.
How are payment disputes handled?
See Disputes and Fraud for information on how Stripe handles disputes.
Support
How do I contact Stripe's support team?
Stripe offers 24/7 support. Reach out to Stripe Support via contact form or Twitter.


