A customer import or export involves having all of your customer information in a CSV file, which can be edited as a spreadsheet. Whether you're moving customers to a particular customer group or adding store credit, exporting and importing customer data is a fast way to update existing customer information or add new customers in bulk.
How Customer Import/Export Works
The Import/Export tool provides a quick and efficient means of managing your customers’ storefront account data in bulk. Notable use cases include:
- Registering new customers
- Updating existing customers
- Migrating customer accounts to your BigCommerce store from a different store or platform
- Backing up customer information
- Exporting customer information to import into business tools like ERPs and accounting software
BigCommerce makes use of comma-separated value (CSV) files which automatically format your customer data for successful import and export. This also provides a framework for you to create new customers and edit existing ones in a single spreadsheet.
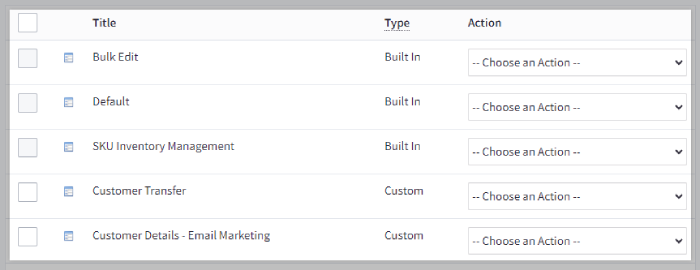
The built-in customer export templates specify whether you import a wide variety of customer data or only basic details. However, you can also create custom templates that let you reserve or omit specific customer attributes in the CSV file, include data that isn’t present in either built-in template, and configure data formatting options that fit your business needs.
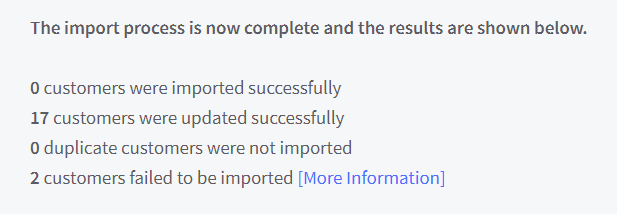
When you're ready to import your customer information, select your preferred import options, such as overwriting existing data or ignoring blank values, and ensure that your file’s column headers match their corresponding customer fields in BigCommerce. After the import process has completed, you can review a summary of new and updated customer entries, as well as a log of any import failures that occurred.
Requirements
- To export customers, you must have the Manage Customers and Export Customers permissions enabled on your user account.
- To manage export templates, you must have the Manage Export Templates permission enabled on your user account.
- To import customers, you must have the Manage Customers and Import Customers permissions enabled on your user account.
- The following fields are required when adding or updating your customers:
- Email Address — must be unique. A customer account can only be assigned to one email address at a time.
- First Name — customer's first name
- Last Name — customer’s last name
Exporting Your Customers
1. Go to Customers › Export.
2. Select your export settings.
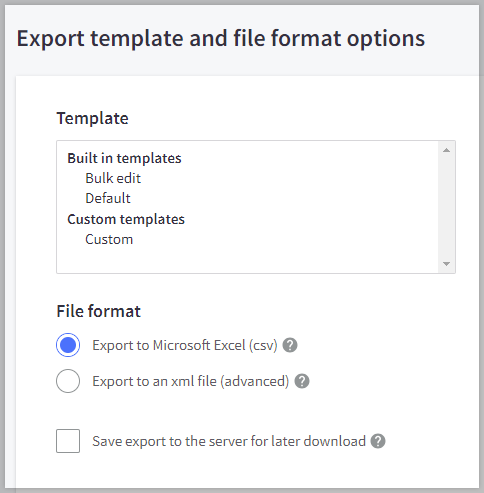
- Template — We recommend Bulk edit or a custom export template.
- File format — You can export your file as a CSV (recommended) or XML.
- Note that only CSV files are eligible to be imported.
- Save export to the server for later download? — Select this option to save the file to your exports folder in WebDAV (recommended for exporting 1000+ customers).
3. Click Continue, then click Export my customers to a CSV file.
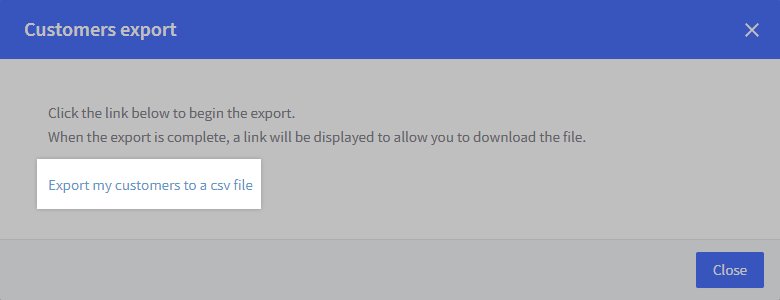
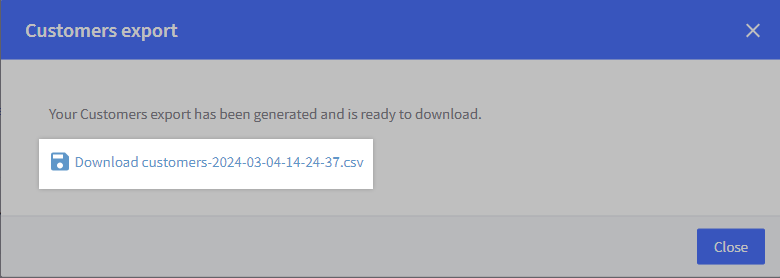
4. When the file is ready for download, click the download link.
Choosing an Export Template
An export template determines specifically what customer information you're exporting. All export templates will include details like the customer's name and email address, but you can get more granular customer information from using certain templates. For a full list of exportable information, see the table of Supported Fields.
BigCommerce comes with built-in customer export templates:
- Bulk Edit (recommended) — Includes the majority of exportable fields, and has specifically named columns that let you skip steps in the importing process.
- Default — Includes only basic customer details, such as first name, last name, email address, phone number, and addresses.
You can also create your own custom export template and select which of the exportable fields you want it to include.
Creating a Custom Export Template
Customizing your template ensures that your customer export contains the fields that best suit your business needs.
While you can create templates from scratch, we recommend using a copy of the Bulk Edit template and modifying it for your needs. This will let you bypass the settings and field mapping when you go to re-import it later.
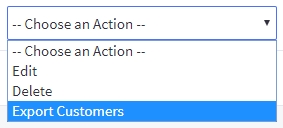
To start, go to Settings › Export templates. Use the Action menu to Create a Copy of the Bulk Edit template.

Type a name for your template in the Template Details section. Since this template will be for customers, ensure Enable Customers Exporting is the only option selected under Export Options. The tabs listed along the top will update with your selections.

Configure the template’s formatting settings and export options as needed. When you're ready, click the Customers tab at the top to view the available export fields.
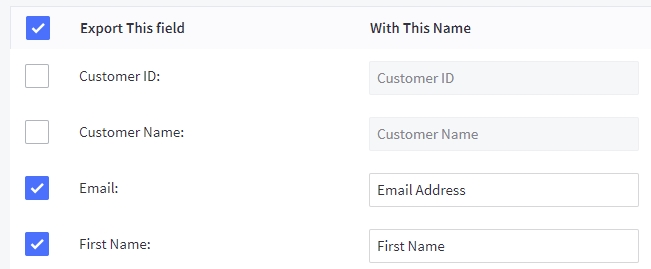
Go through and check or uncheck each field as needed. Click Save & Exit when you have made your changes. You can now export your data using your new template.
Importing Your Customers
The steps below will guide you through importing your customers into BigCommerce.
Be careful! Before beginning, make sure that you have a backup (an unedited Bulk Edit export) of your customers, so that you can put things back to how they were, should things go awry.
1. Go to Customers › Import.
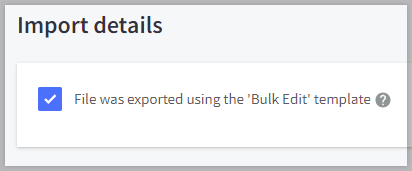
2. If you exported your file using the Bulk Edit template, check the box next to to File was exported using the ‘Bulk Edit’ template. This selects the recommended settings and automatically configures the Link Import Fields step.
3. Under the File details section next to Import file, upload your CSV file directly from your computer by browsing to it.

4. You can typically leave the additional File details settings alone. They are used if you are uploading a non-spreadsheet CSV and need to specify the import settings. Click Next when done.
- Use a file already on the server — If you have a larger file or a slow internet connection, you can connect to WebDAV and save your file to the import_files folder, then select this option. Files can be up to 512 MB.
- This file contains headers — Does the file contain column headings?
- Field separator — In non-spreadsheet CSVs, what punctuation is used to separate the fields?
- Field Enclosure — In non-spreadsheet CSVs, what punctuation is used to enclose field values (such as "Socks and Shoes")?
5. Click Next for a second time if your CSV file is using the Bulk Edit template headers. Otherwise, you will need to assign your column headers to their corresponding fields before proceeding. Next to the Match field, select your CSV file's corresponding column name from the drop-down. You do not need to match every column, but you must match the required columns. Click Next when done.
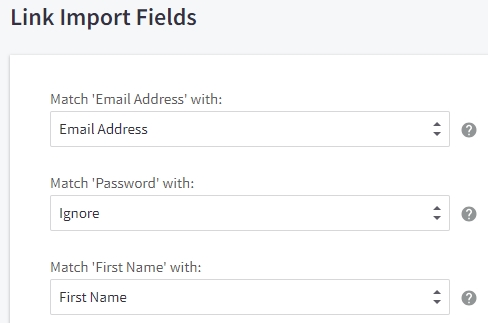
6. Click Start Import when ready to begin importing your customers.

When the import is complete, you will see an import summary.
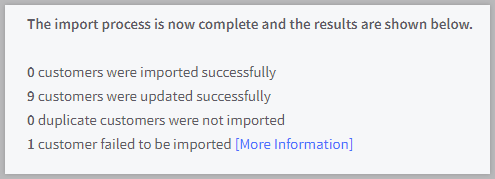
If there was an issue when importing, click More Information to see any errors generated during the import.
Exporting/Importing Passwords
Passwords cannot be exported via CSV file.
To import passwords, you will need to manually add a new column to your CSV file, labeled as Password, then add your customers' passwords. Match the Password column with the password field during the Link Import Fields step.
If a customer is imported without a password, they will need to go through the password reset process.
Supported Fields
Below is a table of all customer attributes that are exportable via CSV. The majority of these fields are included when using the Bulk Edit export template. See Manually Added Fields for a list of fields that do not appear in the Bulk Edit template but can be added to a custom export template. Fields in bold are required.
| Field | Description | Example |
|---|---|---|
| The customer's email address | john.smith@email.com | |
| First Name | The customer's first name | John |
| Last Name | The customer's last name | Smith |
| Company | The company, if the customer orders on behalf of a business | Acme, Inc. |
| Phone | Customer's phone number | 555-555-5555 |
| Notes | Your notes about the customer | Customer is tax-exempt |
| Store Credit | Use this to apply store credit for the customer to use when shopping. This will allow the customer to pay with store credit. | 50 (uses your default currency; for example, 50 means $50 if you are using USD) |
| Customer Group | Assigned customer group if using the Customer Group feature | Retail |
| Address ID | The unique system-created ID for the address | 100 |
| Address First Name | The first name associated with a particular address | Sarah Jane |
| Address Last Name | The last name associated with a particular address | Smith |
| Address Company | The company associated with a particular address | Acme, Inc. |
| Address Line 1 | The first line with an address; normally contains street and house/housing complex number | 123 Main St |
| Address Line 2 | The second line with an address; normally contains care of information and unit or building number | Apartment 201 |
| City/Suburb | The address' city or suburb | Austin |
| State/Province | The address' state or province. No abbreviations. | Texas |
| Zip/Postcode | The address zip or postal code | 78726 |
| Country | The address country | United States |
| Address Phone | The phone number associated with that address | 555-555-5555 |
| Address Form Fields | If you created address form fields, your customers' responses will be included here | Question: Special Instructions for Home Delivery Response: Gate Code is 1234. |
| Form Fields | If you created form fields, your customers' responses will be included here | Question: Where did you hear about us? Response: Online ad |
| Receive Marketing Emails | Records whether the client opted in or out of receiving product review requests or Abandoned Cart Saver emails | Yes = Y, No = N |
Manually Added Fields
These fields are not exported in the Bulk Edit export template by default but can be added to a custom export template.
| Field | Description | Example |
|---|---|---|
| Customer ID | The system-created unique ID for the customer | 100 |
| Customer Name | The customer's first and last name | John Smith |
| Date Joined | The date the customer account was created | 10/15/2017 |
| Address: Address Name | The full name associated with a particular address, can be different from the customer placing the order | Sarah Jane Smith |
| Address: State Abbreviation | The abbreviated form of the address' state or province | TX |
| Address: Building Type | The address building type (commercial or residential). Used for shipping purposes. | Residential or Commercial |
| Orders | The number of orders the customer has placed (exportable only) | 2 |
| Tax Exempt Code | Only used if you have enabled automatic tax calculation. See Making Customers Tax-Exempt. |
Pro Tip! You can add additional addresses by changing the 1 in the column (such as Address First Name - 1) to 2 or more. All addresses will appear in the customer's address book, but there is no distinction between billing or shipping addresses.


