Buy Online, Pick up in Store (BOPIS), also known as “Click & Collect” outside of the United States, is a frequently requested feature to allow merchants to have custom experiences around picking up items at their retail locations. In order to enable BOPIS natively, we have updated our platform from being able to support inventory stored at a single location out-of-the-box, to being able to support multi-location inventory (MLI).
Seamless BOPIS experiences often lead to increased sales, customer engagement, and customer retention by allowing stores to blend their online and in-store shopping experiences, thereby offering a more integrated and convenient way to shop.
BOPIS scenarios are not supported in the native Stencil storefront. The current expected audience for our Multi-Location control panel feature is stores with headless storefronts and Custom Checkout who are familiar with our BOPIS APIs. Native BOPIS support is expected to be added at a later date.
How Multi-Location Works
For many businesses, the physical place where you stock inventory is the same place where you ship orders from. However, as your business grows with additional retail locations, warehouses, and temporary pop-ups, you will need your storefront and backend to reflect the multi-location nature of your inventory.
By default, the shipping origin address entered into the Shipping page is your store’s first location. You can add and edit locations as needed in the control panel, set up pickup methods tied to a specific location, and assign product stock to specific locations.
Requirements and Limitations
You should have the following set up in your store before adding any additional locations:
- Your store must be using the v3 Add/Edit Product experience.
- Your store must be using the latest version of the product list.
- View Locations, Create Locations, Edit Locations, and Delete Locations user permissions must be enabled to create and manage locations.
- Manage Pickup Methods user permission must be enabled to manage pickup methods.
- View Inventory and Edit Inventory user permissions must be enabled to manage stock levels and low stock levels per location.
Current limitations include:
- Multi-origin shipping is not supported. It will be released separately in a non-BOPIS update.
- There is no option to set up different types of locations, such as designated “warehouses” to handle stock and “stores” to sell products. All locations are used for stock assignment and are available as stores for order pickup.
- Low stock and out of stock email notifications are sent for the default location only. We plan to add this functionality for non-default locations at a later date.
Enabling Multi-Location
As mentioned above, your store needs to be using the latest version of several tools before creating additional locations. When you try to create a new location, you will see a checklist detailing each requirement with links to learn more about them.

After you’ve confirmed or updated each requirement, you’ll be able to create new locations.
Locations
Before you can re-assign inventory and create pickup methods, you will need to create locations in the control panel for the additional brick-and-mortar sites where product stock will be allocated and where customers will pick up orders.
To add a new location, go to Settings › Locations and click Add new location.
Fill in the following fields, then click Save.
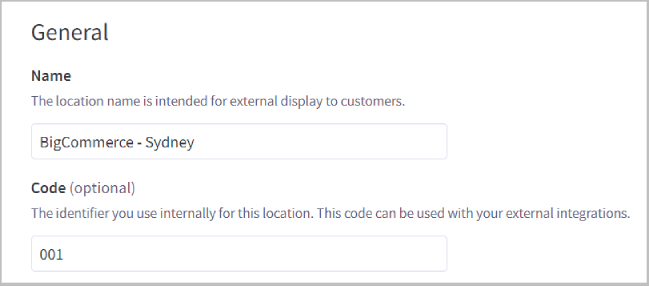
- Name — The name assigned to the location. This field is intended for external display on the storefront, so it should be something recognizable to customers.
- Code (optional) — The identifier you use internally for this location. This code can be used with your external integrations.
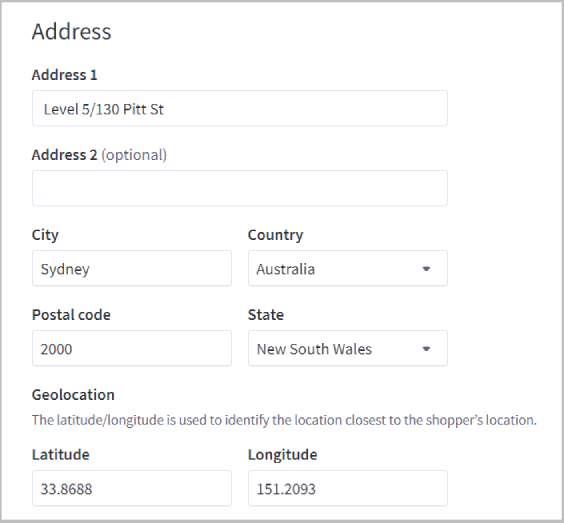
- Address 1 — Use this text field to provide the first line of the location’s address.
- Address 2 (optional) — Use this text field as necessary, such as indicating a unit number.
- City — Use this text field to provide the city of the location.
- Country — Select the country from the dropdown or type to search the list.
- Postal code — Use this text field to provide the location’s postal or zip code.
- State — Select the state or province from the dropdown or type to search the list. Note that this field is only required for countries with states.
- Geolocation — Use these text fields to provide the latitude and longitude coordinates of the location. This is used to identify the location closest to the shopper’s location. You can find your location’s coordinates by using Google Maps or an online GPS address converter tool.

- Phone number (optional) — Use this text field to provide a preferred phone number for contacting this location.
- Email address — Use this text field to provide the preferred email address for contacting this location.
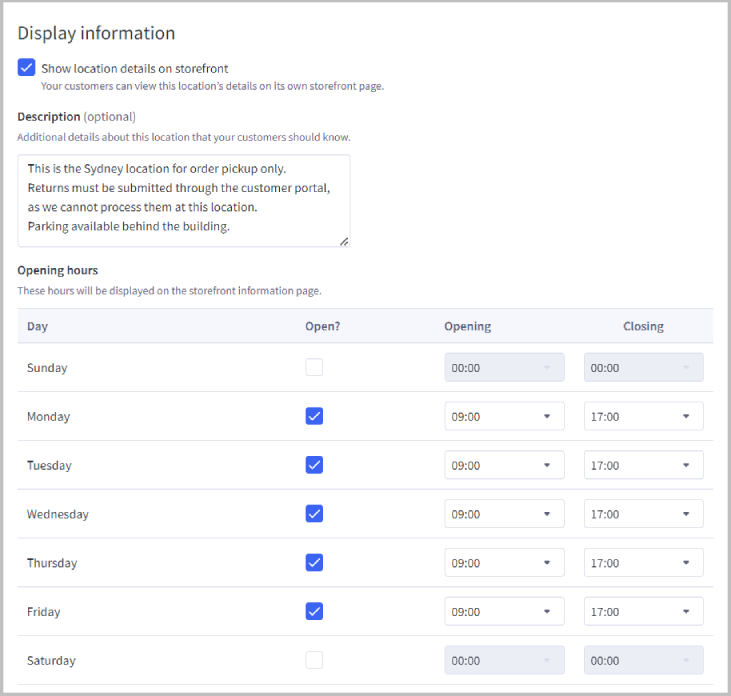
- Show location details on storefront — Your customers can view this location’s details on its own storefront page. Disabling this checkbox will collapse and remove all of the fields below.
- Description (optional) — Additional details about this location that your customers should know.
- Opening hours — Set the location’s opening and closing hours for each day of the week. These hours will be displayed on the storefront information page.
- Day — The day of the week
- Open? — Enable to indicate that the location is open for business on this day. If disabled, all time fields for that day will be grayed out.
- Opening — Select the time when the location opens for business. The dropdown menu uses the 24-hour clock, in 30 minute increments.
- Closing — Select the time when the location closes for business. The dropdown menu uses the 24-hour clock, in 30 minute increments.

- Special hours — Customize opening hours that change for a brief period of time, like for a special event or a public holiday. Click the trash can icon to remove previously saved special hours, and click + Add special hours to add additional occurrences.
- Name — Enter in a label for the special hours.
- Date — Click on the calendar field to select the date for the special hours.
- Open? — Enable to indicate that the location is open for business on this day. If disabled, all time fields for that day will be grayed out.
- All day — Enable to indicate that the location is open all day for the special event. If disabled, all time fields for that day will be grayed out.
- Opening — Select the time when the location opens for business. The dropdown menu uses the 24-hour clock, in 30 minute increments.
- Closing — Select the time when the location closes for business. The dropdown menu uses the 24-hour clock, in 30 minute increments.
- Annual — Enable to set the special hours as an annual occurrence for the location.
After adding a new location, you will be brought back to the Locations overview page. From here, you can see all of your locations, with their associated ID, address, and status, and determine which location is set as the default location. Click on the action menu (⋯) to edit, duplicate, disable, or delete a location.
Only locations that are not used on orders can be deleted at this time, and any stock assigned to a deleted location will also be deleted. Note that the location marked as the shipping origin cannot be disabled or deleted.
Deleting locations used on orders and the ability to transfer stock from a deleted location to another location will be added at a later date.

Can I change my shipping origin location? No, the shipping origin location cannot be changed to another location or deleted. This functionality is expected to be added at a later date. The shipping origin location is the same as your Shipping Origin address.
Pickup Methods
Once you have created locations, you can add pickup methods such as in-store pickup and curbside pickup, that are assigned per location. This allows you to offer unique combinations of pickup methods for each location.
To add a pickup location, go to Settings › Pick up methods and click + Add new.
Fill in the following fields, then click Add.

- Name — The display name for the pickup method.
- Location — Select a location from the dropdown. You cannot select multiple locations.
- Estimated ready-for-pickup time — Use this text field to display the expected time between an order being placed and a customer being able to pick it up.
- Instruction message for pickup — Use this text field to let your customers know what to bring and do when they arrive to pick up their order.
After adding a new pickup method, you will be brought back to the Pickup in store overview page. From here, you can see all of your pickup methods with their associated location. Click on the action menu (⋯) to edit or delete a pickup method. Unlike locations, you cannot toggle availability of pickup methods — you will need to delete a pickup method to remove it as an option for a location.

Assigning Inventory to Specific Locations
With the addition of multiple locations, you can specify product stock levels and availability per location. This can be done when viewing products on the product list, and when adding or editing products.
From the Product List
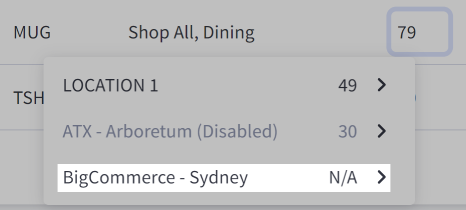
On the product list, click on a product or variant’s stock level to see how the total inventory is split between all locations. Note that you will see low and out of stock indicators for each location, with any disabled locations grayed out in the menu.

Click on any location to open the inventory editor. From here, you set low and safety stock limits, adjust stock levels, and set availability for the selected location. By default, the location will be the one selected from the product list, however you can select another location from the dropdown menu in the upper left.

- Product name — the name of the product or variant. This field cannot be edited.
- SKU — the SKU number of the product or variant. This field cannot be edited.
- Adjust by — add or subtract a specific quantity from the product or variant’s stock. Changing this value will automatically recalculate the Stock field.
- Current Stock — the quantity of an individual product or variant available for purchase. Changing this value will automatically recalculate the “Adjust by” field.
- Low stock — when the stock level reaches this quantity, a notification email will be sent to alert you that you are running low in inventory and may wish to restock. Email notifications are only available for the default location.
- Safety stock — when the stock level reaches this quantity, the product or variant will become automatically unpurchasable. This helps you to avoid overselling.
- BPN — the Bin Picking Number of the product or variant. If your products are stored in a warehouse, use BPNs to specify where in the warehouse they are located.
- Availability — whether the product or variant is available at the location. Unchecking this setting will lead to the product or variant showing as N/A in the product list. This can be useful when you want to stock inventory at a location for staging, but not offer it for purchase and pickup.
Expand, contract, and close the side panel using the buttons at the top right.
Click Save to save your current changes and stay in the editor, or Save and exit to save and return to the product list.
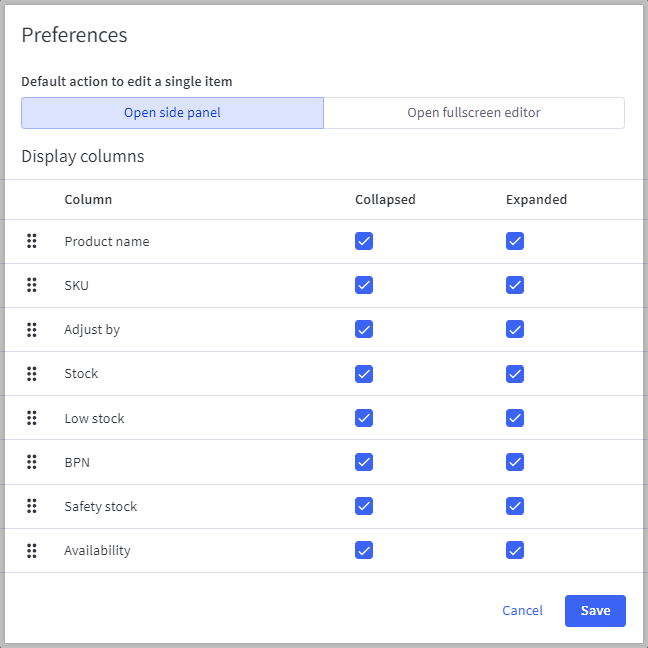
To customize which columns are shown, change their display order, and choose between the side panel or fullscreen editor as the default single item edit behavior, click on the gear icon in the top right to open the Preferences popup.
While Adding or Editing Products
Go to Products › View and Edit a product by clicking its name, or Add a new one. On the Add/Edit Product screen, click Inventory in the side navigation.
Click Edit inventory to launch the inventory editor with the shipping origin location selected. Click the arrow icon in a location’s row to launch the editor with that location selected. If you have more than 5 locations in your store, click View all locations to see them all.

Note that you cannot edit stock fields from this page; you must use the inventory editor to make these changes. If you’ve updated any product attributes like Name or Weight, save these changes before proceeding in editing the product’s inventory.
Can I update product stock levels per location via CSV? Yes. See Importing and Exporting Multi-Location Inventory for more information. Alternatively, you can use the API to manage inventory across multiple locations.
App Support
All apps are designed to be installed and work at the store level. We are working with all of our app partners to ensure that when an app is installed on a store, it will work across all locations associated with that store.
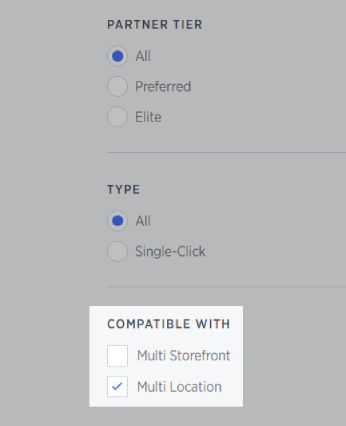
When searching for apps in the BigCommerce App Marketplace, use the Multi Location filter to show only MLI-compatible apps. The filter appears at the bottom left on search result pages.
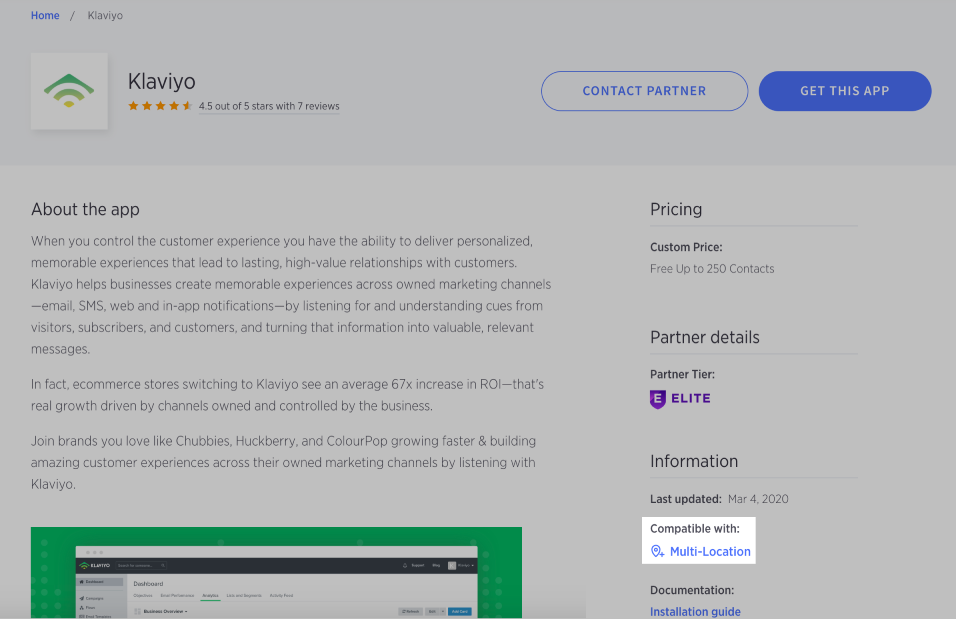
Apps display MLI compatibility under the Information section of the app detail page. The Multi-Location badge appears on the right side of the page under Compatible with.
If you are using Multi-Location and would like to use an app that may not be fully compatible, please reach out to the app developer/tech partner for more details about how their app would work across multiple locations and pickup methods.
FAQ
How do taxes work with locations and pickup methods?
As pickup methods are aware of their associated location, the BigCommerce tax engine and integrations with tax partners like Avalara can consume this location data to determine where the order is being picked up and calculate the appropriate sales tax.
How is BOPIS different from the previous “in-store pickup” static shipping method?
Before BOPIS APIs were available, merchants would repurpose static shipping methods and rename them to offer a pickup method during checkout. However, this method lacks the robust functionality of a pickup method based on multiple locations. For example, with geolocation, we can identify the closest location for each customer, and display information that is unique to each location.
Can an order be split between multiple locations?
Splitting an order, such as having a product purchased from one location and another product from a different location is not supported currently.
Will Multi-Location be available for BigCommerce B2B Edition customers, as their checkout is customized?
No, our Multi-Location experience in the control panel requires Optimized One-Page Checkout. However, the BOPIS experience is supported for B2B Edition on the latest version of the Checkout SDK.
Can I set a global Safety stock quantity for all my products?
No, Safety stock limits can only be applied per SKU, per location.
Why are some products with stock unable to be purchased?
Check the Safety stock level and Availability checkbox through the Edit inventory screen. If disabled, toggle on Availability and ensure that the Current Stock value is greater than the Safety stock value.
How is stock calculated across multiple locations in the storefront?
The storefront uses your default location to determine a product’s available stock when a shopper views its display page on your storefront. This means that if a product is out of stock in your default location, the shopper will be unable to add it to their cart, even if it has stock in other locations.
Alternatively, you can configure your storefront to use the aggregate, or sum, of stock across all locations. With aggregated stock, shoppers can add a product to their cart if its stock is greater than zero in any of your inventory locations.
To request aggregated stock calculation for your store, contact our support team.
What is the difference between “compatible” and “optimized” MLI apps?
An MLI-compatible app works with multiple locations and pickup methods, but does not have the ability to customize the experience between locations.
An MLI-optimized app allows for greater customization to work with multiple locations and pickup methods.


