Importing is the fastest way to add new products to your store, whether they are from a third-party distributor or created manually. To import new products, you will need to list their details in a CSV file.
Need an example? Download a copy of our sample template to get started. Feel free to remove any columns that you don't need — empty fields will cause import errors unless otherwise noted. As long as you have the required fields, the file will import successfully.
Please note that the following actions are not supported when creating products via CSV import:
- Importing digital product files
- Adding new variants to a product with existing variants
- Creating product modifiers
- Assigning shared variant options
- Importing images from a local file
Requirements and Limitations
Before getting started, you will need access to a spreadsheet program that supports CSV files, such as Excel or Google Sheets. The Numbers app is known to cause errors when importing, due to its default field separators (delimiters). We recommend using another spreadsheet program instead.
To import new products to your store, you must meet the following requirements:
- Your store must be using the v3 Add/Edit Product experience.
- If your store is using the v2 experience, see Importing and Exporting Products (v2).
- If you’re currently using the legacy Import/Export experience, you must manually upgrade to the modern experience.
- To import new products, you will need the following permissions enabled on your user account:
- Manage Products
- Import Catalog Entities
File Formatting Requirements
- You must use a CSV file type for import. Other spreadsheet file formats, such as XML, are not supported.
- The maximum CSV file size that can be imported is 20 MB.
- You can import up to 10,000 products without performance being affected.
- When importing new products, the following fields are required, depending on the product type:
- Physical products — Item, Type, Name, Price, and Weight
- Digital products — Item, Type, Name, and Price
- The following fields are not required, but must either be filled in or removed from the CSV file to successfully import new products:
- Product URL
- Free Shipping
- Is Visible
- Is Featured
- Tax Class
- Product Condition
- Show Product Condition
- The Item field is case-sensitive. When specifying the Item field for a row, use "Product", "Variant", "Image", or "Video" in order to prevent import errors.
- Variant, Image, or Video rows must be located under the Product row they correspond to in order to import properly.
- You must leave the ID field blank for new products.
In addition to the considerations listed above, see the list below for requirements specific to importing variants, images, videos, and custom fields.
We will cover how to import products with these attributes in the following chapter.
Variant Requirements
- When creating product variants via CSV import, you must include the following fields:
- Item
- ID
- SKU
- Options
- Type (required for the base product, but must be left blank for variants)
- Name
- Price
- Weight (physical products only)
- You must leave the ID fields blank when creating new variants.
- Each product can have a maximum of 600 variants.
- A swatch variant option value can have up to three colors assigned to it.
- You must use a publicly available image URL when assigning swatch pattern images.
- Pattern image file types must be JPEG/JPG, GIF, WebP, or PNG.
- Pick lists created via CSV import are variant options, not modifier options.
- Only simple products (products without variant or modifier options) can be included in a pick list.
- Shoppers can only select one value at a time in a particular option; multiple values cannot be selected from the same option.
Image Requirements
- When adding new images to products, you must include the following fields:
- Item
- ID (required, but must be left blank)
- Image URL (Import)
- The "Image is Thumbnail" field is not required, but must either be filled in or removed from the CSV file to successfully import new images.
- The image URL can have a maximum of 1,024 characters.
- Images must be hosted and have a referenceable URL. Non-HTTP/HTTPS URLs are not supported.
- Image file types must be JPEG/JPG, GIF, WebP, or PNG. They cannot be TIFF, BMP, or PDF file formats.
- The optimal size for your product images is 1280 x 1280 pixels. Other product images (like thumbnails) will be created from the original image you upload.
- The maximum file size for product images is 8 MB.
- Only one image can be added per variant.
Video Requirements
- When adding new videos to products, you must include the following fields:
- Item
- ID (required, but must be left blank)
- YouTube ID
- Only YouTube videos are supported.
- Videos cannot be added to variants.
Custom Field Requirements
- Each product can have a maximum of 200 custom fields.
- Custom field names and values each have a maximum character limit of 250.
- When adding new custom fields, do not include an ID. If you include an existing custom field ID when adding a new custom field to an existing product in your CSV file, the existing custom field will be updated upon import instead of creating a new custom field.
- You must use straight quotes (" ") instead of curly quotes (“ ”) to wrap your custom field elements.
- If your spreadsheet program automatically converts straight quotes to smart quotes, you will need to update your program’s preferences to use straight quotes by default.
- When adding quotation marks (" ") to custom field values, you must use the HTML character code (") in order to prevent import errors. All other special characters can be entered normally.
- Example [{"name":Color,"value":""Blue""}]
- Newline characters are not supported in custom fields.
Importing Your First Product
Before you upload your catalog for the first time, we recommend importing a single, simple product without variants or images. This allows you to get acquainted with the import workflow and understand how import fields correspond to your product attributes, so that you’re less likely to run into issues when you upload multiple products.
The import process consists of formatting your product information in the CSV file, and then uploading the file to your control panel. In the sections below, we’ll go over the steps involved and include helpful considerations for your first import.
Formatting Your Product Information
Download our sample template and open it in your preferred spreadsheet program to access a CSV file with all available import fields. This template also includes several example products that demonstrate the format for each product attribute. If you want to reduce the amount of data you are managing in your first import, you can delete any non-required fields that you don’t want to fill out for your product.
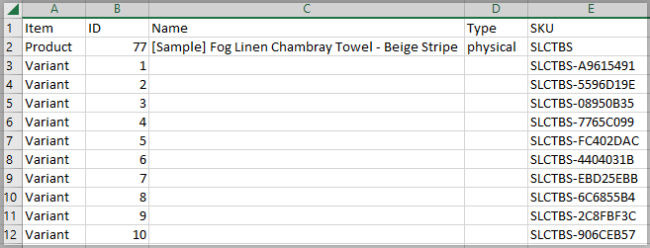
In a row underneath the sample products, add the information for your first product in the relevant fields. Make sure you have filled out the minimum required fields, and refer to our table of supported fields for detailed information on data formatting. We’ve included some handy tips below for entering information in the import fields.
- Item — This should be "Product", rather than "Variant", "Image", or "Video".
- ID — Leave this field blank.
- Type — We recommend setting this as "physical" for your first product, since you cannot add digital product files via CSV import.
- Inventory — If left blank or set as "none", the product will not have its inventory tracked. We recommend setting this to "none" or to "product" for importing your first product.
- Price — Don’t include any currency symbols in this field. Product prices are automatically imported in your store’s default currency.
- Channels — We recommend assigning the product to your default storefront channel during your first import for simplicity. This can be done by entering "1" in the Channels field.
- Categories — We recommend leaving this field blank for your first product, as you must create categories in your store and locate the category ID in the control panel URL before assigning categories via CSV import.
- Description — If you’re not familiar with HTML formatting, you can enter your product description as plain text and then customize the description in your control panel after importing.
- Product URL — Product URLs are not automatically generated via CSV import. See SEO Fields for examples of SEO-friendly product URLs.
- Weight — Don’t include units, as these are automatically applied by your store’s physical dimension settings. This is also true for the Width, Height, and Depth fields.
After entering your product’s details in the CSV file, we recommend deleting the example products before saving your changes, as they include product and category IDs that are not compatible with your store.
Locating Category IDs
To locate a category's IDs, go to Products › Product Categories and edit the desired category.
On the Edit category page, you will find the category ID as the number at the end of the control panel URL in your browser's URL bar.

Uploading Your CSV File
Once you’ve added the product details to your CSV file, navigate to Products › Import. Drag and drop your file into the upload field, or click Upload file to select a file on your computer.
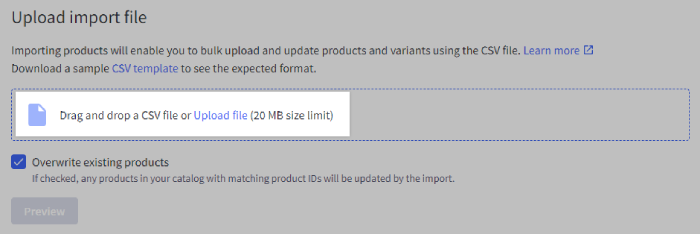
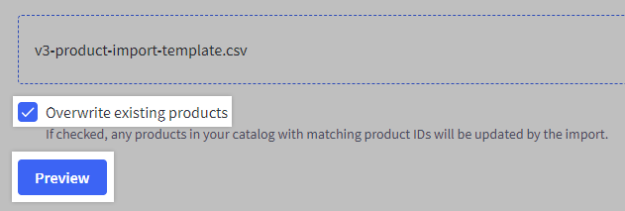
The box next to Overwrite existing products is checked by default. Since you are importing a new product, this can be left checked or unchecked. Click Preview to proceed to the next step.
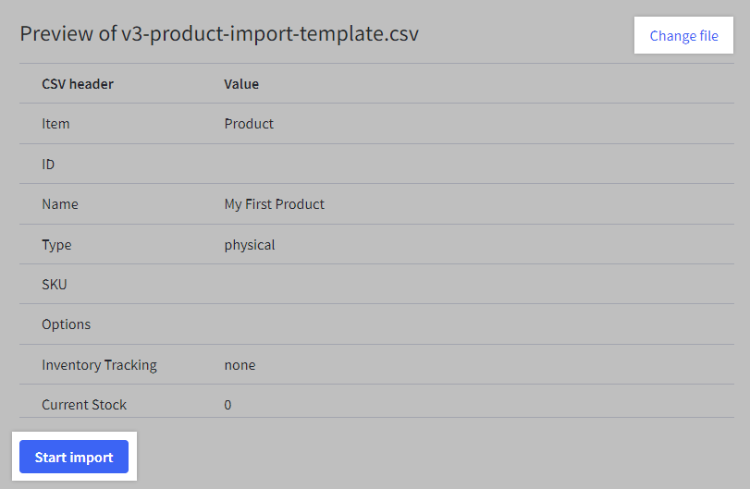
The Preview page displays all fields in the CSV file and the values entered in the first product line. If you’ve deleted the example products in the template, you will see the product information you entered.
Review your product’s details, and click Change file to return to the Upload page if you notice any issues. If everything looks correct, click Start import.
During import, you will see a progress bar that displays how many products have been imported so far. This will complete quickly when importing your first product, but you can navigate to other areas of the control panel during larger imports and the import will continue in the background.

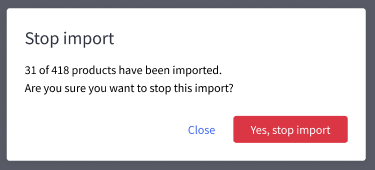
If you need to stop the import for any reason, click Stop Import. On the popup, click Yes, stop import to confirm, or Close to continue with the import.
Upon completion, you’ll see a summary of your import. This will indicate whether your test product imported successfully or failed to import, and includes a list of import errors if any occurred. The import summary remains in Products › Import until you begin your next import so that you can revisit it, if necessary.
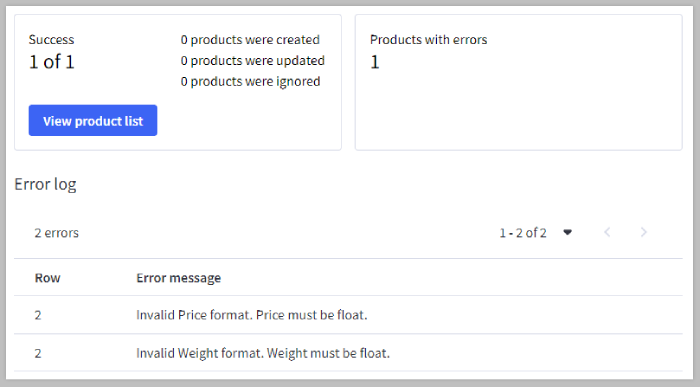
If your product import encountered any errors, adjust the information in your CSV file based on the error messages you received, then click Start new import to import the updated file. Otherwise, you can click View product list to access the newly-created product in the control panel and make additional edits from there, if desired.
Congratulations, you have successfully imported your first product! In our next chapter, we’ll cover how to import complex product attributes like variants and images, and discuss common catalog import scenarios to prepare you for uploading your entire catalog to BigCommerce.


