
Now that you have a general idea of what Multi-Storefront is and how it can be used, we’ll look at technical requirements and considerations you should be aware of before enabling MSF on your store. Finally, we’ll cover how to purchase storefront seats for your store, the first step in moving to our MSF experience
Eligibility and Technical Requirements
Your store should be using the latest version of these MSF adjacent features:
- Your store must be using headless storefronts or Stencil themes. Legacy Blueprint themes are not supported.
- Your store must be using the v3 Add/Edit Product experience.
- Your store must be using the latest version of the product list.
- Your store must be using the modern Product Import/Export experience.
- Your store must be using Optimized One-Page Checkout, or a custom checkout powered by Optimized One-Page Checkout.
Your store must be using v3 REST APIs for:
- Catalog
- Customers
- Redirects
- Pages
- Scripts
The Edit Channels permission must be enabled in your user account in order to edit settings for individual storefronts. Only the store owner can enable this permission for other users.
Can I set up user permissions per storefront? No, user permissions are global and are shared across all storefronts.
In addition to our global-level Platform Limits, there are additional limits for individual storefronts:
- The storefront limit depends on the primary store's billing plan.
- Each storefront can have up to 25,000 products.
- Each product can have up to 250 variants.
- Storefront navigation can show up to 100 categories.
- Each category can have up to 1,000 products.
- Stores can have up to 200 orders per minute.
Is MSF US only? No, MSF is available globally and can be used by merchants in all regions with the ability to localize shopper experience for storefronts targeting different markets. However, some localization features such as payment methods and tax inclusive / exclusive price lists, are only available in beta at this time.
Enabling Multi-Storefront
As mentioned above, your store needs to be using the latest version of several tools before enabling MSF. You will need to confirm or update your store's features before adding any additional storefronts.
When you try to create a new storefront, you will see a checklist detailing each requirement with links to learn more about them. After you’ve confirmed or updated each requirement, you will be able to buy seats and add new storefronts.
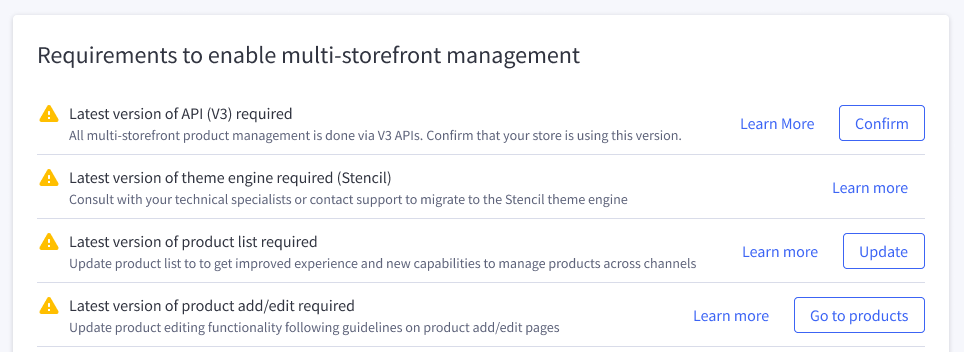
Note that store provisioning of International Enhancements for Multi-Storefront may take up to 24 hours after the MSF eligibility checklist is passed.
Purchasing Storefront Seats
Channel Manager is where you can discover and set up all the “channels” available for your store, like marketplaces, point of sale integrations, marketing feeds, and storefronts (native and headless). It is where you buy storefront seats, create additional storefronts, and configure their individual settings.
Before you can create a new storefront, you’ll need to first purchase a seat for it. Go to Channel Manager and click Create Channel. Under Storefronts, click Buy storefront seats. If you already have available seats, that number will be reported here. Only the store owner can purchase new seats.
For every storefront purchased, you are entitled to an inactive storefront. This includes the default storefront included in your subscription. For example, if you purchased 5 storefronts, you can have 5 active storefronts, along with 5 inactive storefronts, for a total of 10 storefronts in the BigCommerce control panel. Inactive storefronts can be used as a staging environment or sandbox, allowing you to experiment with key operational components, such as product categories, without any effect on the active storefront.
If you attempt to set an inactive storefront as active and you are at your subscription's storefront limit, you will be prompted to purchase additional storefront seats or to return to the Channel Manager and set a currently active storefront as inactive before proceeding.
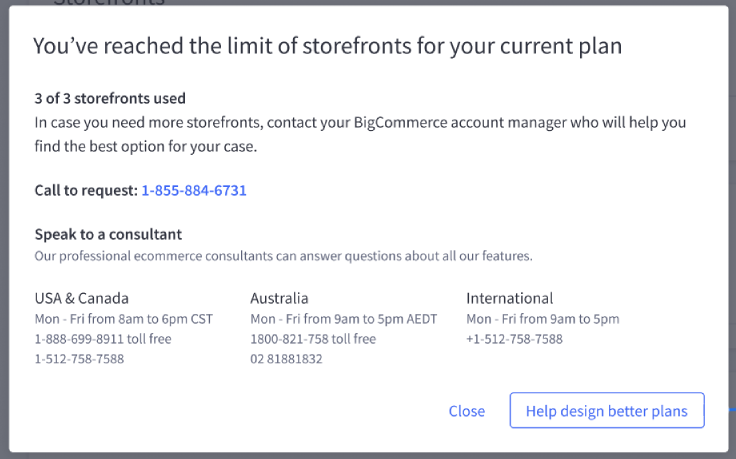
If your store has a single headless storefront, you can set the default Stencil storefront as inactive, then enable your headless storefront as active without the necessity to purchase an additional storefront seat.

The maximum number of storefront seats you can purchase is based on your subscription plan. If you've reached the limit for your plan, you'll need to upgrade before you can purchase additional seats. See our Dev Center for more details.
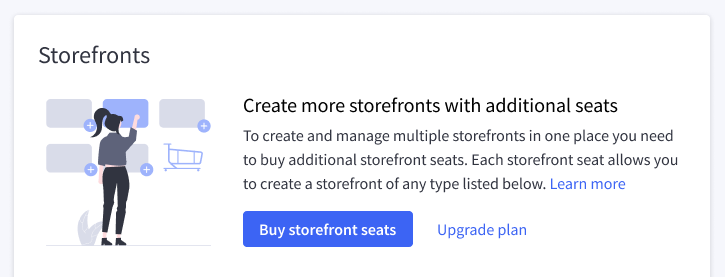
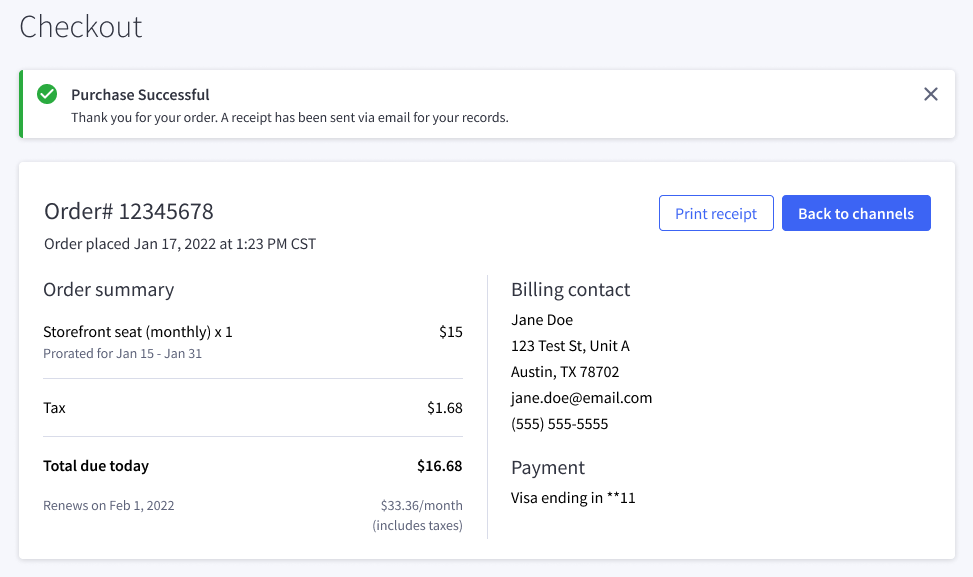
BigCommerce will use the same payment method you use for your subscription plan when you purchase an additional storefront seat. Once purchased, you can return to Channel Manager to create a storefront.
Creating a Storefront
Go to Channel Manager to create a new storefront. Click Create Channel. Under Storefronts, you will see the number of additional storefronts you are currently able to create.
If you have an available storefront seat, can click Create next to BigCommerce or Connect next to the headless platform you want to use.

The setup process differs for each storefront provider. Once connected, your new storefront will appear under Storefronts in Channel Manager. Some headless solutions are connected outside of Channel Manager, either via the API or with their own connector app.
.png)
Deleting Storefronts and Cancelling Storefront Seats
The default storefront cannot be deleted (it is included as part of your store plan) but it can be made inactive. To do this, go to Channel Manager, then select Make inactive from the storefront’s action menu (⋯). You can also do this from the storefront’s Overview page by using the Actions menu.
If for any reason you decide to delete an additional storefront, that seat will then become available for you to create a new storefront. To cancel a seat subscription, you’ll need to contact BigCommerce Support. Deleting a storefront does not cancel a monthly seat subscription. Keep in mind that cancelling a seat subscription will also affect the number of inactive storefronts available.
Once deleted, there is a 90-day grace period during which a deleted storefront can be restored by contacting our support team. After 90 days, all data related to a deleted storefront is permanently deleted with no ability to restore it.
To delete a storefront, go to Channel Manager and select Delete from the storefront’s action menu (⋯).
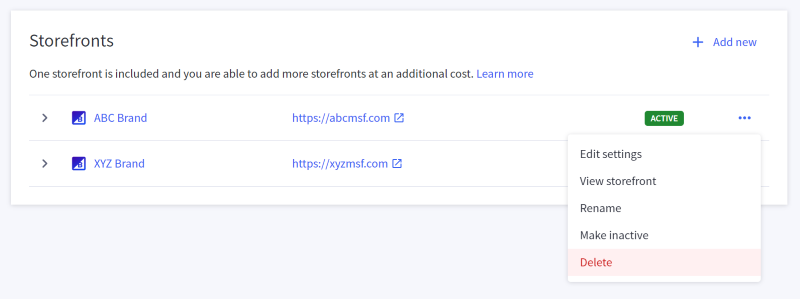
You can also delete a storefront from its Overview page by clicking on Actions and selecting Delete.


