The Products page is a list of all the products in your store. Search for products by keyword or identifier, add filters (like a specific brand or channel), and use built-in, preset views to find the specific products you want to manage.
The list allows you to select all or multiple products at once, so you can update certain product attributes in bulk, like their featured status, visibility, price, stock, storefront categories, and channel assignments. Click the arrow next to a product to see its variants.
Go to Products › View to get started.

Requirements
- To view products, the Manage Products permission must be enabled on your user account.
- To manage stock levels, the View Inventory and Edit Inventory user permissions must be enabled on your user account.
- To edit products and their various components, the Manage Channels, Edit Products, Product Options, Manage Categories, and Manage Brands permissions must be enabled on your user account.
- To export products, the Export Catalog Entities permission must be enabled on your user account.
Searching Products
Use the search bar to find products by keyword. This will search in both the product’s title and description.

Click Add filters to refine your search results. You can:
- Search only within a specific channel or brand.
- Find products with a specific price range, sales history, or inventory level.
- Search by product attributes like visibility, featured, free shipping, and purchasability.
- Sort search results by Product ID, Name or Price.

Use the built-in Preset Views to quickly see:
- featured products
- products with product-level free shipping
- out of stock products
- products with low inventory/stock
- last imported products
- visible products
- not visible products

Customizing the Product List
You can specify which columns to show in the product table and the order they should be in. Click the gear icon at the top of the list. Enable or disable columns using the checkboxes, and drag-and-drop columns up and down to change their sort order.
![]()

To change the number of products shown per page, click the products-per-page drop-down button at the top right of the list.

If you have multiple pages of products, use the arrows to move forward and back.

Product Actions
Several product-level tasks can be performed from the list. Click the ⋯ next to product to perform an action:
- Edit
- Duplicate
- View on storefront
- Enable or disable visibility
- Make featured or not featured
- View in Page Builder
- View orders
- Delete
If you select View on storefront or View in Page Builder, a popup will display, prompting you to select which storefront or Page Builder editor to view the product on.

Managing Channels
You can assign a product to a channel from this list without having to edit the product directly. A product must be assigned to a channel before it will appear on the storefront.
Check the box next to one or more products, then click Add to channels. Select which channels you want the product to be available to, then click Save.

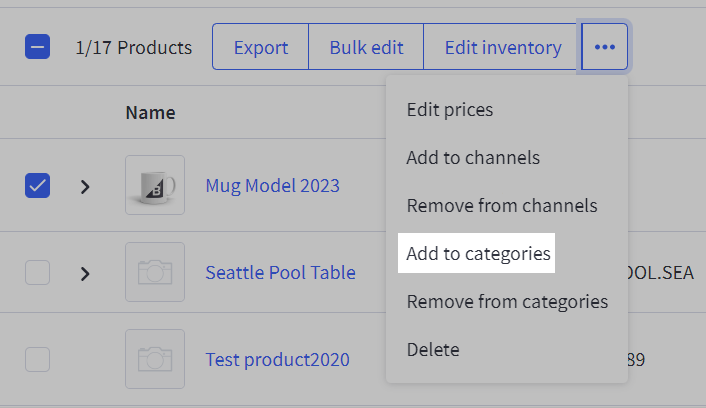
You can use the same process to remove products from channels by clicking Remove from channels. If you cannot see it in the top toolbar, click the ⋯ button and select the action from the menu. Note that you will be prompted to select which channels you want to remove the product from, rather than specifying which channels the product should remain available on.

You can also assign individual products to channels by using the Channels column in the list. The Channels column shows the number of channels the product is currently assigned to.
Clicking the number displays the channel names the product is assigned to and gives you the option to Manage channels where you can change the product’s channel assignments.

Viewing and Managing Categories
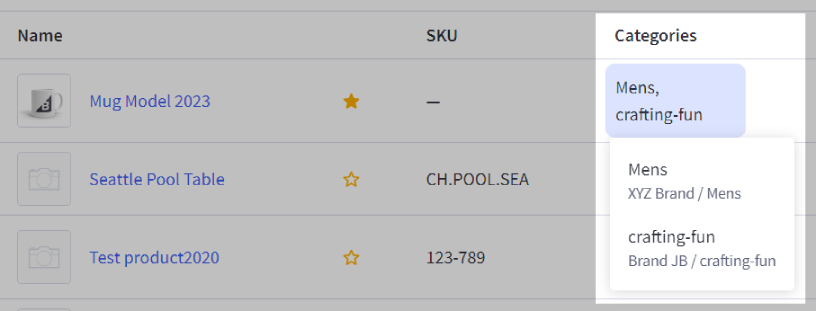
You can quickly view the categories a product is currently assigned to under the Categories column. Clicking the categories field for a product will display a breakdown of each category, with its channel and category path on the storefront.

You can assign a product to a category from the list without having to edit the product directly.
Check the box next to one or more products, then click Add to categories. Depending on how wide your screen is, this may be under the ⋯ button. Select which categories you want the product to appear in, then click Save.

Viewing Product and Variant Images
You can quickly view product and variant images directly from the product list. Click on the image thumbnail next to the product or variant name, and a pop-up window containing the image will appear.

If you have multiple images assigned to a product, only the image assigned as the thumbnail will appear on the product list. To view all of the images assigned to a product, edit the product and click on each image thumbnail individually under Images & Videos.
Managing Featured Products
You can quickly toggle the products you want marked as Featured and included in the Featured Products panel from the list. Click the star icon next to the product name, then select Featured or Not featured, depending on the product’s current featured status.

Once the product has been updated, there will be a success notification.
Managing Product Visibility
You can quickly toggle product visibility from the list on the products you want visible or hidden on the storefront from the Visibility column. Click on the product’s visibility status icon, then select Enabled or Disabled, depending on the product’s current visibility.

Once the product has been updated, there will be a success notification.
Editing Prices and Inventory
A product’s Price and Stock level can be edited by clicking the pencil icon that appears when hovering over it in the list. This can be a quick alternative to opening the product in the full Edit Product experience.
![]()
Clicking the price will open an Edit prices screen where you can edit Price, Sales price, Cost, and MSRP.
Use the gear icon to customize which price fields are shown in the product list, change the editor column display order, and choose between the side panel or fullscreen editor as the default single item edit behavior.
Expand, contract, and close the side panel using the buttons at the top right.
Click Save to save your current changes and stay in the editor, or Save and exit to save and return to the product list.

Note: Pricing changes can take up to 10 minutes to appear on the storefront. See our FAQ on price changes for more information.
Clicking the stock level will open an Edit inventory panel where you can edit Current Stock, Low stock, and Safety stock numbers. Use the Adjust by field to add or subtract a specific amount from Current Stock. If your products are stored in a warehouse, use the BPN field to assign Bin Picking Numbers (BPN) to specify where in the warehouse it is located.
Use Availability to determine whether the product or variant is available at the specific location. In the location dropdown, select which location you want to edit. The default location is your store's Shipping Origin address. See Multi-Location for more information on adding locations and pickup methods, and using the inventory editor.

Use the gear icon to customize which inventory fields are shown in the product list, change the editor column display order, and choose between the side panel or fullscreen editor as the default single item edit behavior.
Expand, contract, and close the side panel using the buttons at the top right.
Click Save to save your current changes and stay in the editor, or Save and exit to save and return to the product list.
Editing Price and Stock Level on Multiple Products
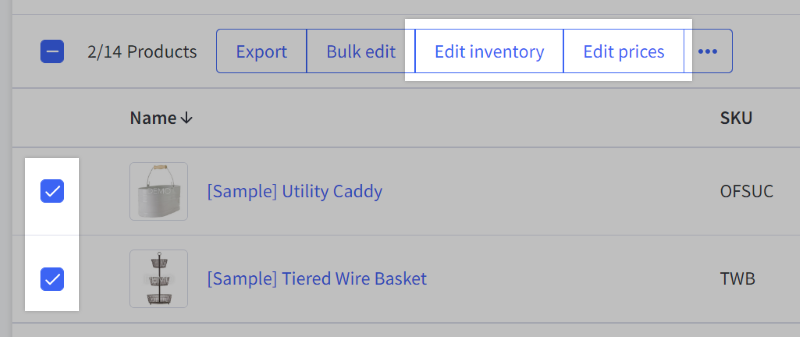
You can use this same experience to update the price or stock on multiple products at once. In the list, check the box next to the products you want to edit, then click Edit prices or Edit inventory.

Bulk Editing Products
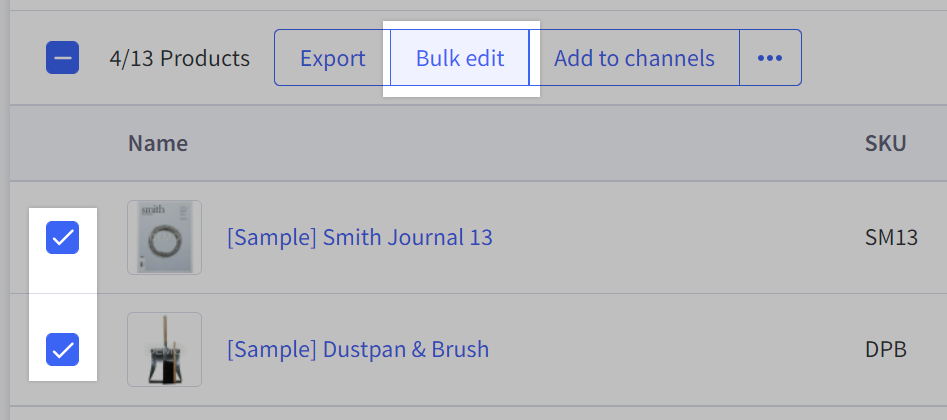
You can update or change the attributes of several products at once using Bulk Edit. Check the box next to one or more products, then click Bulk Edit at the top of the list.
See Bulk Editing Multiple Products in the Control Panel to see which attributes can be edited in bulk, and how to use the bulk editor.

Exporting Products
To export products in the list to a CSV file, check the box next to the products you want to export, then click Export. You can also select all products in the list by checking the box at the top left of the list. See Exporting Your Products for more information.

FAQ
How can I tell if a product in the list has low stock or is out of stock?
If a product has low stock, it will appear in the list with a yellow triangle icon next to its stock level. If a product is out of stock, it will appear with a red circle icon instead.

Note that for products with variant options, these warning icons will not appear unless all variants have low or no stock.
Can I use a different product list if I have Multi-Storefront enabled?
No, Multi-Storefront is not supported by the single-channel product list.
My product list looks different. Can I switch to this experience?
Some stores may have a banner at the top of the current product list page that advertises the new experience. Click View updates to switch to this version of the product list.
If you do not see a banner, you can upgrade by going to Channel Manager, then clicking the + Create channel button at the top right of the page. On the next page, click Request more storefront seats to display a requirements list for enabling multi-storefront management. Click the Update button next to Latest version of product list required.


