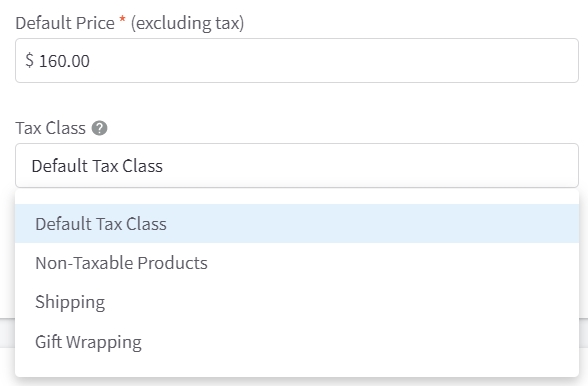
Some of your products may have special taxes that apply to them, or they may be exempt from taxes altogether. You can keep all of your tax rates organized by creating a tax class, which is a collection of tax rates. Changing the tax class of a product can affect the tax depending on what tax rates you include in the assigned tax class. This guide will show you change a product's tax class for stores using a basic or automatic tax setup.
Charging Product-Specific Tax Rates with Automatic Tax
For stores using a third-party tax service for automatic tax calculation, tax rates are determined by a product tax code. Product tax codes assign products to categories that will determine which tax rates are applied to it. Product tax codes can be assigned to products one at a time via the control panel, or in bulk via a CSV product import.
Some products, such as alcoholic beverages, require adding tax properties for industry specific tax rules. Tax properties can be assigned to applicable products one at a time in the control panel and via the API.
Manually Adding Product Tax Codes
Go to Products › View and locate the product you wish to update. Edit the product and find the Tax Provider Tax Code field in the Pricing section, under Advanced Pricing. If you are using the v2 Add Products experience, the Tax Provider Tax Code field can be found in the Summary section.
Importing Product Tax Codes
Go to Products › Export and export your products using the Bulk Edit template. Once exported, find the column for Tax Provider Tax Code and fill in the appropriate tax codes for your products. When you are finished adding your tax codes, import your CSV to update your products.
Manually Adding Tax Properties
Go to Products › View and locate the product you wish to update. Edit the product and navigate to the Pricing section. Click Show Advanced Pricing and edit any applicable tax property fields. Note that tax properties are not supported on the v2 Add Products experience.
Charging Product-Specific Tax Rates with Basic Tax
By default, products will be assigned the Default Tax Class, and will be charged the rate assigned to the default tax class. If your store’s tax calculations were set up manually using basic tax, you can create a new tax class or use the Non-Taxable Products class, and then assign the product to the appropriate tax class.
Creating Tax Classes and Rates
1. Go to Settings › Tax and click on Edit next to Basic Tax.

2. Select the Tax Classes tab. Create a new tax class for your products. If you need to make products tax-exempt, make sure that there is a Non-Taxable Products class.
3. Click the Tax Rates & Zones tab. Edit the rates for each zone to make sure the correct rate is listed for your new tax class and Non-Taxable Products class.
Assigning a Tax Class to Products
1. Edit your product. In the Pricing section, select the appropriate tax class from the drop-down menu.

2. Save your changes. To test that the new tax rate is being charged correctly, create a test order with that product.


