The WYSIWYG (What You See Is What You Get) editor is used to add content to different storefront areas like web pages, banners, and categories. Using the WYSIWYG editor, you can add links, images, tables, and more to your storefront pages — all without touching code.
How It Works
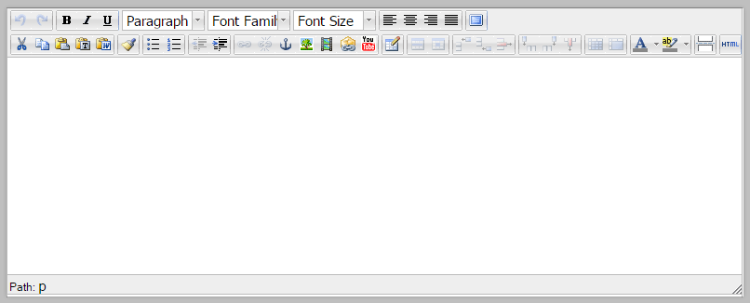
When creating or editing storefront pages, the WYSIWYG editor appears as a toolbar above the page content field. After entering plain text or pasting content into the field, use the tools to format and style it, or add custom content like videos or pop-up windows.
If you want to add advanced customizations, you can edit the HTML code of the content. Note that this uses span tags to apply styling changes instead of CSS code.
Storefront look different than the Editor? The WYSIWYG editor does not take into account any CSS styling or scripts the theme may apply to your content. What you see in the editor is not always how it appears on the storefront. You may need to edit your Stencil Theme files.
The WYSIWYG editor is available for the following storefront content:
A limited version of the WYSIWYG editor can be used for the following content:
- Product descriptions
- Blog posts
- Automatic and coupon promotion banners created with the legacy editor
Requirements
- To enable or disable the WYSIWYG editor, you must have the Manage Channels and Manage Settings permissions enabled in your user account.
- You must have the following permissions enabled to use the WYSIWYG editor in different areas of the control panel:
- Web pages — Manage Channels, Store Design, Manage Pages, Create Pages, Edit Pages
- Product categories — Manage Channels, Manage Categories, Create Categories, Edit Categories
- Banners — Manage Channels, Manage Banners
- Gift certificate templates — Manage Channels, Manage Gift Certificates, Store Design
- Product descriptions — Manage Channels, Manage Products, Create Products, Edit Products, Product Options, Manage Brands
- Blog posts — Manage Channels, Manage News
- Promotion banners — Manage Channels, Manage Settings, Manage Promotions, Edit Promotions, Add Promotions
- Images added with the WYSIWYG editor must use one of the following file types: JPG, GIF, PNG.
- Videos can be inserted via URL if they are hosted on YouTube, Vimeo, or Metacafe.
- Media from the following sources are supported for embedding:
- Flash
- HTML5 audio and video
- QuickTime movies
- Shockwave applications
- Windows Media files
- Real Media files
- another website via an iframe
- Individual uploaded media files can have a file size of up to 512 MB.
Formatting Text
The text formatting options available in the WYSIWYG editor are similar to common word processing programs. They can apply basic text decoration, style, font, size, and alignment.

Additionally, there are tools to add bulleted lists, numbered lists, indents, and outdents, as well as text color and highlight color.

Creating Links
To create a link, select the piece of text or image to be linked, then click the appropriate link button. There are three types of links that you can create:
- a link to an external URL
- a link to an existing product, category, brand, or web page in your store
- a link to a specific location on the same page
External Link

Use the Insert/Edit Link button, represented by a chain icon, to link to a URL that is not part of your BigCommerce domain. The Unlink button, or the broken chain icon, will remove links from an already linked piece of text or image.
The Insert/Edit Link button opens a pop-up menu where you can configure the link’s behavior on your storefront.
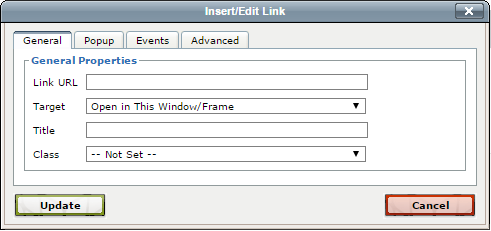
The General tab allows you to define the following properties:
- Link URL — the web address you are linking to
- Target — determines if the link opens in the current window or tab, or opens in a new one
- Title — the text that displays when a visitor hovers their cursor over the link
- Class — apply a custom CSS style; the class details are configured from the Advanced tab
In the Popup tab you can create a pop-up window and define how it works:
- JavaScript Popup — determines if the Popup URL will open in a pop-up window. If unchecked, the Popup URL will open in a standard window or tab.
- Popup URL — the web address of the popup
- Window Name — repurpose an existing pop-up window by giving it a name
- Size — sets dimensions of the pop-up window in pixels
- Position — positions the top left corner of the popup on the visitor’s screen, using X and Y coordinates. Enter c for both values to automatically center the pop-up window.
- Options — determines whether specific browser elements are a part of the pop-up window, such as the location bar, status bar, or scroll bars
The Events tab allows you to execute JavaScript based on specific user behavior, such as what happens when a visitor clicks or mouses over the link text.
The Advanced tab allows you to define a custom ID, style, and class for a link. It also has some lesser-used fields for determining aspects of a link like language and encoding type.
Be careful! The BigCommerce Technical Support team cannot troubleshoot issues related to custom scripting or styling.
Storefront Page Link

The Link to store button links content to an existing product, category, brand, or web page in your store.
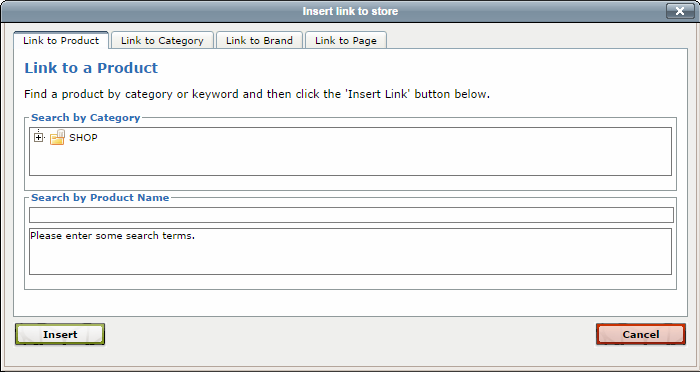
Pro Tip! Add advanced functionality to your storefront page links by using the Insert/Edit Link button. When adding storefront page links in this way, paste the page’s URL tail rather than the entire URL. For example, if your product page has a URL of https://mybcstore.com/product-page/, you would paste /product-page/ into the Link URL bar.
In-Page Anchor

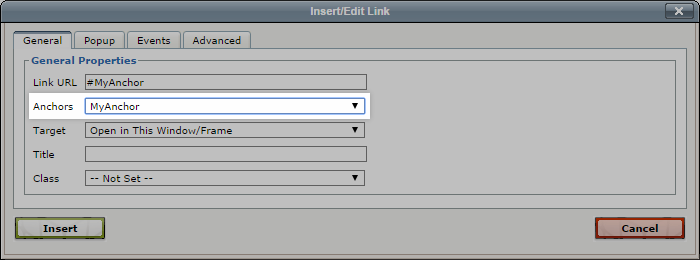
The Insert/Edit Anchor button is used set an anchor which jumps to a specific location on the same page. Add a name for an anchor, then click Insert.
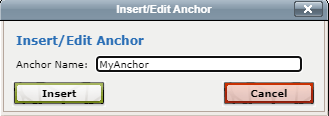
After naming your anchor, add a link to the desired text with the Insert/Edit Link button. Instead of specifying a Link URL, select your newly created anchor from the dropdown.
Adding Images
Use Insert/Edit Image to include an image in the page content or description.

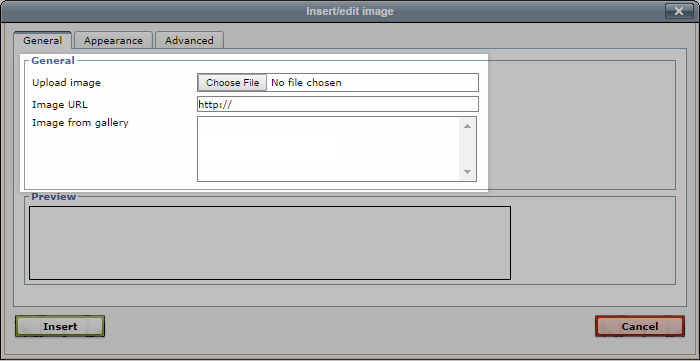
The General tab presents several options for selecting an image, as well as a preview of your image.
- Upload image — Select an image from your hard drive by using the Choose File button
- Image URL — link to a remotely hosted image by entering its URL
- Image from gallery — select an image that has been uploaded via the Image Manager. You must have at least one image uploaded to the Image Manager for this option to appear.
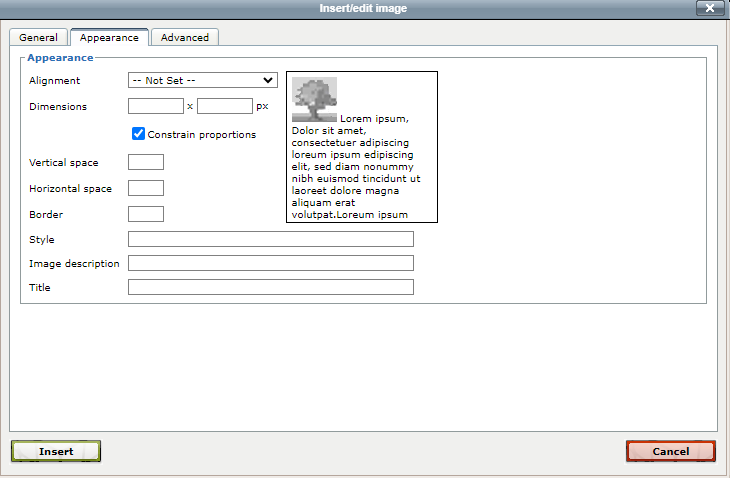
The Appearance tab includes settings for image orientation such as dimensions and border, as well as SEO fields like description and title.
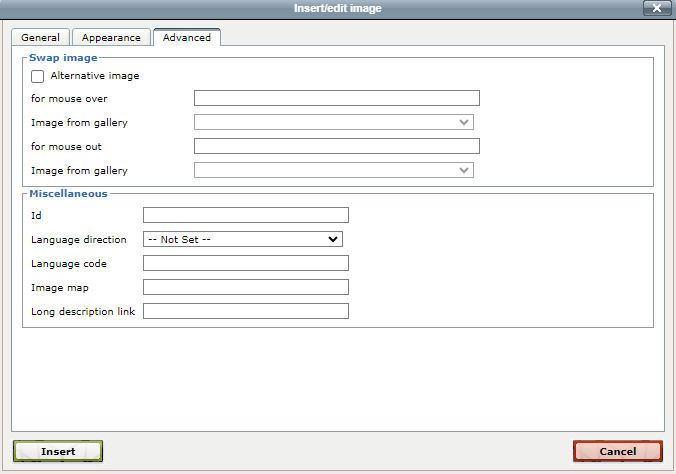
The Advanced tab has options for swapping the image for another based on mouse behavior, and includes miscellaneous options for setting a custom image ID, designating language settings, utilizing an image map, and including a long description link.
Adding Video and Other Media
Use Insert Video to embed a video from one of the supported video hosts. Paste the video URL in the Video Link field, and check the Preview panel to confirm it is loading properly.

Note: When pasting a YouTube video URL, you must use the full URL, not the shortened (youtu.be) version.
The Insert/Edit Embedded Media button allows you to embed media files uploaded to WebDAV, such as unhosted videos, audio, and iframes. To learn more, see Uploading and Linking to a File in Your Store.

Creating Tables
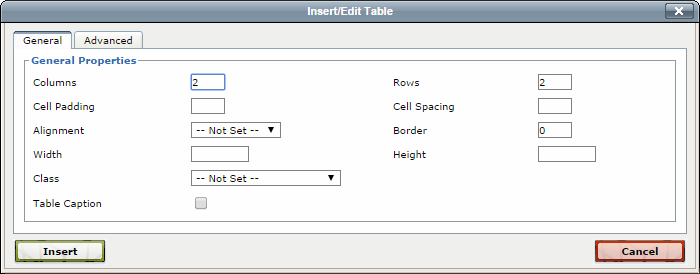
Use Insert/Edit Table to create a table.

The General tab contains settings for defining the basic format of your table, such as the number of columns and rows, size, and alignment.
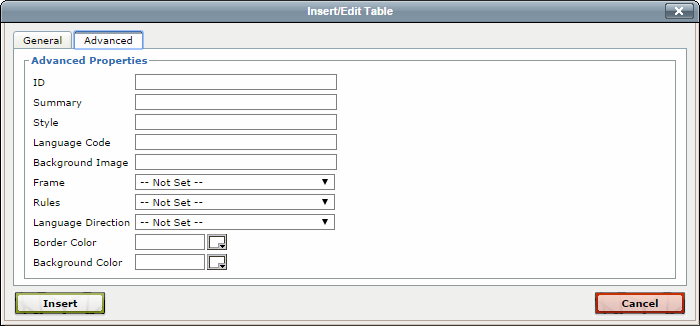
The Advanced tab provides additional settings for the background and border color, language direction, and custom styling. When you’ve finished configuring the table settings, click Insert to add it to the page content field.
When an existing table is selected, additional table-specific buttons are available. The Table Row Properties and Table Cell Properties buttons apply settings specific to individual rows or cells, respectively.

There are settings to insert and delete specific rows and columns. The Insert buttons depict the rows and columns in blue, while the Delete buttons depict them in red.

Combine cells or break up combined cells using the Split and Merge Table Cells buttons.

Additional Options
The Undo and Redo buttons work similar to other programs, allowing you to undo the previous action, or redo it when applicable.

The Toggle Full Screen Mode button expands the editor to fill the browser window.

In addition to standard Cut, Copy, and Paste buttons, the editor includes several advanced options. Use Paste as Plain Text to paste copied content without formatting, or Paste from Word to preserve the formatting of content copied from Microsoft Word.

The Insert Page Break for Printing button allows you to insert a forced page break in your page content when necessary. This is helpful for organizing material that your customers must print and submit, such as custom product request forms.

Edit HTML Source provides direct access to the content's HTML to add, edit, or remove code. Use this button to paste in or write any custom code. If you use other WYSIWYG tools on content created in the HTML source editor, it will attempt to format it as content, which will likely break the code.

Clean Up Messy Code will attempt to clean up minor code problems such as missing opening and closing tags in HTML code entered into the editor.

Be careful! This function will only fix minor syntax errors; it is not a fix for major custom coding issues. If you're having trouble or not sure where to start looking, reach out to one of our partners for assistance.
FAQ
Can I change the theme with WYSIWYG?
No, the WYSIWYG editor only affects content added to a page. See Stencil Themes for information on editing a theme to customize its appearance and code.
Will the CSS in a theme override changes made in the WYSIWYG editor?
Themes will prioritize changes made in the WYSIWYG editor. For example, if you change the color of some of the text or links, the theme will respect that color instead of forcing its link colors. If a color is not specified, it will default to the theme's settings for those colors.
Can I use keyboard shortcuts in the editor?
Press Shift Enter when typing to insert a line break and continue typing on the immediate next line (single-spaced). Pressing Enter at the end of a line creates a new paragraph. Ctrl Z or Cmd Z will undo, Ctrl Y or Cmd Y will redo a step. The keyboard shortcuts for copy, cut, and paste will also work, and you can use Ctrl Shift V to paste content as plain text.
How do I add an email link?
When creating a link to an email address, include mailto:name@domain.com in the Link URL field. Replace name@domain.com with the email address you want to link to.
Is there an easy way to adjust table size?
It's possible to change the size of an existing table by selecting it, then dragging one of its edges.
Is it possible to create a page with HTML?
Yes, you can build all the content of a page with the Edit HTML Source button.
Is web page content exportable?
No. Web page content is not exportable in BigCommerce. If you plan on moving your website, back up your web pages' content by downloading their HTML source code to your local computer or device, or use a backup-and-restore app like Rewind to back up your web pages, products (with descriptions), and categories.
Can I disable the WYSIWYG editor?
Yes. Go to Settings › Display. Scroll down to Control Panel, where you can enable or disable the WYSIWYG editor throughout the control panel.


