We support several methods for migrating your product catalog to another BigCommerce store. See the table below for a comparison of the different types of product data that can be transferred with each method.
This chapter provides instructions on transferring products using the legacy Import/Export experience. If your destination store uses the modern experience, see Transferring Products from a Legacy Import Store to a Modern Import Store. IF your source and destination store both use the modern experience, see Transferring Products from One Modern Import Store to Another.
| CSV Import | API | BigCommerce Apps | Manual Transfer | Non-transferable | |
|---|---|---|---|---|---|
| Product Details | ✔ | ✔ | X | ✔ | X |
| Images | ✔ | ✔ | X | ✔ | X |
| Videos | X | ✔ | X | ✔ | X |
| Digital Files | ✔ | ✔ | N/A | ✔ | X |
| Variants | ✔ | ✔ | X | ✔ | X |
| Modifiers | X | ✔ | X | X | X |
| Bulk Pricing | X | ✔ | N/A | X | X |
| Complex Rules | X | ✔ | X | X | X |
| Categories | ✔* | ✔ | X | ✔ | X |
| Brands | ✔* | ✔ | X | ✔ | X |
| Product Filters | X | ✔ | N/A | X | X |
| Reviews | X | ✔ | Product Review Importer & Exporter (free) | X | X |
| Price Lists | X | ✔ | Price Lists Importer/Exporter (free) | X | X |
*Not all category and brand information can be transferred via CSV import. Use the Catalog API to migrate details like category/brand images or descriptions.
Before following the steps in this chapter, we recommend you review our articles on importing products and product options.
Limitations
- Swatch variant and modifier options can only be transferred via API.
- Shared variant/modifier options cannot be transferred. They are treated as unique variants/modifiers when migrated to the destination store.
Please note: You may want to use the API for transferring products if the destination and source stores are on different product experiences, specifically v2 and v3.
Export Template Details
To create a custom export template for transferring products, go to Settings › Export templates.
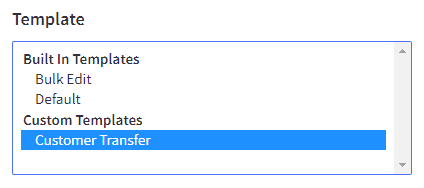
Click the Choose an Action drop-down menu next to the Bulk Edit template and select Create a Copy.

Check the box next to Enable Products Exporting? in the list of Export Options.
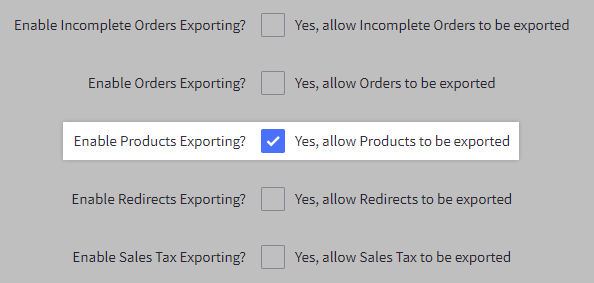
If you are transferring products with variants, make sure that Include Product Options? is checked in Product Export Options.

In Advanced CSV Export Settings, select Expand sub items across the csv from the Sub Items dropdown.

Click on the Products tab at the top of the page and uncheck the following fields:
- Product ID
- Product Image ID
- Product Image File
- Product Image Path
Check Product Image URL (under the Product Images section). Then change the name from Product Image URL to Product Image File. The title is case-sensitive and cannot have any blank spaces before or after. Save your changes.

Exporting from the Source Store
Once you’ve created your custom products template, you can then export products from your source store.
Go to Products › Export.
For Template, select your custom export file, then click Continue.
Click Export my products to a CSV file on the popup.
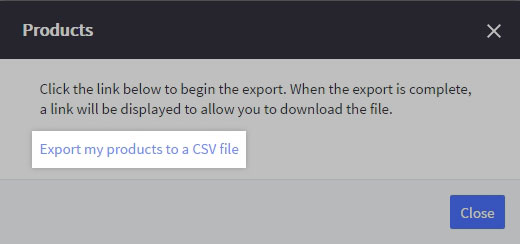
You will see a progress bar as your products are generated. When it is complete, click Download my Products file. It will save to the location preset in your browser (usually the Downloads folder).

Importing to the Destination Store
Using the CSV exported from your source store, complete the product transfer by importing the file to your destination store.
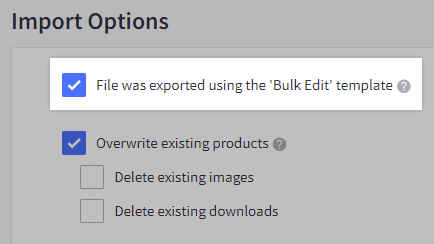
In the destination store's control panel, go to Products › Import. Check the box next to File was exported using the ‘Bulk Edit’ template. Even though you are using a custom template instead of the Bulk Edit template, checking this box will preselect the necessary Import Options to ensure a smooth product transfer.
Next to Import File, click Choose File and select your exported products file.

Click Next. In the Link Import Fields page, confirm that the product fields are matched with the corresponding column names in your CSV. For fields you are not transferring (such as Product ID), make sure they are set to Ignore.
When you are finished, click Next, then Start Import.

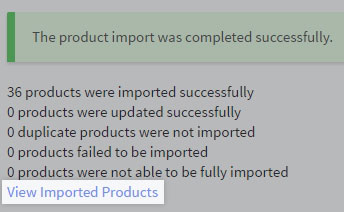
When your file finishes importing, click View Imported Products. Review them to make sure all data has transferred over successfully.
Transferring Files for Digital Products
For stores with digital products, some additional steps are necessary to successfully transfer product files before transferring the products themselves. The source store must remain live (not Down for Maintenance) during the import process, so the destination store can access and download the files.
When creating your custom export template, make the following additional changes to the fields included in the template:
- Uncheck Product File (under the Product Files section).
- Check Product File Path, then change the name from Product File Path to just Product File. This is case-sensitive and cannot have any blank spaces before or after.

Before you import to the destination store, complete these steps in WebDAV.
1. Connect to the source store using WebDAV.
2. Once connected, download/save the product_downloads folder to your computer. This will take time, depending on the number and size of the files.
3. Connect to the destination store using WebDAV.
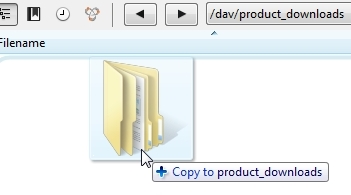
4. Drag and drop (or copy) the contents of the source store’s exported product_downloads folder into the destination store’s product_downloads folder.
Once the transfer is complete, you can import your products from the destination store’s control panel, using the export template created previously.
Transferring Price Lists
If your source store and destination store are both on an Enterprise plan, you can transfer Price Lists using the Price List Importer/Exporter app. Before using the transfer instructions in the app, make sure you have addressed the following considerations:
- Create new Price Lists in your destination store control panel for each Price List you intend to transfer and associate them to the desired customer groups. The app can only modify existing Price List information; it cannot create new Price Lists.
- Make sure that all products in both stores have SKUs, and that the SKUs match between your source store and destination store. This is to ensure that the import will update price records properly.
- Both stores should have the same currencies enabled in order to transfer currency-specific prices.
Transferring Product Reviews
Product reviews cannot be transferred via CSV import using a built-in export template, but the free Product Review Importer & Exporter app allows you to export a CSV from your source store and import it into your destination store. You will need to install the app in both stores before proceeding.
Additionally, you can add reviews to products with an API request. See our Dev Center for more detailed instructions.
FAQ
Why can’t the destination store find/access/see the source store’s product images?
The source store must remain live (not Down for Maintenance) during the import process, so the destination store can access and download the images.


