Switching to the V3 Experience
Try it out! You can view and test the v3 experience beforehand by creating a trial store. This also allows you to become familiar with the new layout of product details and creating product options, variations, and modifiers.
When adding or editing products, if you see the opt-in banner, your store is already eligible to upgrade to the v3 experience. Simply click Switch now to start the process, or select View updates to learn more about the features available on the updated experience.

You can switch back to the legacy experience at any time, should you need to update product options or options sets, or any other product fields exclusive to the legacy experience. Once you have made your changes, use the upgrade banner again to return to the modern product experience.
If you don’t see the upgrade banner and instead see the following ineligibility banner, you may need to make changes to your catalog before your store is eligible for upgrading to the modern experience.

In the following sections, we will present the different upgrade methods and their considerations.
Some stores cannot revert after upgrading. Stores on the v2 product experience with only simple products (product without options) in their catalog will see a similar but different upgrade banner in the control panel.

Note that using this banner to upgrade to the v3 product experience does not allow you to revert back to the v2 experience freely at a later date. After selecting View updates, your store will be migrated to the v3 experience and it cannot be rolled back without contacting our Support team for assistance.
Before Getting Started
While it is not required to remove options created in the legacy product experience and rebuild them after upgrading, this process ensures full v3 compatibility. For this approach, we recommend an API-based solution, such as the StrikeTru or Your Store Wizards apps, or your own custom-developed one. These can minimize downtime, and ensure accuracy in upgrading all aspects of your catalog. If an API-based solution does not suit your needs, you upgrade products manually in the control panel.
Note that an API based solution and the manual upgrade method will temporarily leave your products in an incomplete state on your storefront, as they won’t have any options assigned to them. Therefore, we recommend putting your store into maintenance mode until you have completed the upgrade process and have reapplied these product attributes.
We recommend using a backup-and-restore app like Rewind Backups to save a complete copy of your catalog before following these steps and making any changes.
Potential risks when editing product data: Note that after upgrading to the v3 experience, editing products with options originally created in the v2 experience, or vice versa, can have unwanted effects, like hidden option rules. Products affected by these compatibility issues can be fixed by deleting the options and recreating them in the v3 experience
As a general rule, products created in v2 should have their options edited in the v2 product experience, and likewise for products created in v3. Other product details, like description or custom fields, can be edited in either v2 or v3 with no repercussions.
Eligibility Checklist
In the lists below, we’ve outlined the product attributes or fields that may require action before your store can become eligible for upgrading via the control panel. Note that if you are using a third-party solution, such as the StrikeTru or Your Store Wizards apps, they may have additional eligibility criteria.
- Configurable Fields (deprecated) — Some stores created before 2018 may have products with these deprecated fields. These fields will need to be removed before an upgrade can occur. If you have numerous products using these fields, contact our support team and they can assist you in converting them into options.
- Option Set Rules (as opposed to product-level rules) — These must be removed from all products in order to upgrade the catalog.
Removing Configurable Fields
A configurable field allows you to create custom fields on a product where your customers can add additional information before they add the product to the cart. This feature was deprecated and removed from all existing stores that did not have it already enabled as of December 20, 2017. Any stores created after this date will not have this feature.
Configurable fields are similar to product options, with a few key differences:
- Product options can be exported or imported
- Product options can be tied to SKUs and track inventory accordingly
- Product options can be tied to rules like changing the price or picture
To remove configurable fields from a product, go to Products › View and click the name of your product to edit it. Go to the Custom Fields tab. The Configurable Fields section is located at the bottom.

Click the - circle to the right of the configurable field to delete it, then save your changes.
Removing Option Set-Level Rules
Option set-level rules are applied to any product assigned to the option set, unlike product-level rules which are specific to an individual product. In v3, you can assign product-level modifier rules in the control panel, but option set-level rules cannot be accessed after upgrading. They will continue to operate on products, affecting pricing, weights, availability, and product images on the storefront in unintended ways. These rules can still be accessed and managed via the API.
To locate option sets with assigned rules, go to Products › Product Options and click on the Option Sets tab. Click the Rules column header to sort your option sets by whether or not they have any rules.

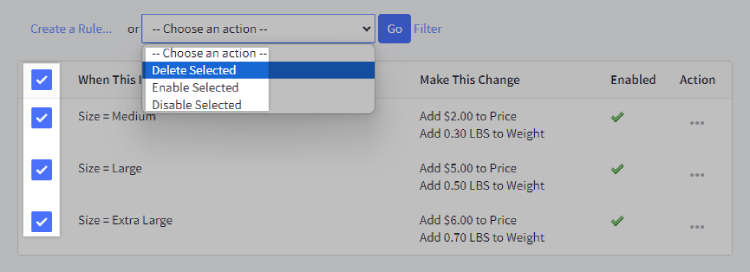
Select Edit rules from an option set’s Action menu, then check the box at the top of the list to select all rules. In the Choose an action drop-down menu, select Delete Selected to remove the rules from your option set.

Repeat the process for all option sets with rules — rules cannot be deleted from all option sets in bulk.
Check for SKUs. After upgrading, we recommend confirming that all variant option combinations have an assigned SKU. While option combinations without SKUs can be purchased on a v3 storefront, they are not fully supported.
Switching Back to the V2 Experience
After upgrading to the v3 experience, you may need to switch back to the v2 experience. It is recommended to remain on v3 when possible to ensure maximum compatibility with the latest platform features, but some situations may call for returning to v2. Reasons can include removing hidden product rules or using third-party integrations that require certain product field formatting only found on the v2 experience.
If you upgraded by using the opt-in banner in the control panel, click Switch to old experience.

Keep in mind that you will need to remove any shared variants and shared modifiers added to your products before reverting. You will see the revert button grayed out and unavailable if your catalog is currently ineligible.

Not seeing the banner? If your store upgraded to the v3 product experience and had only products without options, you will not see the rollback banner in the control panel. If your store needs to revert to the v2 experience for a business reason, contact our Support team for assistance.
Removing Shared Variants and Shared Modifiers
Shared variants and modifiers are product options applied to multiple products with a single click, saving you time and effort in manually creating and applying options to individual products.
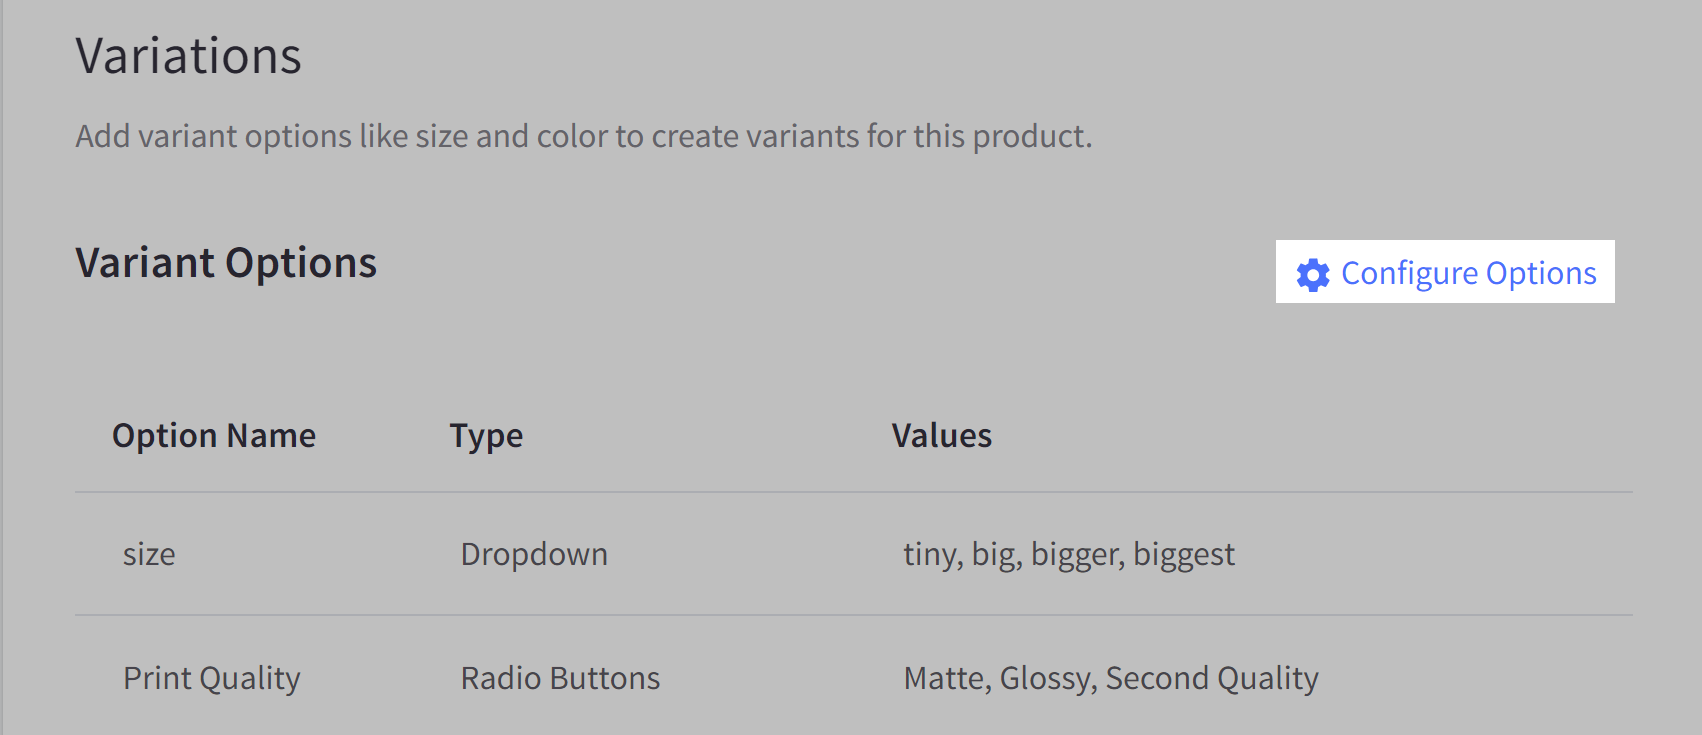
To remove shared variants and modifiers from a product, go to Products › View and click the name of your product to edit it. Go to the Product Options section. Click Configure Options under Variations or Customizations.

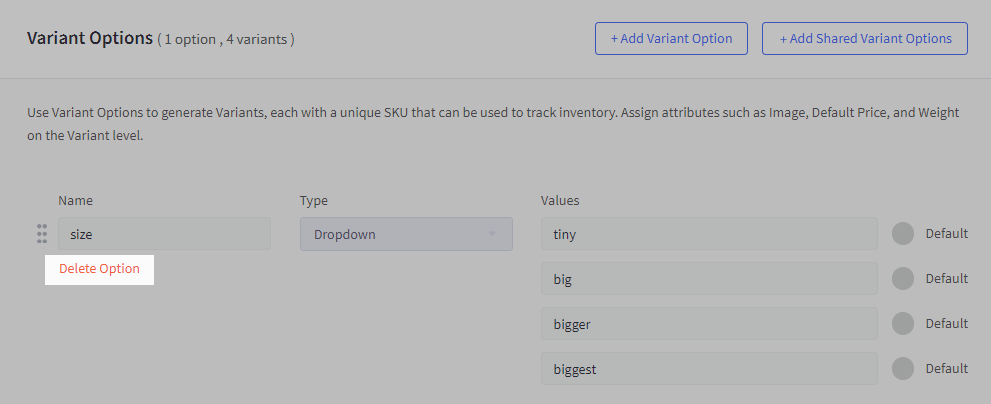
Click Delete Option on the following page to remove each shared variant or modifier from the product. Shared variants and modifiers will be displayed as grayed out and unavailable to be edited, unlike product-level variants and modifiers.

Keep in mind that this action will not delete the shared variant or modifier option from your store or from other products that use this option. For more information on creating and applying shared options, see Shared Variant Options and Shared Modifier Options.
You will be able to return to the modern experience as long as all of your products meet the eligibility requirements.


