If you created your catalog on a separate BigCommerce store for testing or customization, the Import/Export tool allows you to quickly migrate much of your product data to a different store. This is done by creating a CSV export file from the store where your catalog is located, referred to as the source store, and importing the file into the store where you want to transfer your catalog, referred to as the destination store.
In this chapter, we will cover the requirements and limitations involved in transferring your products, as well as provide guidance on how to reformat your existing catalog information to be imported as new products in a separate store.
This chapter assumes that your source and destination stores both use the modern Import/Export tool. If your source store uses the legacy tool while your destination store uses the modern tool, see Transferring Products from a Legacy Import Store to a Modern Import Store. If both stores use the legacy tool, see our guide to Transferring Products.
Requirements and Considerations
The requirements for transferring products from one store to another, including the necessary user permissions and minimum required fields, are the same as importing or exporting products from a single store using the modern experience. See the following guide chapters for more information:
Before following the instructions in this article, review the following considerations to ensure a successful catalog migration:
- As with importing your products from scratch, we recommend first following the steps with a single product before transferring your whole catalog to reduce the likelihood of errors.
- Since the modern Import/Export tool does not support custom export templates, all exportable fields will be included in the CSV from your source store. You can remove any non-required columns that you don’t want to transfer to your destination store.
- The CSV export file references image URLs from your source store. Your source store must be live (not in pre-launch mode or down for maintenance) in order for your destination store’s Import/Export tool to access the image URLs and import them successfully.
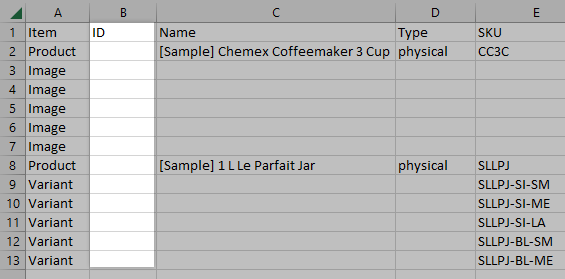
- While the ID column must be present in the CSV file, it must be blank for all products, variants, images, and videos in order for them to be created in the destination store.
- You must also remove the IDs from all custom fields in the Custom Fields column for them to import properly.
- If you have existing products in your destination store, make sure they do not have the same names, SKUs, and URLs as products from your source store. Duplicated product data fields will prevent these products from being created upon import, and they won’t update any existing products unless you’ve included the product ID on the corresponding row.
- If you are using ShipperHQ in your source store, you will need to install ShipperHQ in your destination store and connect it to your ShipperHQ account in order to successfully transfer any Shipping Groups, Origin Locations, and Dimensional Rules via CSV import.
- Note that not all information can be transferred via CSV import, such as:
- Modifier options
- Digital files
- Bulk pricing
- Product filters
- Price Lists
- Product reviews
- Brand and category data
- Product analytics, such as product page visits and quantity sold
- You can use the Catalog API to gather all product attributes from your source store and recreate them in your destination store. There are also apps that allow you to transfer your product reviews and Price Lists.
Exporting and Formatting Products from Your Source Store
To begin the process of transferring your catalog, you must first generate a CSV file of products from the source store, and then edit the data within to allow for successful import into the destination store.
In your source store’s control panel, go to Products › Export. If you are practicing with a single product or you don’t want to transfer your entire catalog, you can select specific products for export.
Click Start export to begin the export process. When the CSV file is ready, click the file name to download it to your computer.

Open the CSV file in your preferred spreadsheet program and make the following adjustments to your catalog data:
Reformatting Products
In your CSV file, remove all values from the ID column, including those in Variant, Image, and Video rows. However, you must not remove the ID column itself, as this is required to successfully import products into your destination store.

Remove the values in the Brand ID, Channels, and Categories columns, since they correspond to IDs from your source store, with the exception of the default storefront channel ID used in all stores (1). If you have already created brands, categories, and channels in your destination store, add the desired IDs to their corresponding fields in the desired Product rows.
Categories and brands cannot be created via CSV import. They must be created in the control panel, or via the API.
Another option is to leave the Brand ID, Channels, and Categories columns blank or remove the columns entirely, then assign them in your control panel after importing your products. You can use Bulk Edit to assign multiple products at a time to brands and categories, and you can add products to categories or channels directly from the product list.
If the products in the CSV file have custom fields, remove the "id":#, attribute from them to ensure they import successfully. If you are using a spreadsheet program that supports wildcard characters in its Find and Replace tool, such as Microsoft Excel, you can remove all custom field IDs at once by searching for the custom field ID attribute with a variable number ("id":*,) and leaving the Replace with field blank, then clicking Replace All.

The Tax Class field uses the tax class’s ID instead of its name. While the default tax class always has an ID of 0, your source and destination stores may have different tax classes with different IDs. Use one of the following methods to gather the tax class IDs from your destination store, so that you can assign them to your desired products in your CSV file:
- Export a subset of products that are each assigned to a different tax class in your destination store and copy the tax class IDs from the CSV file.
- Use an API request to get all tax class information from your destination store.
You can also remove the column to assign all products to the default tax class and update product tax classes individually in the control panel.
Reformatting Variants
When exporting products with variants, option types and values are already formatted for successful import into your destination store. The only adjustments you need to make are to remove variant IDs from the CSV file, and to confirm that any existing products in your destination store are not using SKUs from your source store.

Shared variant options cannot be transferred from one store to another. If you export products with shared variant options from your source store, they will be imported as unique variant options in your destination store.
Reformatting Images and Videos
The CSV export file includes product image URLs in the Internal Image URL (Export) field of each Image row. Cut the full URLs from this column and paste them in the Image URL (Import) field of the corresponding Image rows to ensure that they import successfully.

Other image attributes, like Image Description and Image Sort Order, do not require any additional formatting to import successfully. Additionally, variant image URLs do not need to be reformatted.
To prepare your product videos for import, you only need to remove the values from the ID column of Video rows (not the YouTube ID column). All other video attributes can be left as they are.
Importing Products to Your Destination Store
After you’ve reformatted your CSV file and saved your changes, log in to your destination store’s control panel to import your products.
Navigate to Products › Import and select your CSV file for upload. Since you will be importing only new products to your store, Overwrite existing products can be left either checked or unchecked.

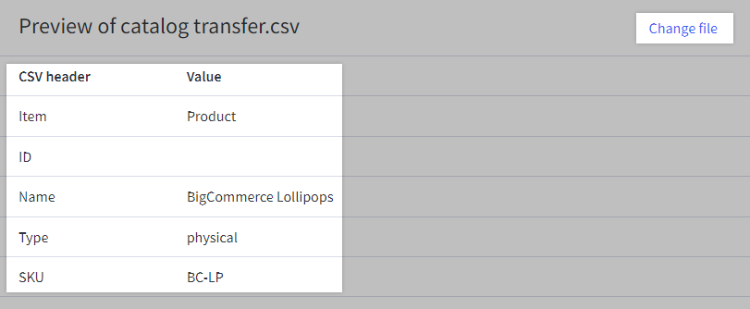
Click Preview to view the details of the first product in the CSV file. This is a good time to confirm that any attribute IDs from your source store, such as those for categories, custom fields, and the product itself, have been omitted. If you need to make any adjustments, edit your CSV file and click Change file on the Preview page to re-upload it.

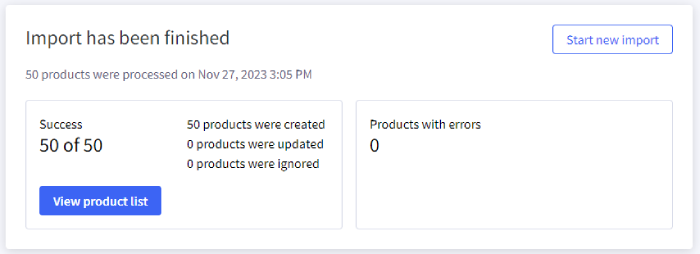
Click Start import to begin importing products to your destination store. When the import is complete, review the import summary to confirm that all products in the CSV file were created in your destination store, as opposed to updating only existing products or products being ignored during import.

If any errors appear in the error log, resolve them in your CSV file and click Start new import to import it again.
Before re-importing your CSV file, remove any products that were successfully created in the previous import. Since these products now exist in your destination store’s catalog and have unique IDs, importing them again will cause duplicate product errors.
Once you’ve successfully imported all products from your source store, click View product list to view your newly transferred catalog and add any data that could not be exported from the source store.


