Exporting and importing your products is the most efficient way to update your product catalog. Whether you're adding new products or editing existing ones, importing is the best method for making those catalog changes in bulk. Using the Import/Export tool, you can create new products, update complex attributes like variants and images, and even generate new categories and brands.
Exporting your products is also a great way to back up your catalog. All export templates include details like the product name, SKU, and price, but you can get more granular by building a new export template from scratch or customizing a copy of an existing one to suit your needs.
This guide covers the legacy Import/Export experience for stores with a single storefront channel. If you are using Multi-Storefront, see our Modern Product Import/Export Guide for information on importing and exporting products in the modern experience.
In this guide, we’ll cover how you can use the Import/Export tool to upload your catalog, make bulk product updates, and export specific product data. This guide also includes helpful information to reference throughout the Import/Export workflow, such as examples of how to format product data in your CSV file, a table of all attributes that can be imported and exported, and instructions for troubleshooting common import errors.
How Product Import/Export Works
BigCommerce uses comma-separated values (CSV) files to import and export all store data, including product information. When you export a CSV file of products from your store, your catalog is automatically formatted for successful import, allowing you to update your existing products and create new products quickly and efficiently. If you are importing your catalog for the first time, download our sample CSV as a guide for formatting your products.

The import tool uses system-generated IDs to identify and update existing products, as well as complex attributes like variants, rules, and images. When creating new products or adding new attributes to existing products, the ID fields should be left blank. The control panel automatically assigns IDs when new products are successfully imported.
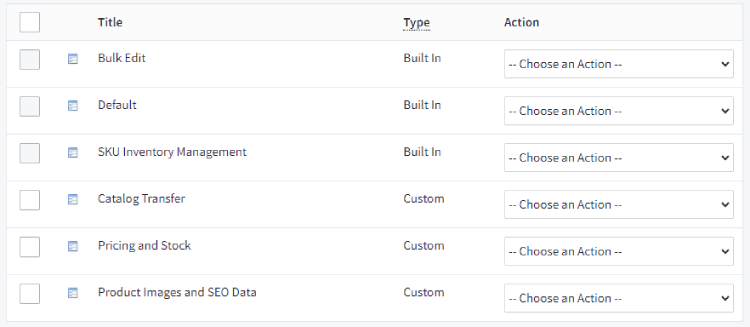
In your CSV file, you can remove any columns containing information you don’t plan on adding or editing, as long as they aren’t required for import. If there is a certain subset of attributes that you regularly export or edit in bulk, you can create a custom export template that only contains those fields. Custom export templates also allow you to export product fields that aren’t included in the Bulk Edit template.

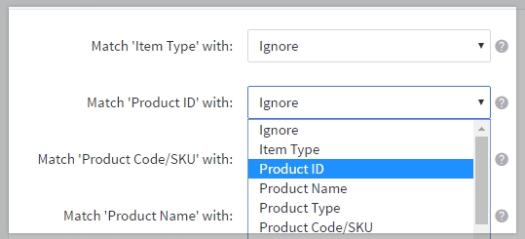
After adding or editing products in your CSV file, upload the file in Products › Import. Before import begins, you can select your preferred import options, such as overwriting existing product data or ignoring blank values, and ensure that your file’s column headers match their corresponding product fields in BigCommerce.

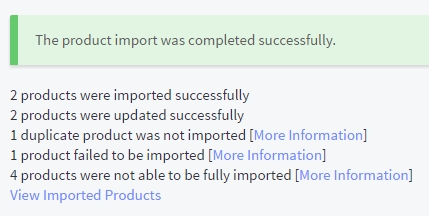
Once you’ve imported your products, you’ll receive a summary detailing the number of products that were successfully created or updated, and providing reports of import errors or duplicate products that failed to import.

You can export a CSV file of your entire product catalog from Products › Export, or select specific products for export from Products › View. Regularly exporting your products is a great way to back up your catalog, in case you need to restore and rebuild your products in the future. You can also export your products as an XML file, which can be used for advanced catalog data implementations, such as creating a custom product feed.
If you want to make quick updates to your catalog’s inventory or product-level shipping details, download a CSV file from Products › Export Product SKUs. This file consists of a limited set of product attribution columns, such as SKU, stock level, physical dimensions, and fixed shipping cost. After you’ve made your changes, go to Products › Import Product SKUs and import your file to update your stock levels and product-level shipping information.
Comparing the Legacy and Modern Experiences
The legacy Import/Export experience includes tools for creating and updating products in bulk on a single storefront channel, while the modern experience was built to provide a simple, user-friendly workflow for managing products across multiple storefronts. See the table below for a comprehensive comparison of the features in each experience.
| Feature | Legacy Import/Export | Modern Import/Export |
|---|---|---|
| Supported product experience | Can be used with Products v2 and Products v3 experiences | Supports the Products v3 experience only |
| Multi-Storefront compatibility | Can only be used in stores with a single native storefront | Can be used in single-storefront and Multi-Storefront stores |
| Adding or editing variant attributes |
Variant information is divided into two item rows:
Adding and updating Retail (MSRP) Price and Sale Price on variants is not supported. |
All variant information is present in a single Variant row. Adding and updating Retail (MSRP) Price and Sale Price is supported on variants. |
| Managing existing variants | Can add new variants to a product with existing variants, but updating the names and option types of existing variant options is not supported | Does not support creating new variants for products with existing variants, cannot update existing variant options |
| Adding and editing modifiers | Creating and updating modifiers is not supported, but you can add or edit price and weight rules for existing modifier options | Creating and updating modifiers and their rules is not supported |
| Importing and exporting product pick lists | Pick lists cannot be imported or exported | Pick lists can be imported and exported as variant options. Importing and exporting modifier options is not supported. |
| Adding images |
Can be uploaded from a full URL path or from a WebDAV file. Multiple product images are organized in the CSV file as groups of columns. |
Can only be uploaded from a full URL path. Multiple product images are organized in the CSV file as individual rows. |
| Product videos | Videos cannot be added or edited | Videos can be added or edited in Video rows |
| Adding digital product files | Can add or edit product files and their attributes like file description, maximum downloads, and expiration period | Does not support adding or editing digital files |
| Assigning categories |
Uses category names and requires parent-child category formatting. Can create new categories via CSV import. |
Uses category IDs and does not require you to specify any parent categories. Cannot create new categories via CSV import. |
| Assigning brands | Uses brand names and allows you to create new brands | Uses brand IDs and does not support brand creation |
| Custom export templates | Supports creating templates with specific fields | Custom export templates are not supported; all exportable fields are included in the CSV file by default |
| Exporting as a XML file | Supports XML export files | Only supports the CSV file type |
| Uploading a file from the server | Supports importing CSV files uploaded to WebDAV | Only supports uploading CSV file directly from your computer |
| Specifying CSV file formatting | Allows you to modify the field separator and field enclosure characters, specify if the CSV file contains headers, and ignore blank values | Does not support the customizable file formatting options available in the legacy experience |
| Data processing | Import occurs on the page | Import occurs in the background, allowing you to navigate to other areas of the control panel while your CSV file uploads |
Upgrading to the Modern Import/Export Experience
The modern Import/Export tool provides several improvements to the workflow for importing and exporting products, and it is a prerequisite for enabling Multi-Storefront. In order to upgrade to the modern Import/Export experience, you must meet the following requirements:
- Your store must be using the Products v3 experience.
- You must have the following permissions enabled in your user account:
- Manage Products
- Import Catalog Entities
- Export Catalog Entities
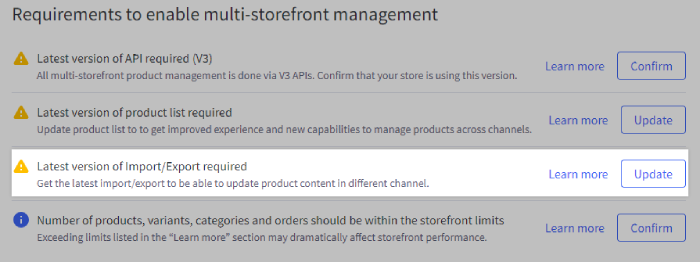
If you’re enabling Multi-Storefront on your store, you can upgrade your Import/Export experience from the Multi-Storefront requirements checklist in Channel Manager.

You cannot revert back to the legacy Import/Export experience after enabling Multi-Storefront. If you rely on any of the legacy-only features, use the upgrade banner described below.
If you’re not ready to enable Multi-Storefront on your store, you can upgrade your Import/Export experience by clicking View updates on the upgrade banner found in Products › Import and Products › Export. In the confirmation window, click Try it now to activate the modern Import/Export experience.

In addition to all the features available in the modern experience, upgrading via the banner will allow you to manage product stock across multiple locations. If you need to revert to the legacy experience for any reason, the banner provides the option to Rollback to the previous version.

In the next chapter, we’ll cover the requirements for creating new products in your CSV file and guide you through importing your first product.


