The QuickBooks Online app (powered by OneSaas) is a free BigCommerce app that integrates your store with your QuickBooks Online account. This app can help save you time, effort, and errors by automating your bookkeeping. Its features include:
- automatically syncing orders, products, customers, taxes, discounts, refunds, and shipping charges
- accurately recording sales income, tax, refunds, discounts, and shipping
- automatic payments reconciliation when paired with QuickBooks Payments
Prerequisites
Before setting up the QuickBooks Online app, please make sure you have the following set up in your BigCommerce account and QuickBooks Online account. If you don't already have a QuickBooks Online account, you can create one on the QuickBooks website.
BigCommerce
- At least one payment method must be set up. If these change, you can sync the new methods with QuickBooks Online.
- Basic tax must be set up or an automatic tax provider must be enabled.
- Ensure that all customer data is accurate. Customer names and email addresses are used to prevent duplicate data between systems.
QuickBooks Online
- Set up your Taxes. Manual and Automated Sales Tax are both supported.
- Set up your Chart of Accounts.
- Enable Shipping and Discounts.
- Enable Track Quantity on Hand.
- Ensure you know how to reconcile your payments in your accounting system using clearing accounts.
Connecting the QuickBooks Online App
Once you've completed the prerequisite setups, you can install and connect the QuickBooks Online app.
1. In the BigCommerce control panel, go to Settings › Accounting.
2. Next to QuickBooks Online, click Install.

3. Click Confirm to allow QuickBooks Online to access your BigCommerce store.

4. You will now be asked to Connect and grant BigCommerce access to your QuickBooks Online account. If you don't already have one, you will be prompted to create a trial.

5. After you've logged in and connected your account, you'll be taken into the app and presented with two workflows.

Importing Orders into QuickBooks Online
In this section, we'll show you how to sync BigCommerce orders into QuickBooks online. To get started, See OneSaas's Using the Shipping, Discount and Other Special Products in OneSaas to learn more.

Retrieve Orders from BigCommerce
Select the order statuses you would like to sync and how they will appear in QuickBooks Online (Sale Invoice or Sales Receipt).

Default Products and Advanced Options allow you to set a preferred order prefix, set default products for various line items used in orders (e.g. Shipping or Discounts) or let QuickBooks Online generate the invoice numbers when orders are transferred over.

- Order Number Prefix — The prefix you input here is added to all orders retrieved from BigCommerce. For example, if you set BC as a prefix, order 1234 would be sent to QuickBooks Online as BC1234.
- Use Shipping Item — Used to specify a dedicated 'product' to assign shipping charges in QuickBooks Online. See OneSaas's support documentation to learn more.
- Discount Product — Used to specify a dedicated discount 'product' so you can track your discounts in QuickBooks Online. See OneSaas's support documentation to learn more.
- Default Gift Card Product — Used to specify a dedicated gift card 'product' so you can track gift cards in QuickBooks Online. See OneSaas's support documentation to learn more.
- Assign them to the — Used to choose the nature of the customer record that is created in QuickBooks Online. The default option is Original Customer; however if your customers specify a company name and you prefer to have that appear instead, then you can opt for the Customer's Organization option. Alternatively, if you do not want any customer records to be created, select the Generic Online Sale Customer option. This means all sales will be synced to a generic "BigCommerce" customer record. See OneSaas's support documentation to learn more.
- Automatic Invoice Numbers — Used to disregard the BigCommerce order number completely, and use the sequential numbering convention within QuickBooks Online.
Retrieve Cancelled/Refunded Orders from BigCommerce
Enable Retrieve Cancelled/Refunded Orders from BigCommerce if you would like refunds to be generated in QuickBooks Online when an order is refunded or canceled. Note that Partially Refunded orders will be treated as a full refund within QuickBooks Online. You will have to manually edit the refund note/receipt that is generated to reflect the partial refund.

You can also add a prefix to all refunded orders retrieved from BigCommerce by clicking Advanced Options. This functions exactly like the Order Number Prefix option we mentioned earlier.

BigCommerce Products
If you have existing products in QuickBooks Online, you'll need to select how they will be matched to your BigCommerce products. You have the option to match your BigCommerce SKUs with either the QuickBooks item Name field or the SKU field.
If you select to match by the SKU field and your products in BigCommerce do not have SKUs, QuickBooks Online will automatically generate SKUs.
QuickBooks Online has a SKU limit of 30 characters. If your SKUs must be greater than 30 characters, manually create items in QuickBooks Online and match products by the item Name field.

Some products or customers not appearing in QuickBooks Online? Not all products and customers are created in QuickBooks Online during the first sync. Those not associated with orders from after the Integration Starting Date will sync after their next order.
Create New Items in QuickBooks Online
Enable Create New Items in QuickBooks Online if you'd like new items automatically sent to QuickBooks Online.

- Non-Inventoried Items, Inventoried Items — Select Non-Inventoried Items if you do not intend to track inventory within QuickBooks Online; otherwise, select Inventoried Items. Note that if you choose to track inventory, you will need to set up the initial stock levels for each item manually.
- Income Account, Expense Account, COGS Account, Inventory Asset Account — These are all basic accounts that QuickBooks Online requires when creating a new item. Consult with a tax professional or an accountant if you are unsure on which accounts to use. If you want different products to have different income/expense accounts, then this will all have to be set up after the items are created.
- Inventory Starting Date — If you choose to track inventory, you will also be required to specify a starting date for when inventory starts. Make sure you specify a historical date so that historical sales can be generated against items created by the integration. For example, if you are looking to integrate sales from Feb 1st, then you should set an Inventory Starting date that's dated Jan 31st, or earlier.
Map Tax Codes
When orders are synced, the tax code applied to the order is matched to a corresponding tax code in QuickBooks Online. When mapping tax codes, the codes found in BigCommerce are displayed on the left, while drop-down fields on the right allow you to select the corresponding tax codes found in QuickBooks Online.

If you don't see a corresponding tax code, you'll need to log into QuickBooks Online and create it, then Refresh the list in the QuickBooks Online app.
Note that if you have Automated Sales Tax enabled in QuickBooks Online, no mapping is required. QuickBooks Online will recalculate taxes when orders are synced across both systems.
Send Payments from BigCommerce to QuickBooks Online
When syncing orders, you can choose how payments appear in QuickBooks Online. You can map all of your payments into a single account or allocate each payment method to its own account. For example, you may want all of your PayPal payments going to a PayPal clearing account while your Credit Card payments go to a separate clearing account.

Note that any payment methods that are not individually mapped will allocate to the default account you selected.

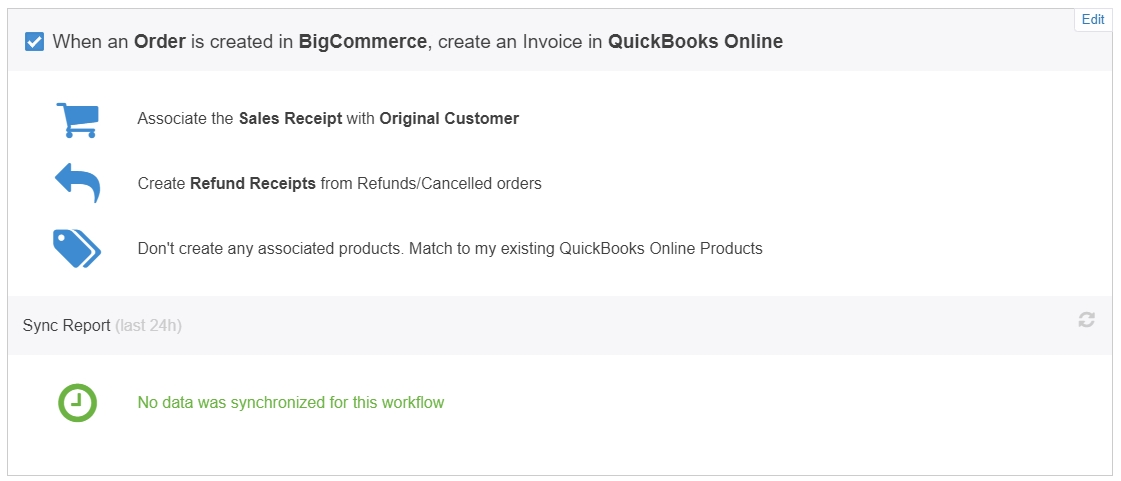
Click Save when you've finished setting up the order workflow. Afterward, you'll see an outline of what you've configured. Click Edit in the top right corner if you need to make changes.

Stock Level Updates
This option should only be enabled if your products have been manually created in QuickBooks Online with stock levels that match your BigCommerce stock levels.
We recommend that for the first few synchronizations, you enable only the Orders Workflow. This will ensure that most of the products that are in use are synchronized, automatically eliminating the need to manually create them and update the stock.
If you would like for QuickBooks Online to be the source of truth for your stock levels, enable When stock levels are updated in QuickBooks Online, update stock levels in BigCommerce and Save your changes.

Sync Settings
Click on the Sync tab when you've finished configuring the app workflows. Here you'll be able to set your time zone, the integration start date and turn the integration on. Default values are loaded when first setting up the app, but you can Edit them to suit your needs.
Note that the Integration Starting Date specifies a filter against your BigCommerce order date. This means any orders dated before the specified date will not sync.

Once you've set up your sync settings, agree to the user agreement terms & conditions and turn on the automatic sync. Afterward, you'll see when the next sync is scheduled to take place, or you can trigger a sync by clicking on Sync Now.


