The date and timezone settings in your BigCommerce control panel allow you to manage the internal time tracking used in your store's dashboard. This helps you keep a record of when orders come in and how dates are displayed. This is also how the store tracks when to end a discount or coupon offer if they had a time limit.
Requirements
In order to manage the date and timezone settings in your store, you must have the Manage Settings permission enabled on your user account. This is enabled by default for users with the Store Administrator or Store Owner role.
Date and Timezone Settings
Date and timezone settings can be accessed in Settings › General, under the Date & Timezone tab.
Localized Store Experiences: Date and timezone settings are available for all of our supported languages. For more information on the default language store setting, see Store Profile Settings.

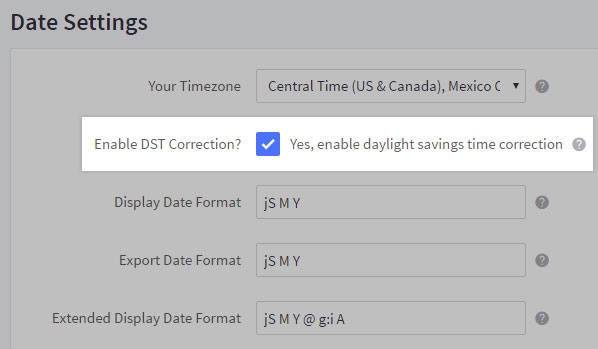
- Your Timezone — the timezone where you are located. Determines times used when applying timestamps to orders and store logs.
- Enable DST Correction? — If checked, this setting adds an additional hour to your timezone. This is a manual setting and should be enabled only when observing Daylight Savings Time. Disable this setting when you are no longer observing Daylight Savings Time.
- Display Date Format — the format used when displaying dates on your storefront
- Extended Display Date Format — the format used when displaying dates in your control panel
Pro Tip! ny of the date formats can be customized by using the characters listed in the php.net/date format table.
FAQ
Why do I need to adjust my time settings for Daylight Savings Time?
Orders, store logs, and other control panel events include a timestamp of when the event happened. These timestamps do not automatically adjust to correct for Daylight Savings Time (DST), but you can manually enable it in the control panel. When DST ends, you'll need to disable it.
When enabled, DST Correction will add one hour (+1) to your timezone.
How do I enable Daylight Savings Time Correction?
Go to Settings › General, then click the Date & Timezone tab. Check the box next to Enable DST Correction, then click Save.

How do I fix incorrect control panel timestamps?
If you notice that the timestamps in your control panel are incorrect, check the following settings.
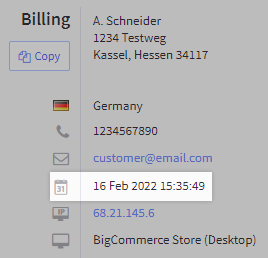
Example Order Timestamp:

Under Settings › General, click the Date & Timezone tab and verify that the following settings are correctly configured.
- Your Timezone — Ensure that you have set the appropriate timezone for your business.
- Enable DST Correction? — If checked, 1 hour is added to your timezone’s time.
Pro Tip! The DST Correction setting should only be enabled when Daylight Savings Time is being observed (generally from some time in March to November). When it is no longer being observed, you will need to uncheck this setting manually.


