Apple Pay provides an easy and secure way to pay for physical goods and services. Customers can quickly and securely provide their payment, shipping, and contact information to check out.
Apple Pay is built into all Apple devices by default, giving it a convenience that can attract customers, increase conversion rates, and boost user adoption.
How It Works
Once enabled, shoppers that meet the requirements will see the option to check out with Apple Pay on product pages, the cart page, in the quick cart, and at checkout. You can change certain styling elements of the Apple Pay button, such as background color, width, and height. See Styling the Apple Pay Button for more information.

Apple Pay on product pages
.png)
Apple Pay on the cart page

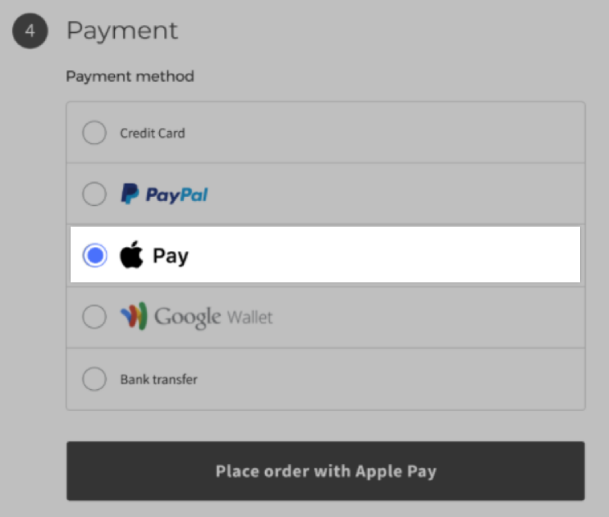
Apple Pay at checkout
Once selected, the Apple Pay checkout window will open in your storefront and shoppers can use their saved payment and shipping information to complete the transaction.
.png)
After an order has been placed, it will appear in your control panel as Apple Pay in the Payment Method field. Orders placed using Apple Pay share the same fulfillment process as typical orders.
.png)
Requirements and Limitations
If you are interested in setting up Apple Pay, please read through the store and shopper requirements in Connecting with Apple Pay.
- Limitations
- Any customizations made to the Apple Pay buttons on the cart page and in the quick-cart do not carry over to the Apple Pay payment option at checkout.
Supported Gateways
- Adyen
- Authorize.net
- Bank of New Zealand
- Bolt Payments
- Braintree
- Chase Merchant Services
- Checkout.com
- Cybersource
- Mollie
- Moneris
- Nexi XPay
- PayPal
- Stripe
- TD Online Mart
Adyen
See Connecting with Adyen for documentation on features, requirements, and setup.
- Additional Setup
- Apple Pay must be enabled in Settings › Payments within your control panel.
Authorize.net
See Authorize.net for documentation on features, requirements, and setup.
- Additional Setup
- See Supported Payment/Merchant Service Providers for instructions on enabling Apple Pay via Authorize.net.
Bank of New Zealand
See Connecting with Bank of New Zealand for documentation on features, requirements, and setup.
- Additional Setup
- You must have NZD as an available transactional currency.
- Apple Pay must be enabled in Settings › Payments within your BigCommerce control panel.
- Shopper Requirements
- Shoppers must select NZD as their transaction currency.
Bolt Payments
See Connecting with Bolt Payments for documentation on features, requirements, and setup.
- Additional Setup
- Apple Pay must be enabled in Settings › Payments within your control panel.
Braintree
See Connecting with Braintree for documentation on features, requirements, and setup.
- Additional Setup
- Apple Pay must be enabled in Settings › Payments within your control panel.
Chase Merchant Services
See Connecting with Chase Merchant Services for documentation on features, requirements, and setup.
- Additional Setup
- Apple Pay must be enabled in Settings › Payments within your control panel.
Checkout.com
See Connecting with Checkout.com for documentation on features, requirements, and setup.
- Additional Setup
- Contact your Checkout.com Customer Success Manager or reach out to Checkout.com Support to enable it on your Checkout.com account.
- Apple Pay must be enabled in Settings › Payments within your control panel.
Cybersource
See Connecting with Cybersource for documentation on features, requirements, and setup.
- Additional Setup
- Apple Pay must be enabled in Settings › Payments within your control panel.
Mollie
See Connecting with Mollie for documentation on features, requirements, and setup.
- Additional Setup
- Apple Pay must be enabled in your Mollie dashboard under Settings › Website Profiles.
- Limitations
- Manual capture is not supported.
- Apple Pay via Mollie only appears at the Payment step of checkout. It redirects shoppers to Mollie's payment page to complete the payment with Apple Pay.
Moneris
See Connecting with Moneris for documentation on features, requirements, and setup.
- Additional Setup
- Contact Moneris to allow for Apple Pay payments in your Moneris account.
- Apple Pay must be enabled in Settings › Payments within your BigCommerce control panel.
Nexi XPay
See Connecting with Nexi XPay for documentation on features, requirements, and setup.
- Additional Setup
- Apple Pay must be enabled in Settings › Payments within your control panel.
PayPal
See Connecting with PayPal for documentation on features, requirements, and setup.
- Additional Setup
- Your store must use one of the supported country and currency combinations.
- Apple Pay must be enabled in Settings › Payments within your control panel.
- Limitations
- Manual capture is not supported.
Stripe
See Connecting with Stripe for documentation on features, requirements, and setup.
- Additional Setup
- Apple Pay must be enabled in your Stripe dashboard. If you don't see Apple Pay in your dashboard, contact Stripe support.
- Apple Pay must be enabled in Settings › Payments within your control panel.
TD Online Mart
See Connecting with TD Online Mart for documentation on features, requirements, and setup.
- Additional Setup
- Apple Pay must be enabled in your TD Online Mart merchant account.
- Activate Apple Pay in Settings › Payments within your BigCommerce control panel.
- Shopper Requirements
- Shoppers must use the currency selected during TD Online Mart merchant account creation.
Additional Resources
- Connecting with Apple Pay
- Styling the Apple Pay Button
- Integrate with Apple Pay (BigCommerce)
- Apple Pay (Apple)


