
Themes automatically create thumbnail images for products, brands, and categories to ensure that the layout of the theme can remain consistent and easy to navigate. While the theme controls the general dimensions and number of images shown, you can adjust these settings.
If most of your images’ dimensions do not match your theme’s presets, it is easier to customize the default image dimensions in Page Builder than to edit each image individually.
This information is written for the Cornerstone theme. Check your theme’s documentation if you are unable to find the settings referenced below. If you are using a legacy Blueprint theme, see Blueprint Themes for more information.
When choosing product images to use as a thumbnail image, it is best if they are all the same aspect ratio, so when products are arranged in a grid or line, they appear even.
Before You Start
When preparing to change your image settings, you will want to know the dimensions and general aspect ratio of the images themselves. For example, if your product images are typically taller than they are wide, then you would not want to enter proportionally wider dimensions in the theme presets.
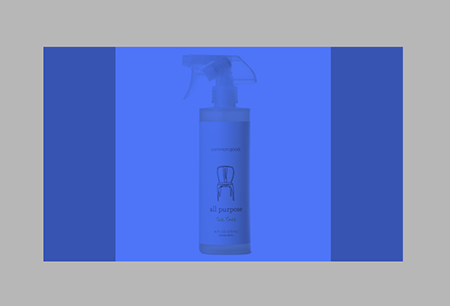
It's also worth noting that when Stencil resizes images, it takes aspect ratio into account. The image will adjust until its largest dimension meets the set product card dimensions. In the example below, the image’s height was resized to match the height of the product card, leaving a black border to fill the width.
Lastly, it is important to check for any affected images in Page Builder before publishing, after any image adjustments. This way, you can identify and resolve any image distortion issues before shoppers can see them.
Resizing Product Images
Generally, the recommended dimensions for product images are 1280 x 1280 px, though this may differ depending on your theme. Your theme’s product image settings are handled in Page Builder, under Theme Styles › Products › Image sizes.
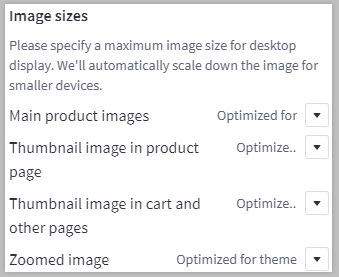
From here, you can control the dimensions for the primary product image shown on the product page, the thumbnail that appears below the main product image or on the cart page, and the zoomed image that appears when hovering your cursor over the main product image. You can choose to use the dimensions optimized for the theme or specify your own dimensions.
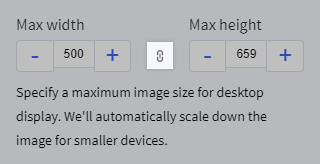
When changing one image dimension (width or height), the other will automatically adjust to maintain the preset aspect ratio. If you wish to change the image proportions, you can click the toggle between the Max width and Max height fields.
Resizing Product Cards
The thumbnail image of products that displays on category pages or in panels, like the Featured Product Panel, is set inside of a product card. Think of this product card like a frame for a picture. It defines how much room exists between multiple pictures hanging on a wall, as well as defining the absolute maximum space that a single picture can occupy.
When you adjust image dimensions in Page Builder, what is actually changing is the "frame" or product card, not the image itself. Product cards can be resized from the Image sizes menu in Page Builder. Use the Image in gallery view dropdown to apply the preset dimensions or to add your own.

Resizing Carousel Images
Stencil themes typically use carousel dimensions between 1200 x 600 px and 1600 x 900 px. Check your theme's documentation before creating and adding carousel slides, as different themes have different recommended dimensions. We recommend that all carousel images share the same dimensions, regardless of the dimensions used, as this creates a uniform appearance for the carousel on your homepage.
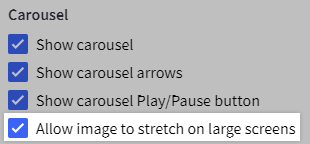
You can enable Allow image to stretch on large screens under Theme Styles › Home Page › Carousel if you want your carousel images to stretch on viewing screens wider than 1261 pixels.
Resizing Logo Images
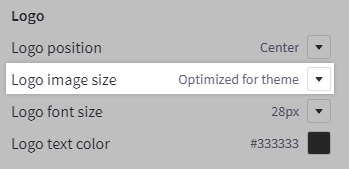
The recommended logo image size for most themes is 250 x 100 px. You can use Page Builder to resize your logo from Theme Styles › Header & Footer › Logo. In addition to using the optimized dimensions or specifying your own, you can also choose to apply the original dimensions of the uploaded image.
The logo on your printable invoices uses the original dimensions of your logo image. To change the size of the logo on your printable invoices, resize your logo image using your preferred image editing software, then re-upload the image in the control panel.
If you uploaded a unique logo to your checkout page, you can adjust the size from Theme Styles › Checkout Page › Logo.

Other Image Types
If you have added images to your product brands, you can resize them using the Brand Image in Gallery View dropdown in Theme Styles › Products › Image sizes. As with other image settings, you can choose to use the recommended dimensions or specify your own.

To resize swatch images that display color and pattern options for your products, select Specify dimensions in the Product swatch images dropdown, under Theme Styles › Products › Image sizes.

You can also modify the thumbnail images included in your blog posts. Go to Theme Styles › Global › Blog and select Specify dimensions from the Size of images dropdown to enter your desired dimensions.

Need to change other image settings? Other images in the store, such as category images, do not have built-in settings within Cornerstone. You can edit your theme files to change image presets, or opt to use a theme in the Theme Marketplace that offers advanced image options.
Conclusion
Blurry or distorted images can negatively impact the customer experience in your store, so it’s important to know what causes different image display issues and how to fix them. Reviewing the optimized image dimensions and aspect ratios in your theme’s documentation can help you to select and format images so that they will enhance your storefront and encourage conversions.


