Setting Up Microsoft Ads and Listings
What We'll Cover
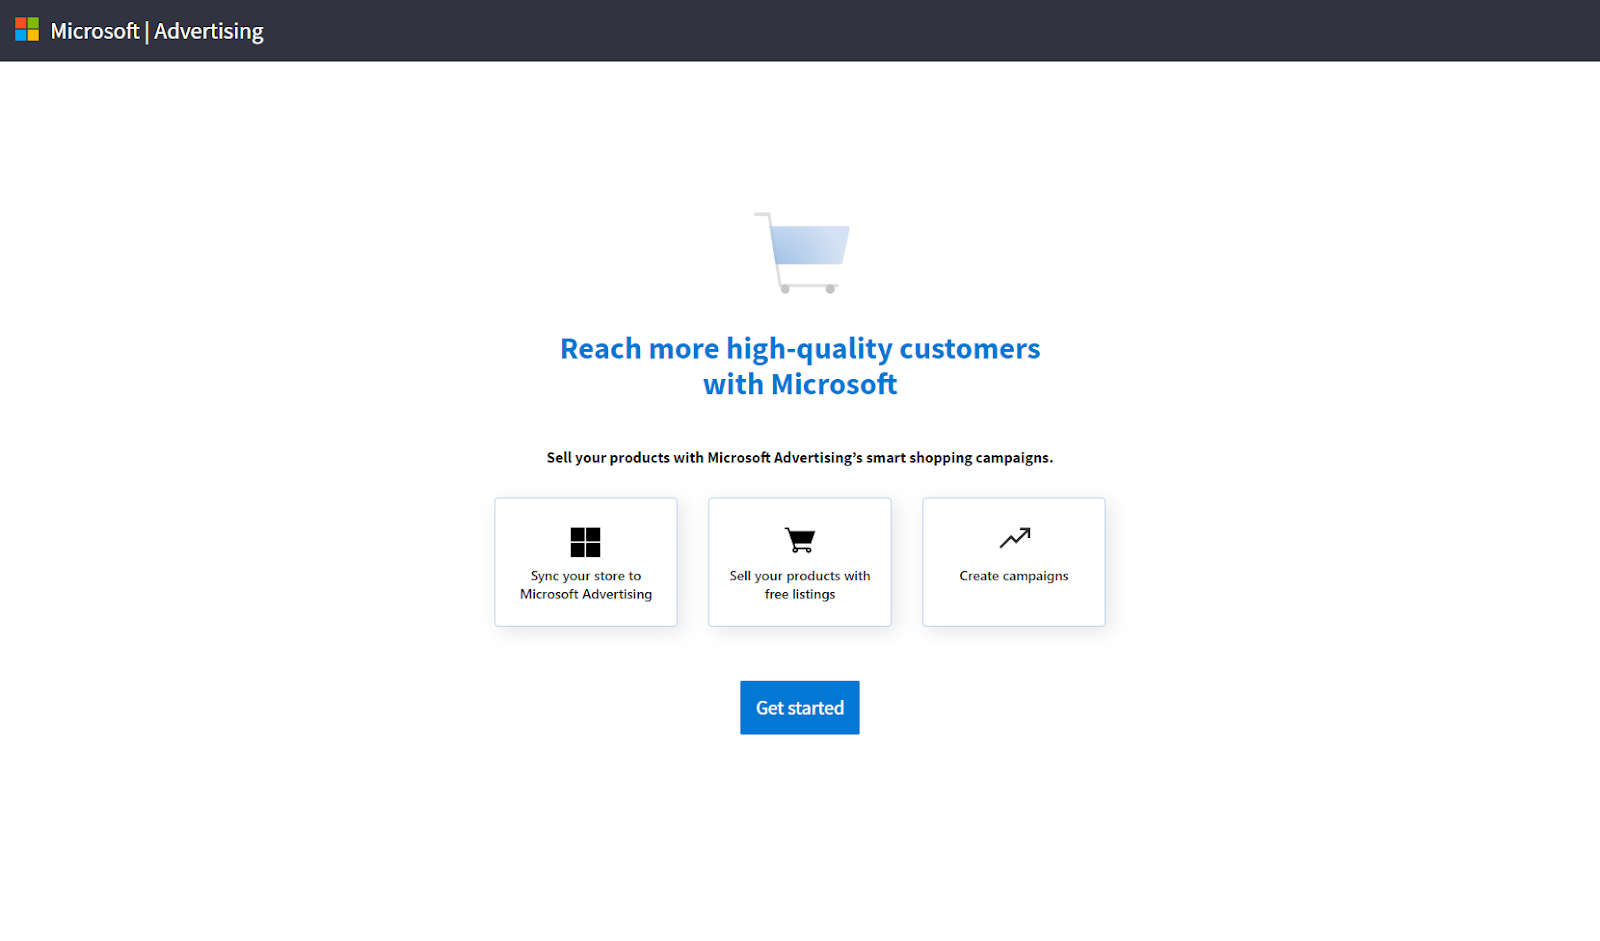
Microsoft Ads and Listings allows you to connect your BigCommerce storefront to Microsoft so you can upload and sync your product catalog. Once approved, your products are then eligible to be listed for free in the Bing Shopping tab. You can create smart shopping campaigns to further promote your products and reach more customers, and track campaign performance directly from within the app.
How It Works
The app connects your BigCommerce storefront to your Microsoft Advertising account, so your product data can be included in free listings and paid ad campaigns.
The app also automatically installs the UET tag on your storefront, so you can track events generated from your listings and ads, like page views, purchases, or other conversion goals.
Requirements
- You must be logged in as the Store Owner to install the app.
- You need a Microsoft Advertising account. If you don’t already have one, you can create one using the app.
Setup
Install the app. In Channel Manager, click Create Channel. Under Ads and Social, click Connect next to Microsoft. Click Install, then Confirm.
Click Get Started.
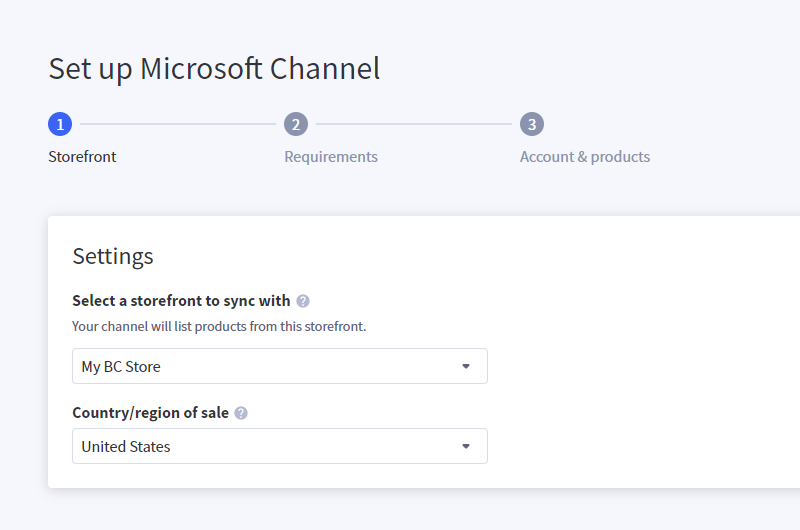
Select a storefront to sync with Microsoft. The Country/region of sale will be automatically selected based on your storefront settings, but you can change this if needed.
Review and confirm your storefront meets Microsoft Advertising requirements:
- Launch and activate storefront
- Refund policy and terms of service
- Secure checkout process
- Contact information
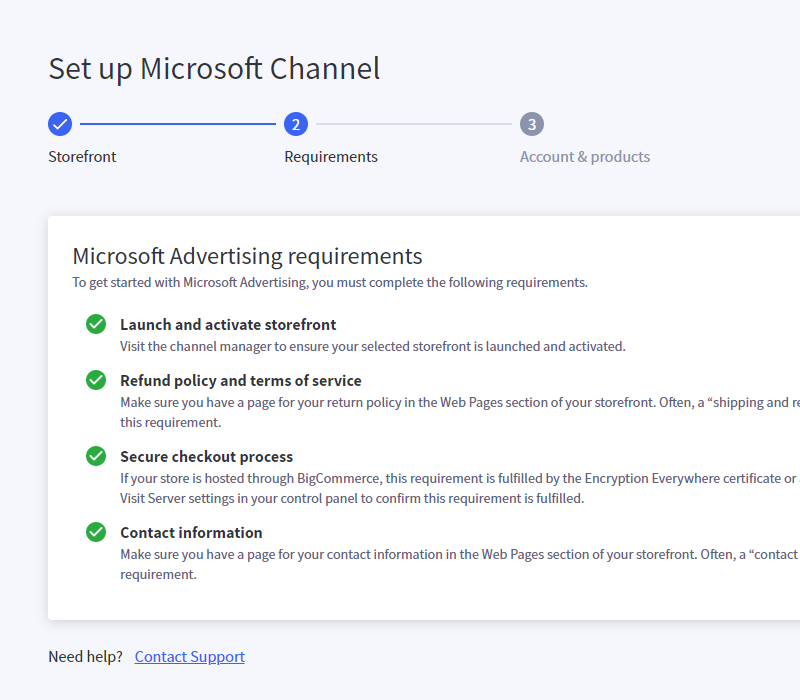
BigCommerce will automatically confirm if your storefront is launched and includes contact information.
You will need to manually confirm you have a return/refund policy and terms of service in place and easily found on your storefront. If you are using BigCommerce for checkout (most stores), it is already secured, so you can check this.
After you’ve confirmed all requirements, click Continue.
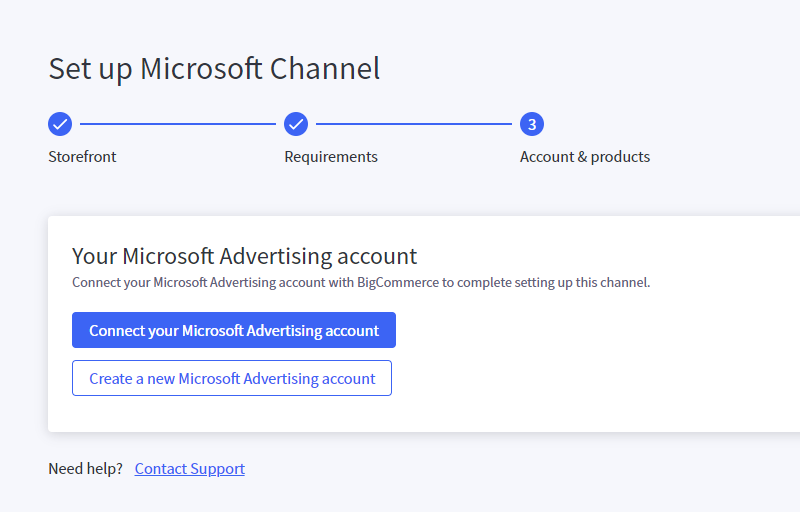
Next, you will Connect your Microsoft Advertising account, or create a new one. You’ll be redirected to Microsoft to confirm permissions, then returned back to BigCommerce.
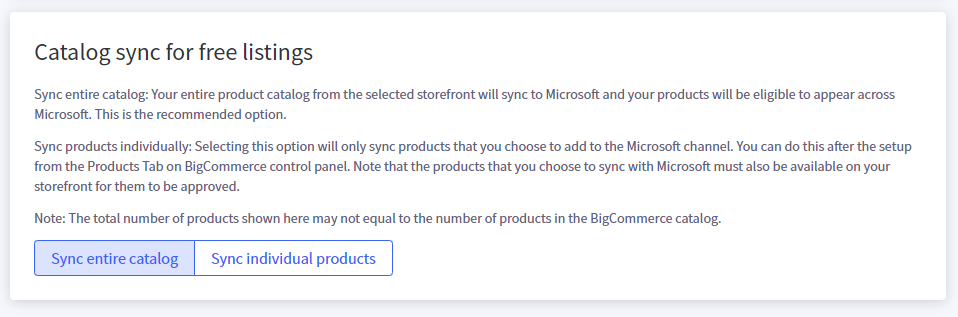
Sync Type
You have two options for syncing your catalog:
- Sync entire catalog - Your entire product catalog from the selected storefront will sync to Microsoft and your products will be eligible to appear across Microsoft’s network. This is the recommended option.
- Sync products individually - Selecting this option will only sync products that you choose to add to the Microsoft channel. You can do this after setup from the Products page. Note that the products that you choose to sync with Microsoft must also be available on your storefront for them to be approved.
Products
From the Products page in the app, you can manually initiate a catalog sync, toggle automatic sync, see the approval status of synced products, and check recent sync activity. You can also change your catalog sync type (entire catalog or individual products).
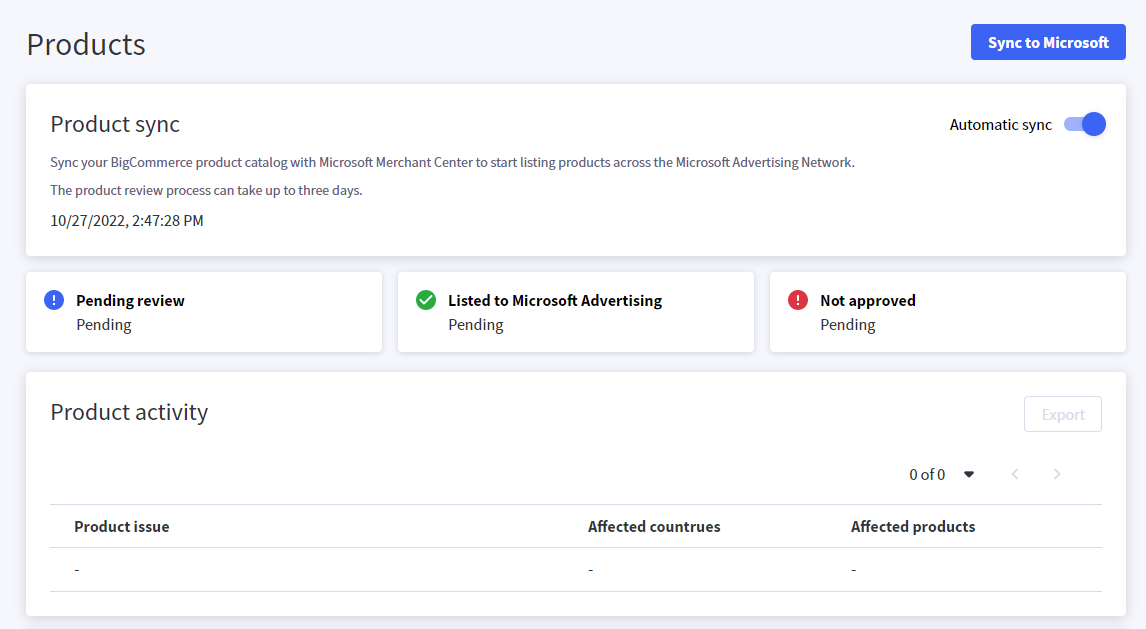
Product Sync
If Automatic sync is enabled, updates to existing products and new products added to your BigCommerce catalog will be included in the next scheduled sync. Updates are sent to Microsoft every 24 hours.
You can also use the Sync to Microsoft button to manually initiate a sync. This will start the process within a few minutes.
Note: Microsoft’s product review process can take up to 3 days.
Review Status
Once the product sync process is complete, this area will report the number of products pending review, listed, or not approved.
Product Activity
This area reports any product issues, such as missing required product data that may be preventing a product from being approved. You can use the Export button to download this report data.
Add your products
Expand this section to change your catalog sync type.
Campaigns
On this page, you can see performance metrics for all or individual ad campaigns in both graph and table format.
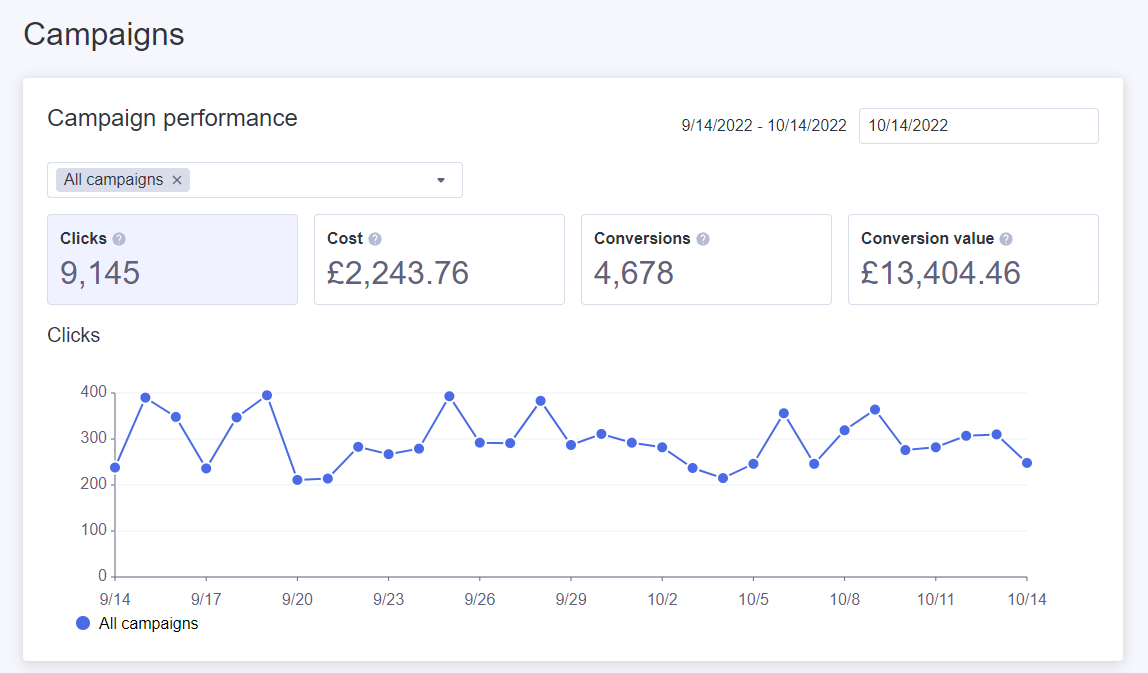
- Clicks — The total number of clicks in the selected time period for your campaign. Clicks typically include a customer clicking on ad on a search results page or website. Clicks can also come from other sources (for example, spiders, robots, and test servers).
- Cost — The actual spend for the campaign in the selected time period.
- Conversions — Total conversion for the campaign in the selected time period.
- Conversion value — Total value from conversions.
To create a new campaign, click Create campaign in the notification banner at the top of the page. Your campaign will include all products currently assigned to Microsoft in your store.
- If you selected Sync entire catalog as your sync type in setup, this will be all your store’s approved products.
- If you selected Sync individual products, this will be approved products you currently have assigned to Microsoft in your Product List.
Only one campaign can be created within the app.
Settings
This page provides details about your connected Microsoft Advertising account and is where you will add payment information.
Payment Method
Click Set up my payment method. You’ll be redirected to Microsoft to input your payment details.
Disconnect Microsoft Advertising
Disconnecting from Microsoft Advertising will remove any generated product catalogs from the associated Microsoft Advertising account. If you need to connect a different Microsoft Advertising account, click Disconnect, then repeat the setup process.