Import/Export Overview
Importing and exporting can streamline your product, inventory, customer, and data management for your store. It's the recommended method for adding large product catalogs and customer lists or for making changes in bulk. BigCommerce uses CSV as the primary file type for exporting or importing data.
In this article, we'll go over the different types of data that can be imported and exported, what a CSV file is, and how to customize an export template.
Look different? This article refers to several features unique to the legacy importing and exporting product experience, such as custom export templates. See our Modern Product Import/Export guide for help with the latest experience.
Importing Data
Importing data via a spreadsheet into your store will apply any adjustments you have made directly to that area of your business. It's a great way to create new products, add customers, or make a quick change to existing products.
If you are wanting to import data from a third party such as a distributor or another ecommerce platform, we recommend taking the time to match your third-party CSV’s column headings with the attributes available in BigCommerce. This will ensure your data is imported accurately.
| Import use-cases include: | You can import the following: |
|---|---|
|
|
Importing a File from the Server
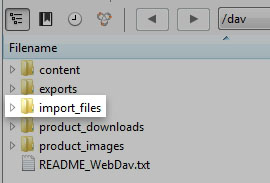
If your file contains large amounts of data, we recommend importing your file from the server instead of directly through the control panel. This will increase the stability of the import process. You will first need to connect to WebDAV and add your file to the import_files folder.
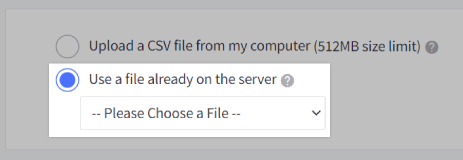
Afterward, begin the import process for your products, customers, or other data. Select Use a file already on the server instead of uploading it from your computer. Then, select your file from the dropdown that appears and continue your import process as usual.
Exporting Data
Exporting lets you view your product, order, or customer data in spreadsheet form. From there, you can make changes (like adjust product prices or descriptions) and re-import it back into your store, or send order data to third-party accounting software.
When exporting, you will be given the option to export to a CSV file or XML file. We recommend exporting the file as a CSV if you plan on re-importing the data.
| Export use-cases include: | You can export the following: |
|---|---|
|
|
Exporting to the Server
If you are exporting a lot of data—taking the number of products, options, SKUs, rules, and product images into account—we recommend exporting your file from the server instead of directly through the control panel. This will increase the stability of the export process.
Begin the export process for your products, customers, or other data. Select Save export to the server for later download.

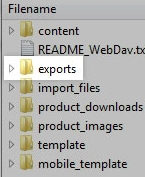
Connect to WebDAV and open the exports folder. You will be able to download your export file from there.
Export Templates
When exporting products, orders, customers, or product SKUs, you will be asked to select an export template. This template determines which fields get exported. We recommend using the Default template for exporting Orders, and the Bulk Edit template when exporting Products and Customers.
However, you may find it preferable to use a custom export template. A custom template will let you change formatting options, rename the headers, and include or exclude what fields get exported.
What Is a CSV File?
A CSV is a comma-separated values file which allows data to be saved in a table-structured format. CSVs look like a garden-variety spreadsheet, but with a .csv extension. Traditionally they take the form of a text file containing information separated by commas, hence the name.
CSV files can be used with any spreadsheet program, such as Microsoft Excel, Open Office Calc, or Google Spreadsheets. They differ from other spreadsheet file types in that you can only have a single sheet in a file, they can not save cell, column, or row styling, and cannot save formulas.
In ecommerce, CSVs are used primarily for importing and exporting product, customer, and order information to and from your store.
Sample Product Import CSV: bulk-edit-product-import.csv
Saving Your Spreadsheet as a CSV
1. Open your file in your spreadsheet program.
2. Click on File and choose Save As.
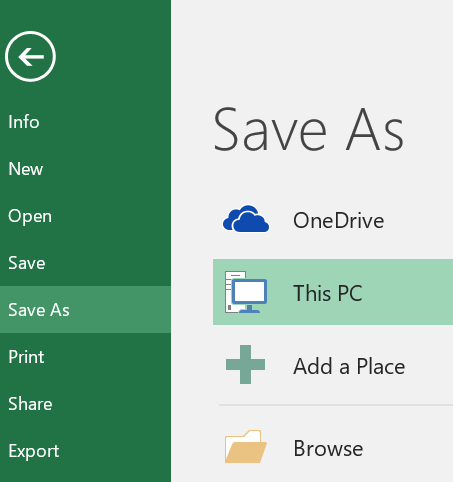
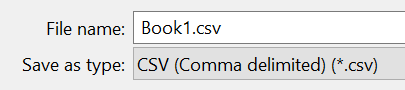
3. Select where you'd like to save the file, then under Save as type, choose CSV (Comma delimited). Click Save.
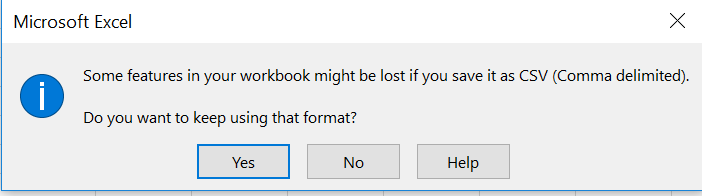
4. You may see a message that some features "might be lost if you save it as a CSV". This message is to inform you that any formatting you may have (such as colors or bold text) and any formulas will not be preserved in the CSV formatted file. Click Yes to continue.
How CSVs Are Used
BigCommerce uses CSV files for all import and export functionality. Here is a list of the most common uses:
| Import | Export |
|---|---|
Creating and Customizing Export Templates
Customizing your templates is the best way to ensure your export has exactly what you want. You can build an export template from scratch or customize a copy of one to suit your needs. These are ideal for running reports, doing a quick update, or transferring products to another store.
To start, go to Settings › Export templates. You will see the pre-made export templates that are available to use.
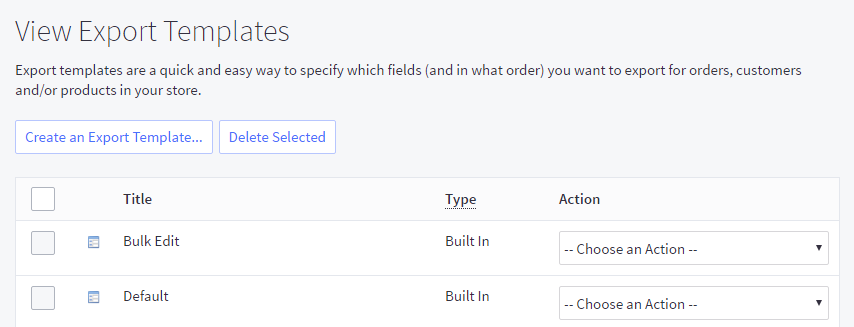
Although you can create an export template, we recommend using a copy of the Bulk Edit template and modifying it for your needs. This will let you bypass the settings and field mapping when you go to re-import it later.
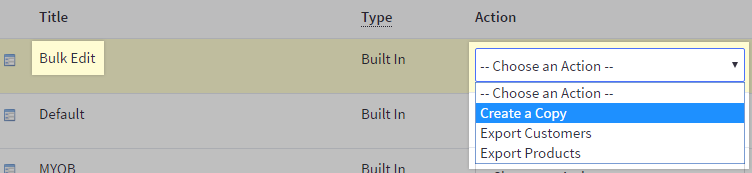
1. Click Create an Export Template to create a new one, or click Choose an Action and select Create a Copy next to Bulk Edit.
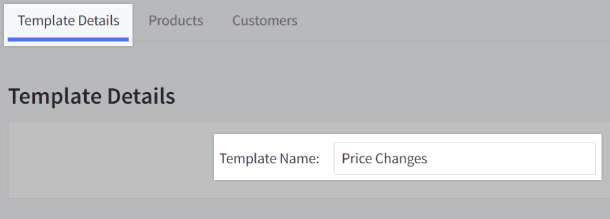
2. Under Template Details › Template Name, type a new name for your template. We recommend calling it something particular for its purposes, such as Tax Report or Price Changes.
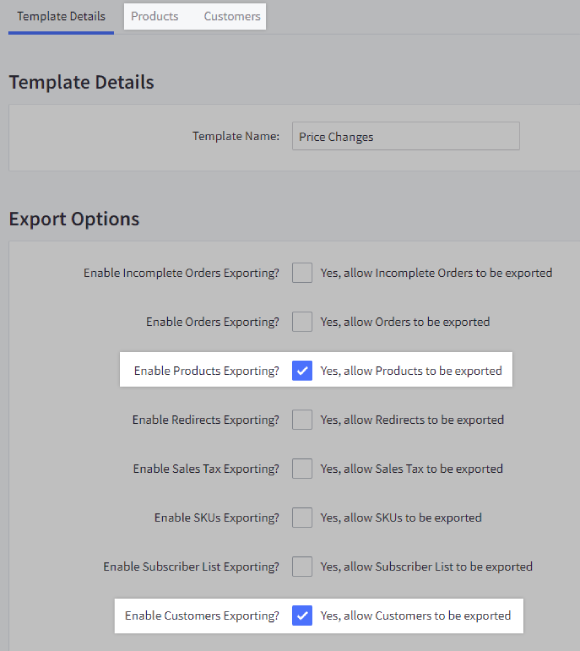
3. Under Export Options, check the type of data you are creating the template for. Notice that the tabs listed along the top change with your selections.
4. Click on the tab at the top of the screen for the data type. In this example, we will click the Products tab.
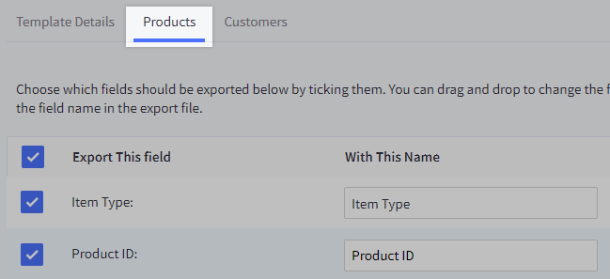
5. Go through and check or uncheck each field as needed. Keep in mind that some fields are required for re-import.
Pro Tip! You can check or uncheck Export This field to select or deselect all fields in the list within your custom export template.
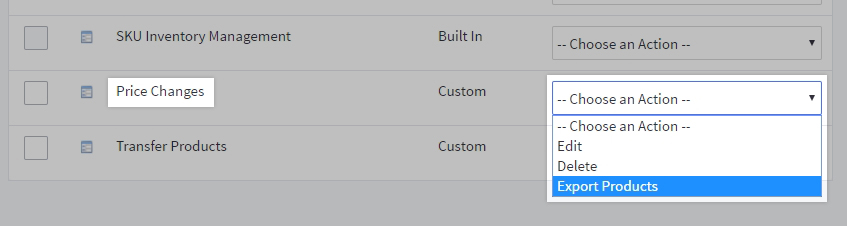
When you have made your changes, click Save & Exit. You can now export your data using your new template. If you wish to export from this page for any reason, you can do so by clicking the Choose an Action dropdown and selecting Export [data type].
Field Formatting Options
In the template details below Export Options section is the Field Formatting Options section. These options allow you to control how to format the fields within the template when it exports.
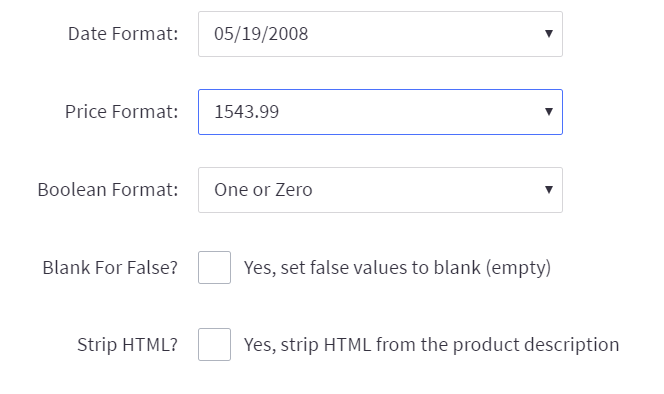
- Date Format — a dropdown menu with a number of ways to format how dates are displayed in the export
- Price Format — a dropdown menu to select a preferred format to view prices
- Boolean Format — a dropdown menu with a selection of how to display Boolean outputs
- Blank for False? — check to make blank fields also stand for false in Boolean options
- Strip HTML? — check to remove HTML from product descriptions. Do not use unless you wish to remove style and formatting from your product descriptions. We recommend backing up your products before enabling this setting.
Product Export Options

- Include Product Options? — check this option to include product options
Advanced CSV Export Settings
These settings can generally be left alone if you are using the Bulk Edit template. The settings here can be adjusted to meet the needs of the export. For example, setting Sub Items to display each item on a separate line makes it easier to see products in an order.
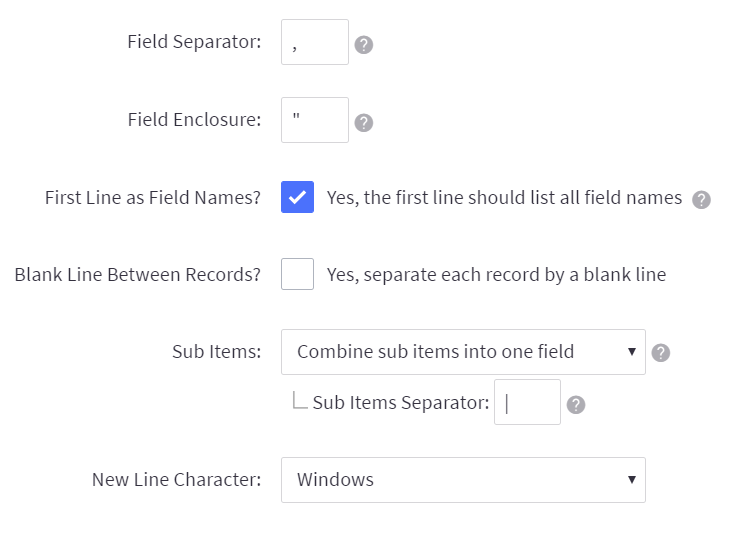
- Field Separator — assign a character to separate each field in the export. By default, this will be a comma.
- Field Enclosure — assign a character to enclose the contents of each field. By default, this will be a double quote.
- First Line as Field Names? — check this option to make the first row of the export contain the names of the fields being exported, such as Product Name and SKU
- Blank Line Between Records? — check this option to separate each row of content in the export with a blank row
- Sub Items — a dropdown menu to select how you want sub-items displayed in the export
- Sub Items Separator — assign a character to separate each sub-item. This must be different to the character assigned as Field Separator. By default, this will be a vertical bar.
- New Line Character — a dropdown menu to select how new lines are formatted in the export
Editing and Deleting Export Templates
You can only edit or delete custom templates. If you wish to modify a built-in template, follow the steps above to copy and customize it.
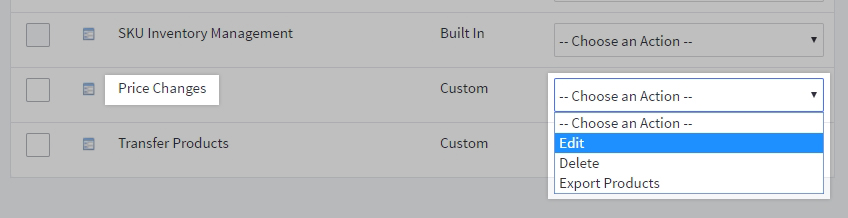
Editing an existing template
Click the Choose an Action dropdown next to the template you wish to edit, then select Edit. You will be brought to the edit page for the template. Once you have made your changes, Save & Exit.
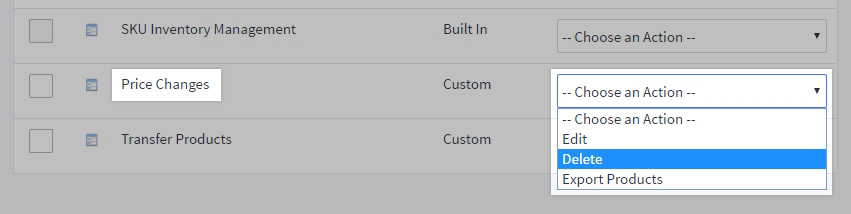
Deleting a template
Click the Choose an Action dropdown next to the template you wish to delete, then select Delete. You will see a pop-up asking you to confirm that you want to delete the template. Click OK. Your template will be deleted.