Backing Up Your Store
What We'll Cover
Whether you are adding new products and images, making a change to your theme, or editing your customer and order information, making backups of your store should be your first priority. Backing up your product, theme, customer, and order information will save you countless hours of work in the event of catastrophic data loss, giving you confidence and peace of mind.
These instructions will cover backing up and restoring your product, order, redirects, and customer data. Theme customizations can also be saved and restored. You can also back up your store using the API — see our Dev Center for more information.
Looking for automatic backups? If you choose to set up a scheduled automatic backup of your store, check out our Apps Marketplace for Site Tool apps like Rewind. They can help you to automatically back up your products, themes, customers, orders, and more.
Backing Up Your Store
301 Redirects
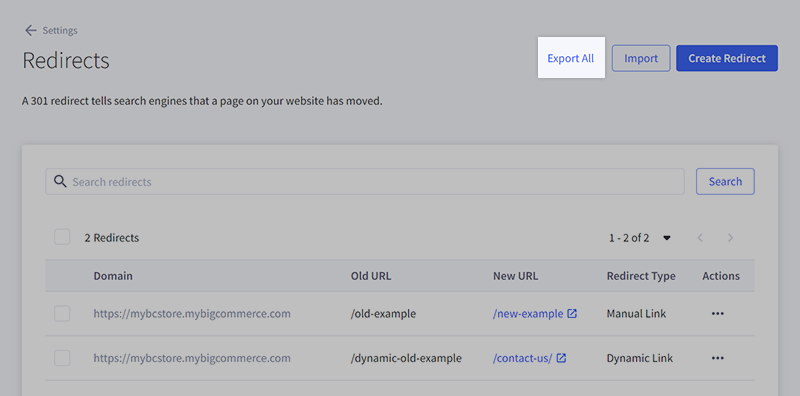
1. Go to Settings › 301 Redirects and click Export All. If you have more than one storefront, you have the option to export redirects for all storefronts or one specific storefront.
2. Click Start export. Once the export is complete, you will be presented with a link to download your CSV file.
Products and Product Images
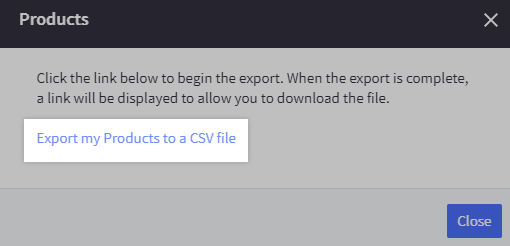
1. Go to Products › Export. Select the Bulk Edit template, then click Continue.
2. Click Export my products to a CSV file.
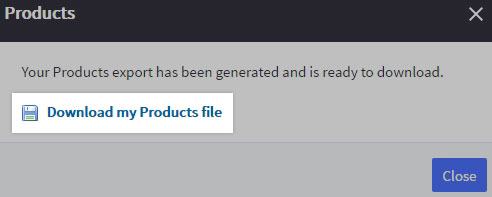
3. A status bar will move across the screen. When it finishes, click Download my Products file to save the file to your computer.
4. Connect to your store using WebDAV. Download the product_images folder by dragging and dropping it to your desktop.
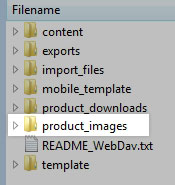
Pro Tip! Consider copying the other folders from WebDAV to your computer as well, as they may contain business-critical files uploaded by you in the past.
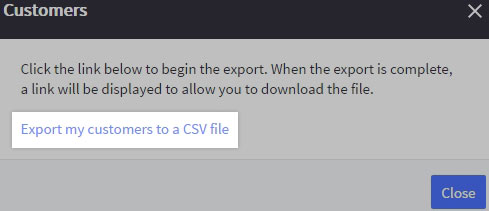
Customers
All customer data, except for passwords, can be exported by CSV. Exporting passwords would violate the terms of our PCI Compliance.
1. Go to Customers › Export. Select the Bulk Edit template, then click Continue.
2. Click Export my customers to a CSV file in the pop-up window.
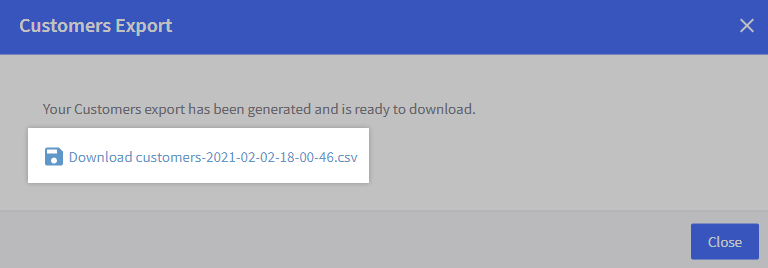
3. A status bar will move across the screen. When it finishes, click the Download customers file to save the file to your computer.
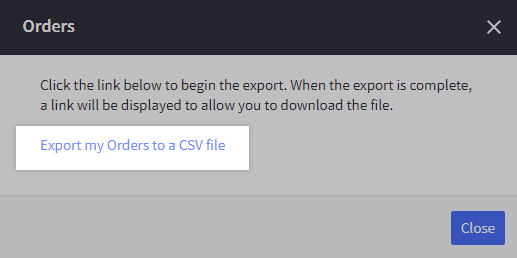
Orders
Orders cannot be imported via CSV into BigCommerce, although they can be exported for backups and reports. Our API does allow for orders to be imported and exported — see the Dev Center for more information.
1. Go to Orders › Export. Select the Default template, then click Continue.
2. Click Export my orders to a CSV file in the pop-up window.
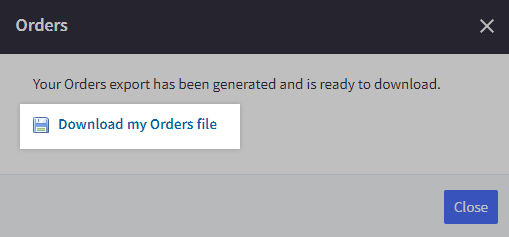
3. A status bar will move across the screen. When it finishes, click Download my Orders file to save the file to your computer.
Theme Customizations
Images are not included in theme downloads. To back up images you have uploaded to your store, you will need to save them in a separate file and manually restore them.
1. Go to Storefront › Themes. Click on Advanced, and select the theme version you want to download. If you're using Multi-Storefront, each storefront's themes are located in the storefront-specific settings within Channel Manager. See Single-Storefront vs. Multi-Storefront for more information.
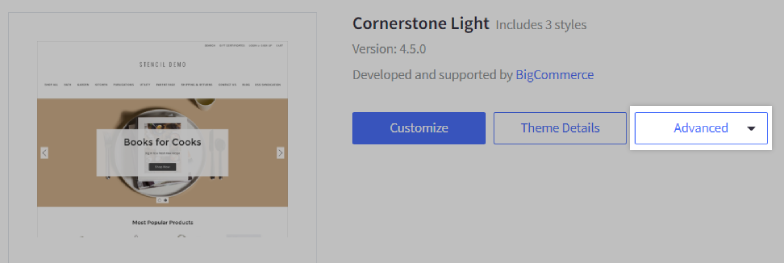
- Download Current Theme — the theme applied to the storefront, containing any edits made in Page Builder
- Download Original Theme — the default theme, without any edits made in Page Builder
- Download Saved Theme — saved theme versions created previously in Page Builder
2. Save the zip file to your computer.
Using a legacy Blueprint theme? See Blueprint Themes for information on backing up customizations made to your template files.
Restoring Your Data
301 Redirects
1. Go to Settings › 301 Redirects.
2. Click Import, then click Choose file to select your CSV import file from your computer.
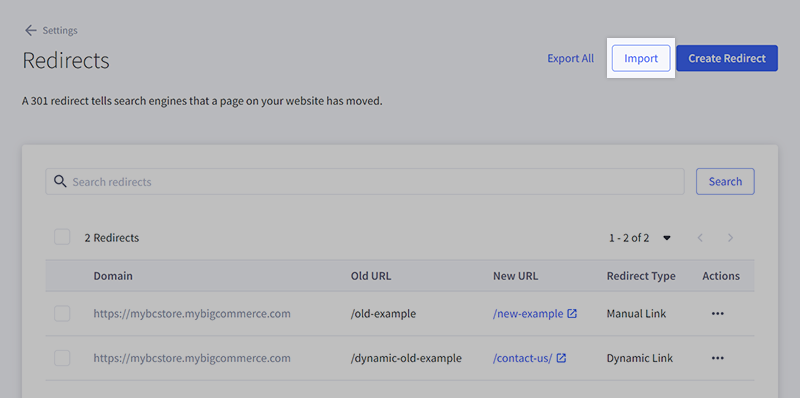
3. Click Preview. Confirm the selected data is correct, then click Start import. Once the import is complete, you will be presented with a report showing details about the import. If there were any errors, that information will be displayed in a table.
Products and Product Images
If you need to restore your product images as well as product information, connect to WebDAV, then drag and drop the contents of your backed up product_images folder into your existing product_images folder before completing the following steps.
Note that restoring product images will only work on the store those images were on originally. See Importing Product Images if you are transferring images from a different source.
1. Make a copy of your backed up Products file.
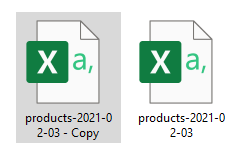
2. In the copy, delete the following columns:
- Product ID
- Product URL
3. Go to Products › Import.
4. Select Bulk Edit Re-Import and upload your copy of the backup. There is no need to change any other setting.

5. Click Next, then Next on the following screen. Click Start Import.
6. Once your import is complete, your products will be restored along with their images.
Customers
1. Make a copy of your backed up Customers file.

2. Go to Customers › Import.
3. Select Bulk Edit Re-Import and upload your copy of the backup. There is no need to change any other setting.
4. Click Next, then Next on the following screen. Click Start Import.
5. Once your import is complete, your customers will be restored.
Theme Customizations
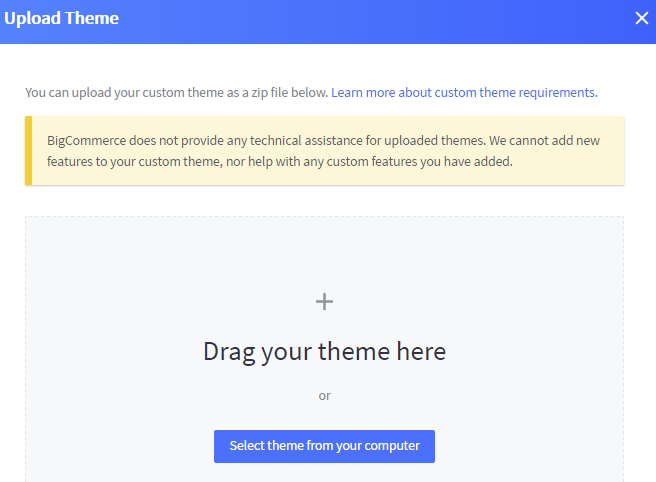
1. Go to Storefront › Themes. Click the Upload Theme button by the Themes heading, below the Current Theme.
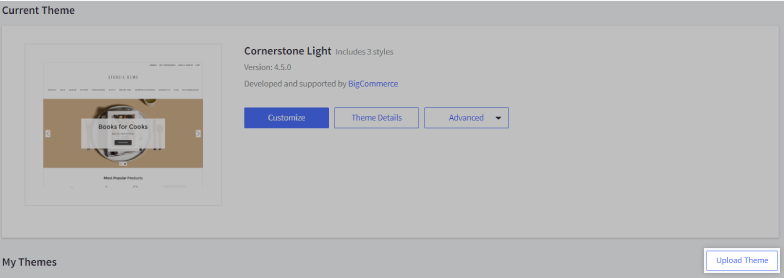
2. Drag the zip file into the Upload Theme pop-up window, or you can Select theme from your computer.
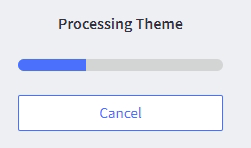
3. Once the zip file has uploaded, a theme card will appear under Themes showing the processing progress. Click Cancel if you want to halt processing and start over.
4. After processing, a new custom theme card will appear under Themes. If your theme was unable to be successfully processed, you will be presented with a screen detailing any errors encountered. Ensure your theme meets all the custom theme upload requirements.
5. Once your theme has been successfully applied, you can begin manually restoring your backed-up images.
Using a legacy Blueprint theme? See Blueprint Themes for information on restoring customizations made to your template files.