Getting Started with BigCommerce for WordPress
Guide (View all Chapters)
Getting Started with BigCommerce for WordPress
Headless Commerce with BigCommerce and WordPress
BigCommerce for WordPress is a free WordPress plugin that lets you use BigCommerce for your site’s backend commerce functionality and use WordPress to manage frontend content and design. Basically, BigCommerce powers product, customer, and order data, while WordPress handles content management and design.
This guide is intended for WordPress users who are new to BigCommerce and want an idea of what’s involved in getting the ecommerce portion of your store (BigCommerce) ready to integrate with the content portion (WordPress). However, even seasoned BigCommerce users might find it useful as a general overview of our BigCommerce for Wordpress integration. For more details on getting the plugin installed and configuring your settings, see Using BigCommerce for WordPress in our user docs.
The technique of decoupling a site’s frontend presentation from its backend management is referred to as headless commerce, and the plugin pairs BigCommerce with WordPress with this kind of architecture. All of your catalog, shipping, payment, and tax settings are configured in BigCommerce, and getting set up in WordPress requires just the one plugin.
What do I need to get started?
- a WordPress site (both hosted WordPress.com and self-hosted WordPress.org sites are supported)
- the BigCommerce for WordPress plugin (available in the WordPress plugin directory)
- a BigCommerce account. If you don’t have one, the plugin can create one for you.
It’s not required, but we also highly recommend having an SSL certificate installed on your WordPress site so you can take advantage of Embedded Checkout.
Using Multi-Storefront? The BigCommerce for WordPress plugin is not compatible with Multi-Storefront.
Installation
The first thing you’ll want to do is install and activate the BigCommerce for WordPress plugin in your WordPress admin. You can search for “BigCommerce for WordPress” in the plugins area of your WordPress admin, or download it directly from WordPress.org.
During activation, you’ll be asked if you want to connect an existing BigCommerce account or create a new one.
- If you don’t already have an account, setup will ask for a little more information about your business before creating your account. Once created, you’ll receive a welcome email with instructions on setting your password and accessing your new BigCommerce control panel.
- If you have an existing BigCommerce account, setup will have you log in, choose your store (if you have more than one), and confirm installation of the plugin.
Once setup is complete and the connection has been made, a new navigation option labeled BigCommerce will appear in WordPress. You’ll be redirected to the newly created BigCommerce › Settings page and your BigCommerce products will begin importing to WordPress (new accounts have sample products).

Your BigCommerce products and your payments, shipping, and tax settings will need to be configured before shoppers are able to check out on WordPress. If additional BigCommerce setup is needed, a notice will appear on the settings screen to link you to the appropriate area in your BigCommerce control panel.
Products

Setting Up Your BigCommerce Catalog
You’ll need to add your product data to BigCommerce before it can be accessed and shown on WordPress. Products can be created using the easy to use Add Products tool, or imported in bulk using a CSV formatted file. If you are a developer, products can also be created using the API.
The following attributes are required to create a new product:
- Product Name
- Price
- Category
- Weight (physical products)
Product Sync
When you first connect the plugin, any existing BigCommerce products are synced for the first time and individual product detail pages are created for each of your products (found under BigCommerce › Products).
When a change is made to a product in BigCommerce, it won’t show up in WordPress until the next scheduled sync has been completed. WordPress will automatically check BigCommerce for new and updated products regularly. You can set how often it should check by using the Sync Frequency setting in WordPress. It can be as often as every 5 minutes or as seldom as once a month.
In addition, you can always initiate a sync manually outside of your set schedule by using the Sync Products button on the Settings page.
Product titles, descriptions, and statuses (Published or Draft) can be edited within WordPress. However, when the name and description fields are edited within WordPress, they will no longer sync from BigCommerce during future imports. You can reset these listings to remove any custom descriptions or names to restore the catalog sync function.
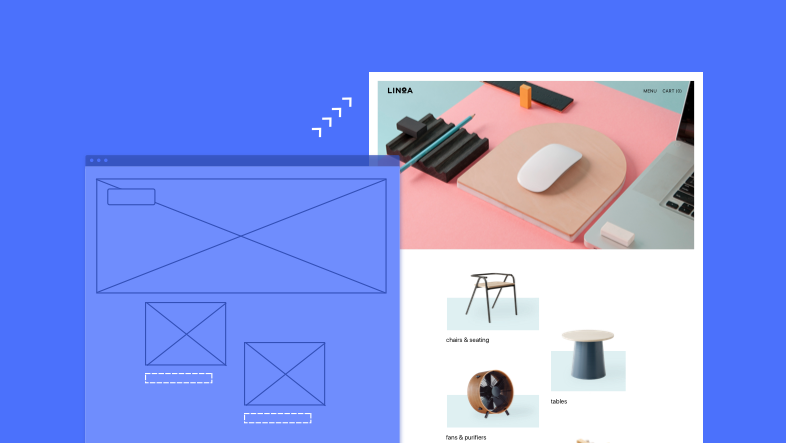
Adding Products to WordPress
Once your catalog has been added to BigCommerce and synced to WordPress, you can begin adding products to WordPress posts and pages.
It’s not required, but we recommend using Gutenberg for the easiest way to add products and other BigCommerce widgets. The classic editor is still fully supported.
When adding or editing a post or page, use the Add Block button (or the Add Products button if using the classic editor) to open the product selector. You can browse your catalog by brand, category, featured, on sale, or recent, or use the search bar to filter results. Select which products to include, and they will be inserted as a list into the post or page.
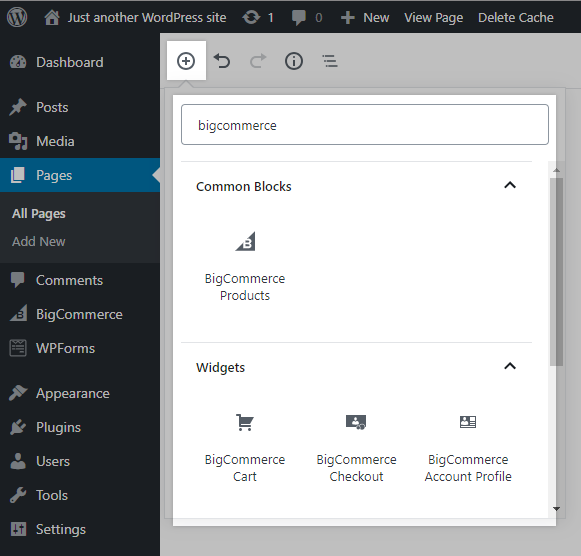
Products and other elements can also be inserted using shortcodes.
Shipping

To set up shipping, you’ll need to tell BigCommerce where you ship from, where you ship to, and what shipping services you offer.
Go to Settings › Shipping to get started.
First, you’ll define your shipping origin, which is used for calculating shipping quotes and taxes.
Set up your shipping zones. These are all the areas in which you plan to offer shipping, and can be defined by country, state, or zip/post code. Shoppers outside of your serviced shipping areas who attempt to check out are shown a message that their order cannot be shipped using their supplied destination address.
Once your origin and zones are established, you can decide what methods/services to offer for each zone. This can be a flat-rate fixed charge, like $5 ground shipping on all orders, or a dynamic shipping quote charge that is calculated in the cart or at checkout based on shipment details like weight, dimensions, origin, and destination.
After you’ve configured your shipping settings in BigCommerce, it’s a good idea to create or update your shipping and return policies. Make sure they are easily accessible on your WordPress storefront.
For extended shipping functionality, BigCommerce also supports advanced shipping solutions like ShipStation, ShipperHQ and more.
Payments
You need to provide a way for customers to pay for their order.
Go to Settings › Payments. Here you can set up online payment gateways and digital wallets to accept money online.
Offline methods (like pay by check, bank deposit, or cash on delivery) can also be offered as payment options.
Currently, Embedded Checkout supports all non-hosted payment gateways supported by Optimized One-Page Checkout. In addition, hosted PayPal payment methods (like PayPal and PayPal powered by Braintree) are also supported.
If you are redirecting for checkout, any BigCommerce-supported payment gateways can be used.
Tax
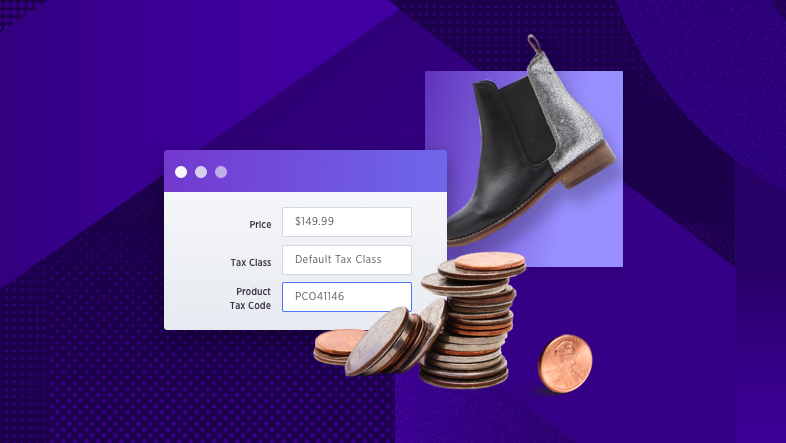
Tax needs to be configured in BigCommerce so that it can be dynamically calculated and shown on WordPress on the cart and checkout page.
If you’re in the US or Canada, you can use automatic tax calculation for the easiest way to set up taxes. If you are outside the US or Canada, you need to use Basic Tax Setup.
Both automatic and basic tax methods offer ways to set up product-specific tax rates and tax-exempt customers.
For tax questions about your specific store, business, or industry, we recommend consulting with a tax professional.
Checkout

Customers can check out directly on your WordPress site using built-in checkout provided by the plugin, or they can be redirected to your BigCommerce store’s checkout page to complete their order.
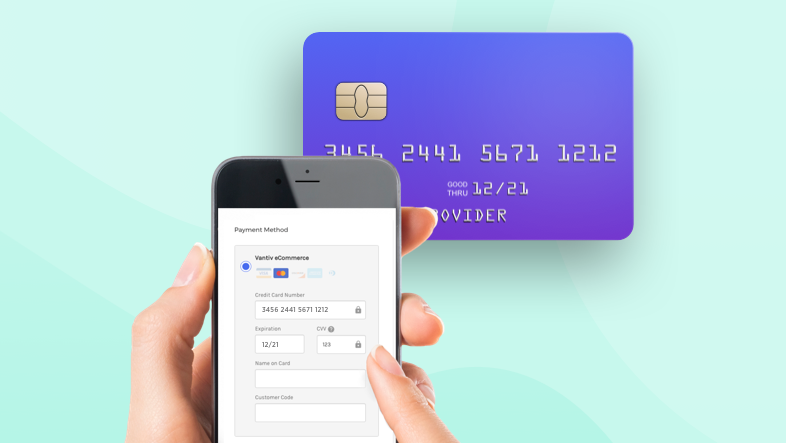
Embedded Checkout
If you are using Embedded Checkout, your BigCommerce store’s checkout form is embedded on your WordPress checkout page using an iframe.
Embedded Checkout is the preferred checkout method since it provides a more seamless shopping and checkout experience by not redirecting the customer to another site to check out.

You’ll need to have an SSL certificate installed for your WordPress domain to use Embedded Checkout. You may be able to source a certificate from your WordPress host, your domain provider, or another third party. All BigCommerce stores come with an SSL certificate already installed, so an additional certificate for your BigCommerce storefront is not necessary.
When using Embedded Checkout, a page in WordPress titled Checkout hosts the embedded checkout form. The form can be hosted elsewhere using the Add Block button or by using shortcodes.
Redirected Checkout
If you are not using Embedded Checkout, customers are redirected to your BigCommerce store’s checkout. This will be a xxx.mybigcommerce.com URL or a custom domain or subdomain if you’ve set one up. For checkouts that redirect, we recommend using Optimized One-Page Checkout.
Be sure to set up your other checkout-related settings, such as enabling guest checkout, allowing order comments, and requiring terms and conditions agreement.
Content Pages
Since WordPress handles the frontend of your site, you’ll need to create any necessary content pages within WordPress.
- For almost any business that transacts online, having a Shipping and Returns Policy that is clear, concise, and easy to find should be a priority. It will give shoppers peace of mind and can help shape customer expectations.
- An About Us page can help shoppers learn more about you and your business. It allows you the opportunity to differentiate your store or business from your competitors or the rest of the industry, and gives you a chance to tell your story and connect with your customer base on a more personal level.
- A public FAQ page can improve customer satisfaction while decreasing the amount of customer support you have to provide. An FAQ page is also a good opportunity to gain market authority for search ranking by providing quality answers and information.
- Depending on your business, having additional informational pages can also improve overall customer sentiment. This can be things like sizing charts, recommended use and care guides, recipe ideas — whatever makes sense for your business and customers.
Next Steps
Checking Orders
Orders that originate from your WordPress channel appear in your BigCommerce View Orders area. The order source will be the channel name you configured when setting up the plugin. You can create a custom view to quickly access orders from a specific channel, and orders can be searched or filtered by channel.
Multichannel listing
In BigCommerce, you can add and remove products for specific channels. Not all channels support listing in the control panel and may offer alternatives, such as listing products through an app interface.
If your store uses the Multi-Channel Product List, go to Products › View and check the box by any products you want to update. Select Assign products to channels or Unassign products from channels from the Bulk Actions menu.
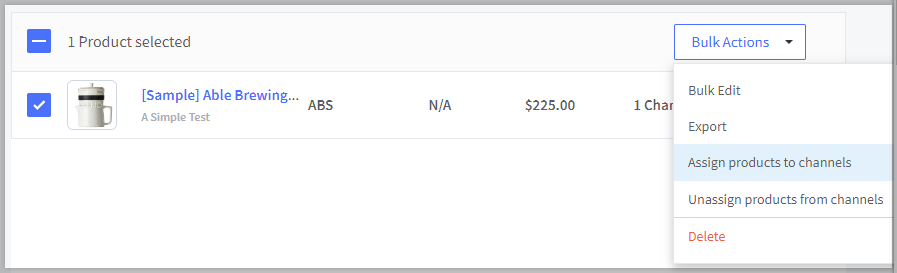
If your store uses the new Product List experience, after checking the boxes next to the products, an actions menu will appear above the product listings. Select Add to channels or Remove from channels.

When you remove a product from a WordPress channel, it will set that product post status to Draft, so it won’t appear in any lists on the WordPress storefront (even if it is still referenced via shortcode on a page), and its individual Product Detail Page will be publicly inaccessible.
When you add or assign a product to a WordPress channel, its post status will update to Published, meaning it will appear in wherever lists it is referenced (via shortcode) and its Product Detail Page will be publicly accessible.
Getting Help
Looking for information on app compatibility, extending the plugin, or need to reference code?
Check out BigCommerce for WordPress in the Dev Center.
Have questions for Partners or fellow merchants using the plugin?
Join the BigCommerce for WordPress Community Group.
Need the plugin?
Search for “BigCommerce for WordPress” in the plugins area of your WordPress dashboard, or download it directly.
Want to contribute to the project?
Need step-by-step instructions or more details on plugin settings?
See BigCommerce for WordPress in the Help Center:
Want to learn more about BigCommerce?
Visit the BigCommerce Help Center.